


There’s been quite a bit of concern from many on the performance forums concerning the longevity of Yamaha’s lightweight NanoXcel2 hull material, particularly in regards to those with 2017-18 GP1800’s who are pushing their machines further and further beyond that of the original factory configuration. Some have noted fracturing, cracking and even delamination around the intake grate insert and surrounding. While the internet trolls like to exaggerate the issue, as per Jerry Gaddis, owner of GreenHulk.net, states, “it’s not exactly an epidemic.”
That being said, Gaddis took to the forum after doing some research and offered up a surefire fix for the cracking issue. With only a couple of hours’ worth of labor and enough time overnight to let the fiberglass fix cure, Gaddis is positive that any threat of cracking around the intake grate will be resolved. Below we’ve shared Gaddis’ complete tech guide for repairing/restructuring the intake grate mounts in its completion, but you can read it verbatim HERE as it’s worth reading through the whole thread as Gaddis answers further questions from posters.
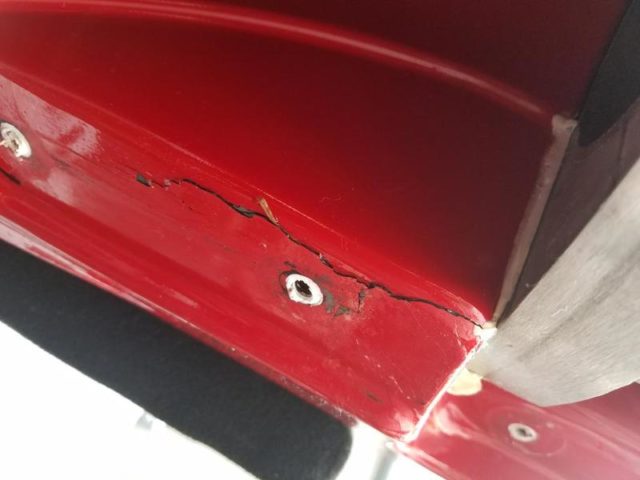
Above: Shown is an example of how some modified GP1800s are displaying cracking around the pump tunnel.
It’s worth mentioning that there are literally […] thousands of GP1800’s running around out there and we’ve only seen a handful of failures, so it’s not exactly an epidemic.
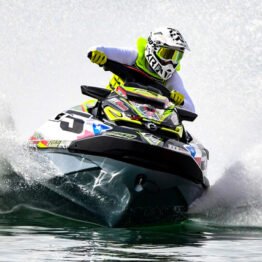
My personal GP1800 is an 88-plus-mph ski and the hull [has shown] no sign of cracking in this area; however, I opted to do this fix as a preventative measure. It’s always better to be safe than sorry. I recommend that anyone with a GP1800 [that is] modified to go faster than 80mph do this fix also.
The issue is that the lower hull is in two pieces, which are bonded together. For whatever reason, Yamaha cut out that upper portion of the lower hull and put the intake grate insert into this recessed area, leaving only one layer of hull for support. As mentioned above, some skis have cracked in this weaker, one-layer area as shown here.

Above: This picture shows how the factory GP1800 insert is placed into this cut out portion of the hull
The Green Hulk fix involves removing the stock inserts, filling in the recessed area with epoxy resin and fiberglass mat and using the old-style FX SHO ride plate inserts. (I want to give Bruce Clarkson over at RIVA Motorsports credit for sharing with me that the old-style SHO inserts can be used on the 2017-18 GP1800 to properly fix the hull cracking issue seen on some skis.)
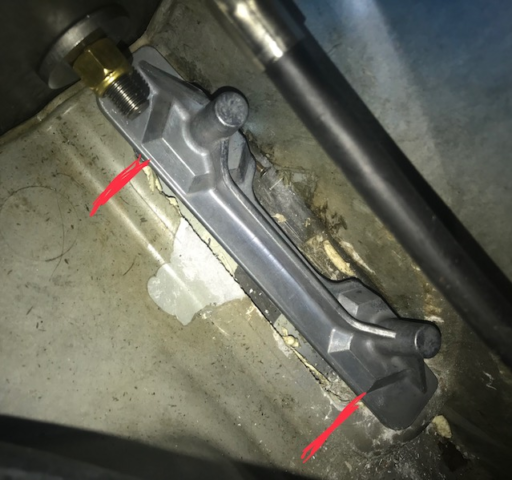
Above: This picture shows you how the factory FX SHO intake grate inserts extend over the recessed area [marked in red] giving you more structural integrity and support. [Tip: To remove the stock inserts use a heat gun to break the glue down making the inserts easier to remove. What I did was protect the steering cable by wrapping it in a wet towel and used a heat gun on the inserts until the factory epoxy until it bubbled and smoked. I then threaded the old bolts in and gave them a couple light taps with a hammer from under the ski and the old inserts and glue came off in a single piece.]
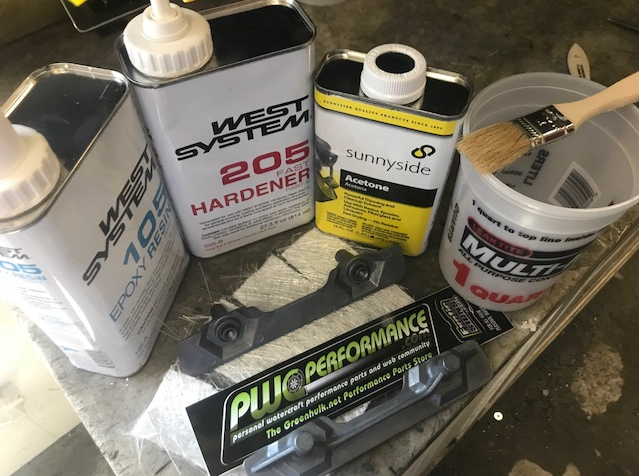
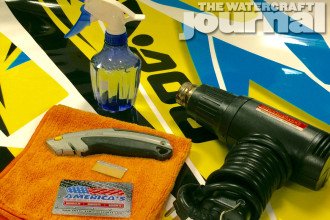
Above: Here’s a picture of all the supplies that I used. The acetone was used for easy clean up of any drips.
Clean the area good and prepare to start laying the epoxy resin and fiberglass mat. I used a total of 4 pieces of fiberglass mat on each side to build up the recessed area flush with the surrounding area. It’s best to lay the fiberglass mat on a piece of plastic, or some other flat surface and then soak it down with the epoxy resin. Lay each piece one at a time into the recessed area to build it up.
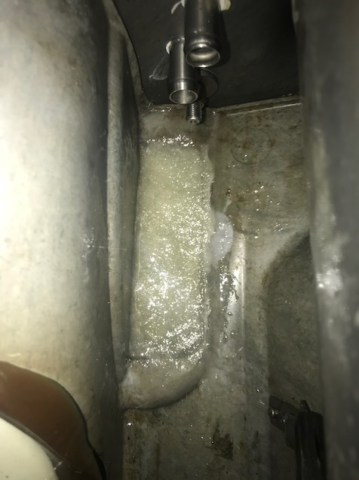

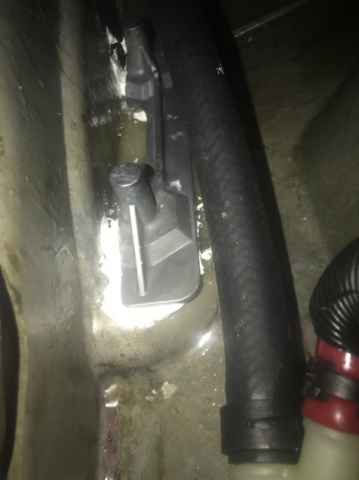
Above left & center: This is what the hull will look like once the Epoxy Resin/Fiberglass Matt is all cured. Above right: At this point you are ready to re-drill the intake grate bolt holes from the bottom of the ski and then install the FX SHO inserts. I used 3M 5200 Fast Cure to seal the ride plate inserts to the hull. This image shows the FX SHO inserts in place. Tip: Temporarily bolt the intake grate up to hold the inserts in the proper position until the 3M 5200 cures (overnight)
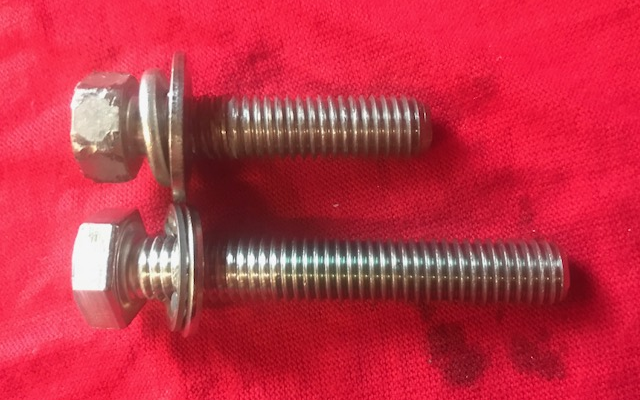
Above: This picture shows the stock bolt next to the longer stainless steel bolt. I got these stainless steel bolts and washers from my local hardware store.
You will need longer bolts on the 4 rear grate bolts being the insert is sitting up higher than what it was before you built the recessed area up with Epoxy Resin/Fiberglass. You will need four M8 1.25 pitch bolts 50mm long. Also get 4 flat washers and 4 lock washers. I used blue Loc-Tite on the threads of all bolts.
If you haven’t already chosen which intake grate is best for you then I highly recommend you read this thread. Based off my personal testing, I chose to use the RIVA grate and pump seal kit on my GP1800.
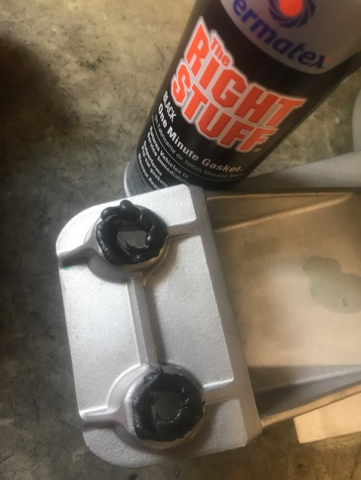

Above: Be sure to use Permatex The Right Stuff to seal your intake grate. Here’s a couple of pictures of the areas that I sealed mine. Tip: expect the Right Stuff sealant to ooze out and get messy once the grate is mounted up. Using some acetone on a rag makes quick and easy clean up of the sealant. To make things easy for everyone, I have added the FX SHO inserts here in the GreenHulk Store.