

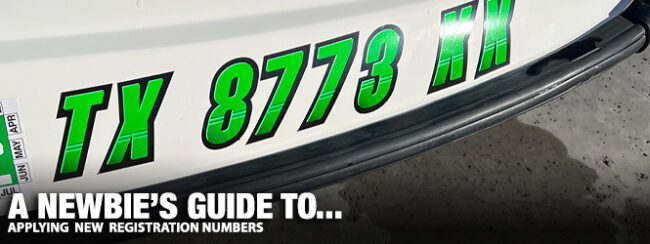
Now that you have your watercraft registration number and date sticker, you’re required to display it on your vessel. And this is the same for all states. As mentioned before your state-issued eight-digit registration number, the first two digits are your state’s abbreviation followed by four numbers, followed by two letters.
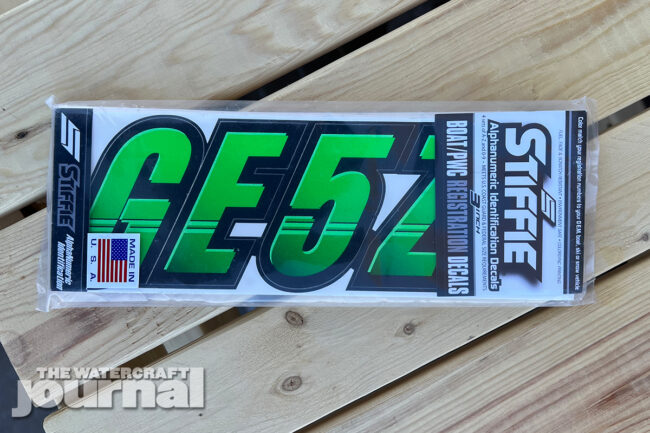
There are a couple of ways you can go about getting these numbers; first, you can go down to a local marine supply store like West Marine. You also have the option to go to a sporting goods store like Bass Pro Shops, Academy and so on. In the marine section, they all have registration number packs that you can purchase. If you do not live close to one of the stores, Amazon is also a decent option because they have different designs, colors and fonts to choose from.
Another way of displaying your registration numbers is to have pinstriper paint on your registration numbers. This was very common back in the day; however, it is almost a lost art. You can also do what we have done in the past and go to a local graphics shop and have them match colors to your watercraft’s design and color palette. This by far is the most expensive option but it also looks the best in our option.
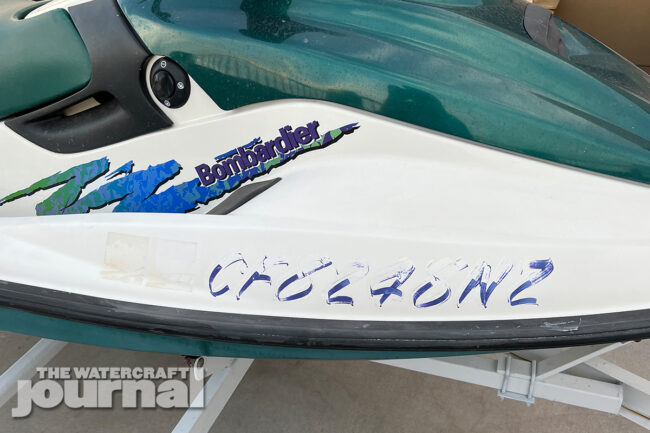
Now if you bought a used ski, it is far more common for people to have pinstripers paint on their registration numbers. Even though this looks extremely cool it makes for a bit of a pain for the next person who buys your ski given that they are going to have to change the registration numbers.
If your ski is gel coated you were going to have an easier time removing pinstripe numbers compared to skis like the newer Yamahas that are painted with automotive grade paint. If so, you might want to consider covering the old pinstriping with a vinyl sticker and put vinyl registration numbers over it because anything short of a repaint is going to damage the base coat color of your watercraft.
Here we’ll show the removal of pinstriped registration numbers and install registration decals along with a date sticker on this 1997 Sea-Doo GTX. If your ski is painted with gelcoat, you are in luck because there are products on the market like Owatrol Marine Strip, which is gel coat safe. This product works extremely well at removing old paint like pinstripping and will not harm your gel coat.
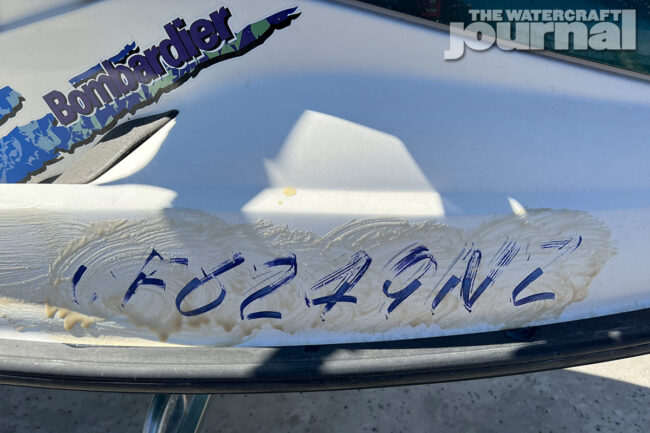
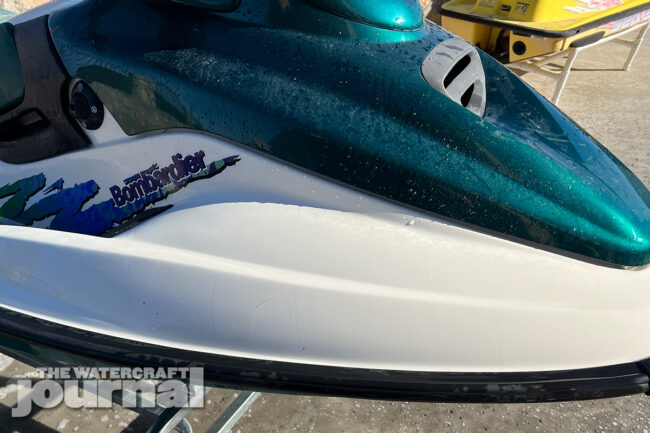
The process of applying this product is quite simple. Begin by cleaning the area you wish to remove with soap and water and apply this product liberally with a paintbrush. Allow it to sit long enough to soften the paint. This may require a few applications to remove all the paint.
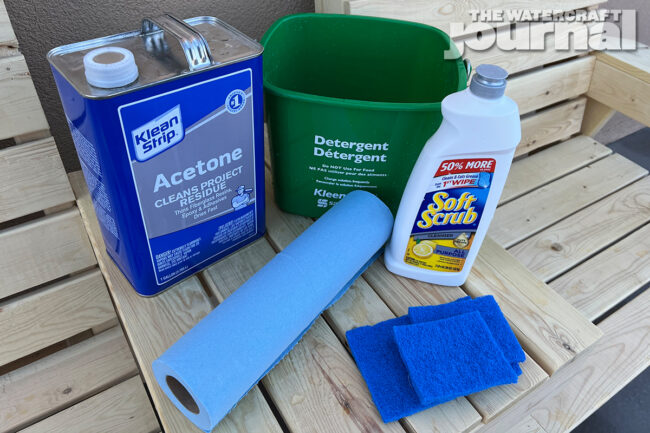
You can also use a non-scratch Scotch-Brite pad along with bleach-free Soft Scrub with a bucket of warm water to assist in the removal of the paint. If after a few coats you are not seeing results, you’re going to need a little elbow grease to get those last lingering bits off.

When it comes to removing vinyl decals, another product you can use to remove any leftover adhesive residue is acetone but we will caution to use this sparingly as not every ski is the same material. Acetone on a Yamaha will permanently ruin the automotive-grade paint. Yet, a little acetone on a rag on older 1990’s and early 2000‘s Kawasaki and Sea-Doo gel coat is extremely tough and can hold up to these harsher chemicals.
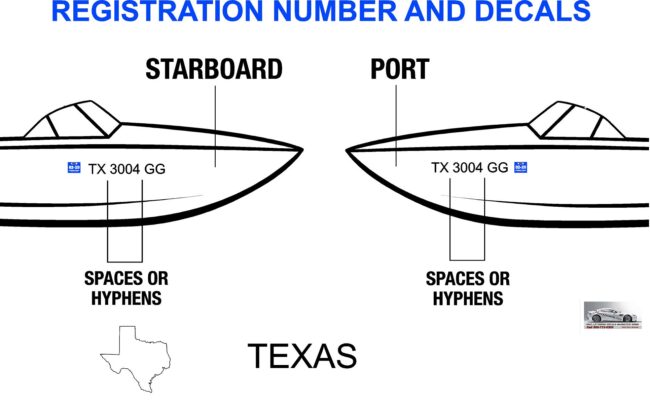
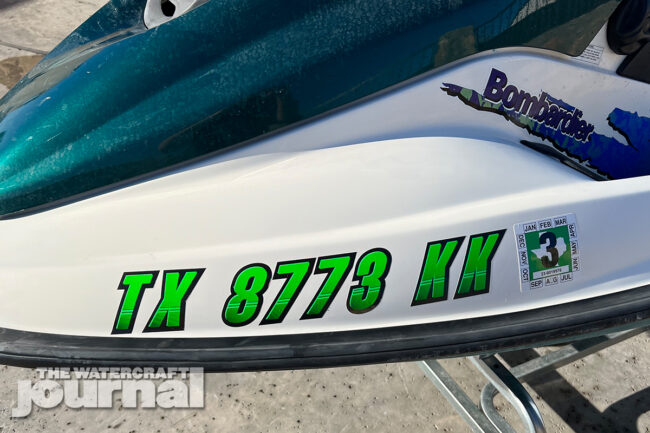
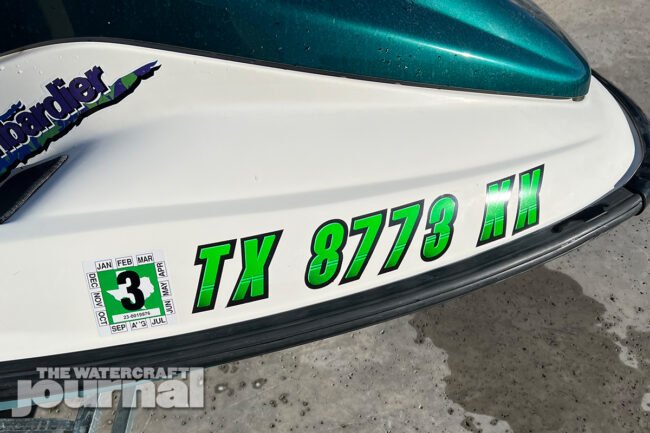
When it comes to applying new stickers it is required that you do so in a certain way. Your date sticker will always go to the rear of the vessel no matter if it is on the starboard or port. And your registration number must read left to right no matter if it is starboard or port.
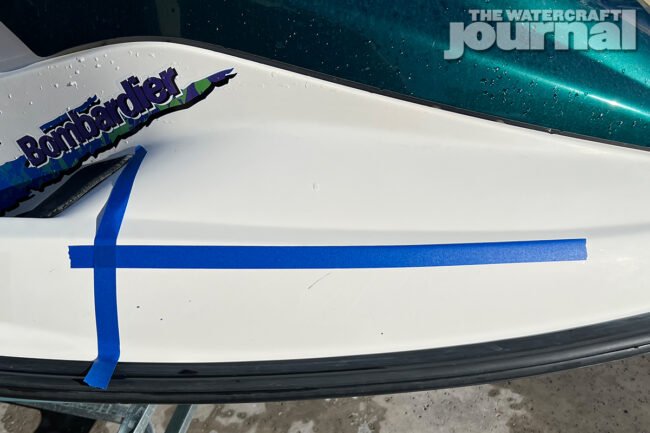
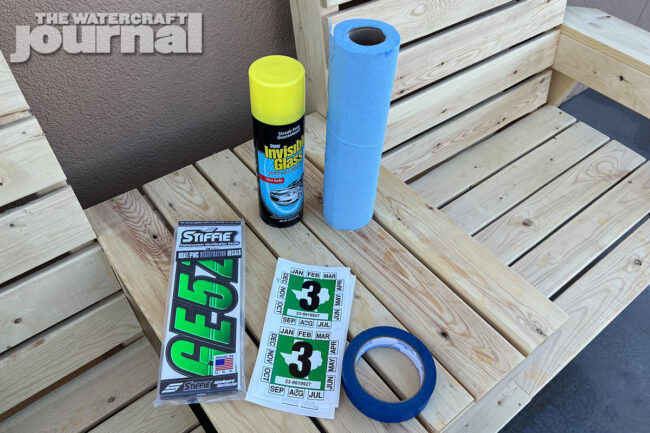
Once you have cleaned the surface it is time to apply for your registration numbers. Use a very mild solvent like glass cleaner and lint-free paper towels to remove fingerprints and oils from the surface. Next, using masking tape to make a guide line, align your decals on the ski (prior to removing the paper backing) with the curve of the watercraft.
Now with everything lined up to your liking, begin peeling back the paper backings exposing the adhesive and begin applying. Most off-the-shelf decals are applied to a dry surface while some higher quality vinyl decals are applied to a wetted surface (be sure to verify which ones you have before applying them). Finally, apply your date sticker and registration number. If you wanted to look nice and straight, take your time. There is no rush because you want to get it right the first time.


Where is any info. about the long sleeve jerseys? Please include prospects with color choices.
What on earth are you asking about?