

Sea-Doo effectively opened up a world of convenient, easy travel with the introduction of its LinQ accessory system back in 2018. The collapsible mounting system allows the personal watercraft enthusiast an array of options to maximize the enjoyment – and utility – of their Sea-Doo.
Whether its storing an extra change of clothes or a large beach blanket in the soft-sided storage tote; loading up plenty of drinks and snacks in the 4.2-gallon floating cooler (that’s right, it floats!); or packing an extra 3.8-gallons of fuel to push your day’s ride just a little bit further; the LinQ system is easily one of the brand’s best additions.

Unfortunately, when it came to Sea-Doo’s Fuel Caddy, certain concessions were required to be made in order to be sold worldwide. Of those was incredibly restrictive filler neck. The locking sleeve filler neck is one of those infamous CARB-legal impositions foisted upon the consumer market, which renders the product itself nearly inoperable. Trying to use the caddy’s filler neck is a chore on dry land; trying to unlock the neck and refill your ski out on the open ocean is all but entirely impossible.
Admittedly, we broke off the restrictive collar and spring-loaded snout early last year and haven’t regretted it since. (Well OK, maybe a little.) Thankfully, since we don’t live in California we’re not concerned with complying their draconian rules – so we’re going to show you a very easy – and CHEAP – upgrade for your LinQ Fuel Caddy that most anyone can follow; it won’t spill a drop of gas on your Sea-Doo, and best yet, transfer fuel from the caddy to your ski twice as fast.


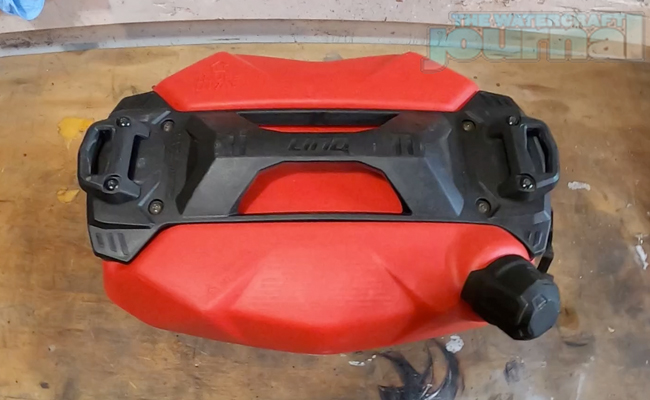
From the factory, the LinQ Fuel Caddy is pretty great. The US Coast Guard-approved marinized tank mounts snuggly to all models equipped with the LinQ mounting brackets, carries 3.8-gallons of fuel, and even allows the LinQ watertight bag to stack on top for added storage. A rubberized boot on a durable tether caps the filler spout when not in use and all hardware is treated to resist corrosion from salt water. Unfortunately, the locking spout just plain sucks – it’s hard to use (particularly out on the water) and is absurdly restrictive.
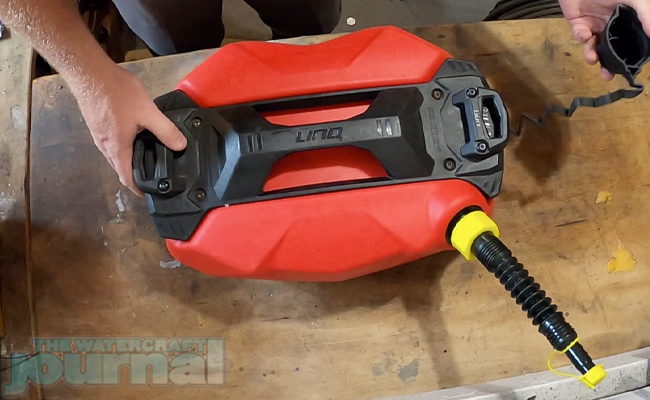
For a mere $10 dollars at EZ-pour (www.EZpourSpout.com) we picked up their flexible Fuel Spout and Vent kit. The EZ-pour spout itself includes a built-in flame arrestor, as well as a screw-top cap and strap, and a push-in 1/2-inch vent and cap. The EZ-pour spout also came with two different screw-tight caps; the yellow cap is coarse thread and typically used for jerry cans and racing jugs – exactly what our Fuel Caddy required.
(As a bit of legal disclaimer, EZ-pour asks that its replacement fuel spout be used on gas cans prior to 2009. Again, this is to comply with hyper-restrictive CARB outlines. This modification should really only be used by those of you not living in states and regions complying with these decisions. Check with your local authorities and parks departments to see what kind of fuel spouts are acceptable.)
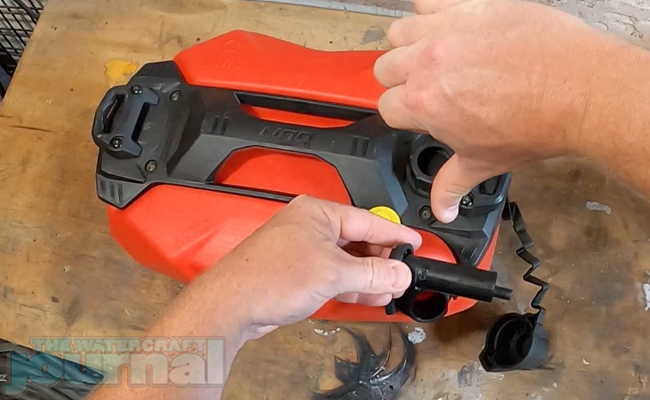
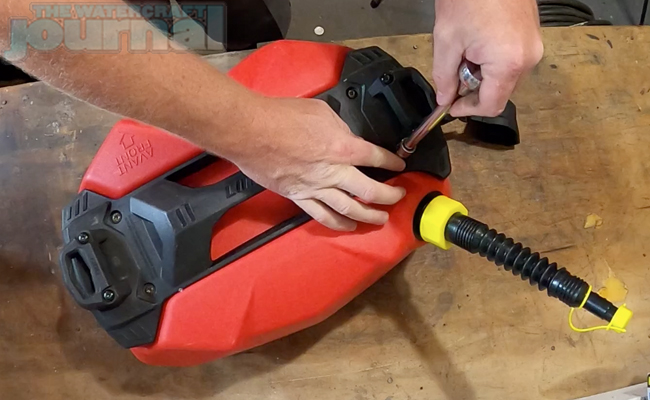
Installing the EZ-pour spout is as simple as removing the rubber cover, unscrewing the old cap, and removing both it and the locking collar from the caddy’s threaded neck. The new spout installs easily, simply slide the yellow cap over it and tighten it down. The spout’s cap also screws on snug; threading on the strap requires looping it around and sliding the barbed end into the cap’s tab.
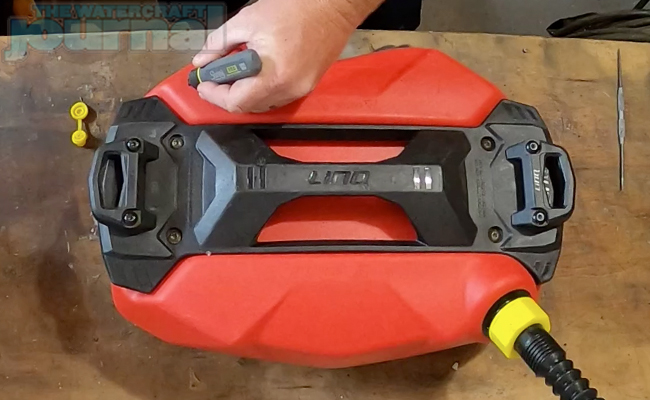
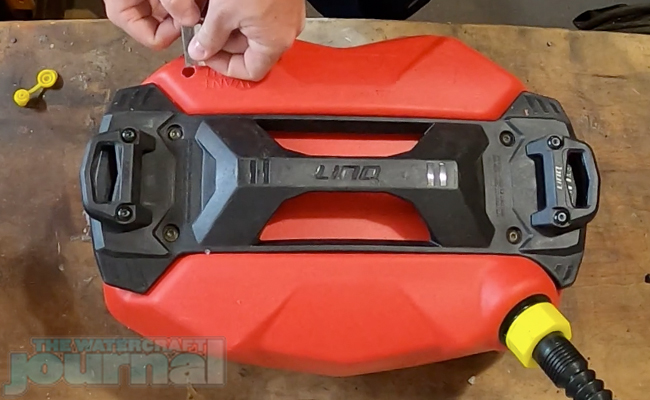
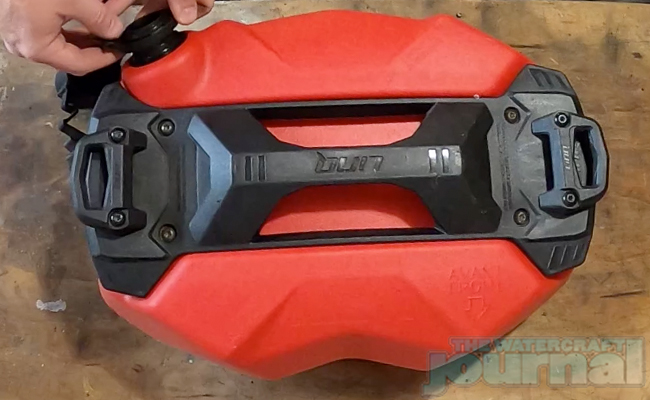
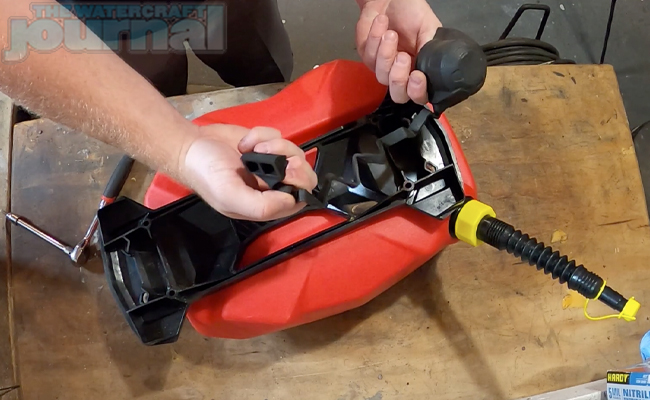
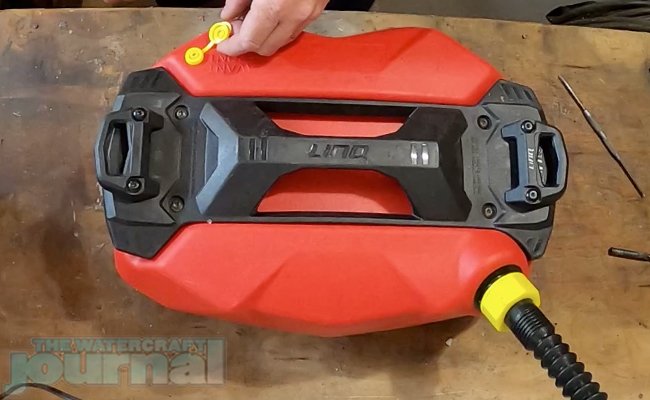
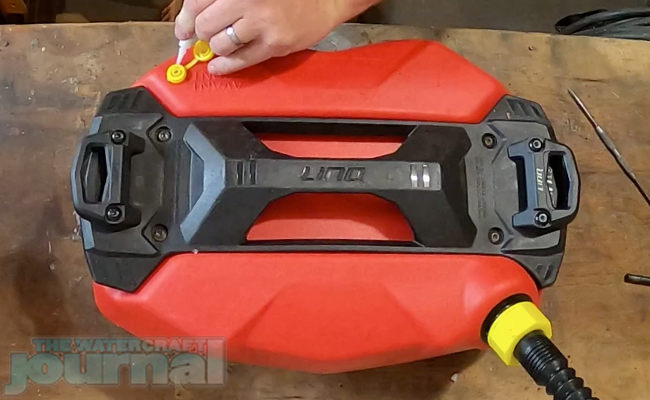
Since we didn’t require the rubber cap anymore, we removed the top panel using a Torx 30 wrench or driver. The the end tab of the rubber cap simply slips off of the base plate, allowing you to tighten it back on. The final step was installing the vent. As you’re pouring you want the cap to be as opposite from the spout as possible; equally, we don’t want fuel to be able to spill out easily, so we chose to drill our hole on the furthermost corner of the top of the caddy.
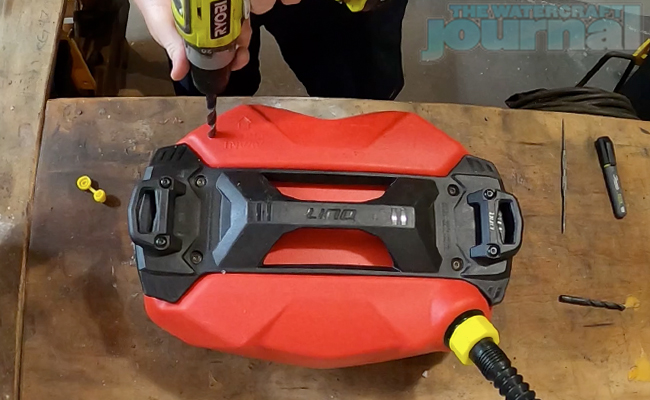
We first made a mark where we wanted to drill; then we drilled a small “pilot hole” before running the half-inch bit into the tank. Next, we cleaned up the edges with a razor blade allowing the vent to be pressed in with a little grunt. For added measure, we ran a bead of Super Glue around the edge. Not so much as a sealant, but to keep the vent from wiggling loose. From there, our modified Fuel Caddy was ready to go.
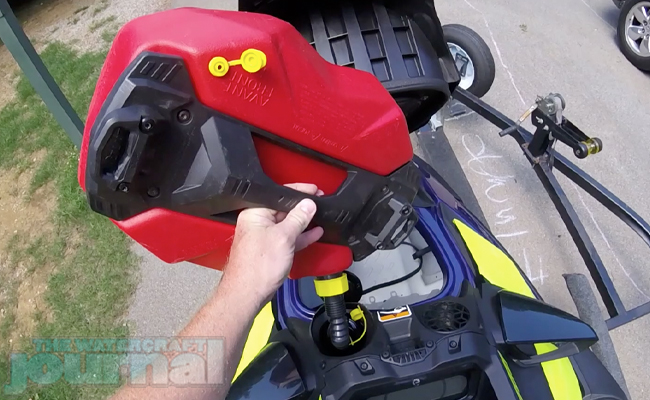
Of course, the LinQ Fuel Caddy attaches to the back of our 2021 Sea-Doo RXP-X 300 without the need of tools or any effort at all. Aboard the RXP-X, removing the caddy and pouring its contents into the fuel tank is just as easy. The flexible spout makes positioning the caddy much easier, and the open vent allows the entirety of the fuel caddy to transfer 3-gallons of fuel within 35-seconds, literally two-to-three times faster than the CARB-compliant spout. It’s now one of the easiest – and fastest – fuel cans we’ve got.
Again, this might not be for you – particularly, if you live somewhere that is uptight about the kinds of filler necks your jerry cans have. So please make sure to do a little background checking to make sure you won’t be issued a hefty fine just for swapping out your Fuel Caddy’s spout.