
There are fewer environments more diverse to enjoy aboard your personal watercraft than in the open ocean. It’s also the playground best suited to push the abilities of your machine as well as your own skills – so be prepared for a challenge if ol’ King Neptune decides to churn up the sea-state a little bit! Whether exploring, surf riding, fishing or racing – ocean riding is some of the best there is.
As fun as the ocean may be, the caustic nature of saltwater can quickly corrode sensitive materials, untreated metals and soft, pliable plastics. That’s not to say you can’t enjoy your watercraft offshore, it’s just that you’re going to want to follow certain steps to properly clean and maintain your machine so it’ll continue to operate at its optimal level.

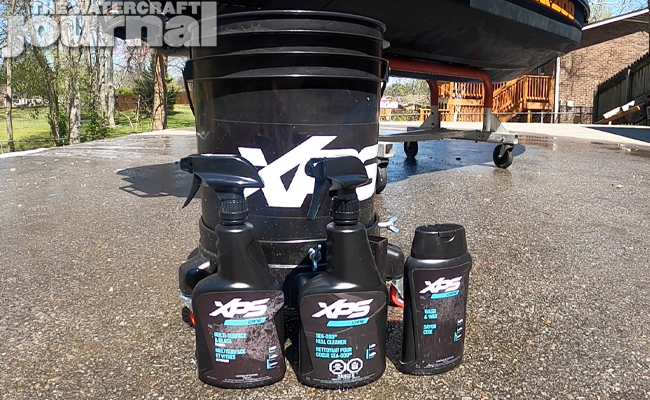
Above Left: Essential to preserving your PWC is proper care and maintenance of its more sensitive surfaces. Salt-Away is one of the most common chemical treatments for post-salt water cleaning, and it comes with its own distributing/diluting hose attachment. Whether you’re cleaning a Sea-Doo or other brand, XPS is a quality brand of spray lubricant. We also like WD-40’s “Big Blast” nozzle. Above right: We also strongly suggest keeping spray cleaners, or a bottle of boat wash/wax. We used XPS’ total “Care” line for our 2020 GTI SE 170 used here.
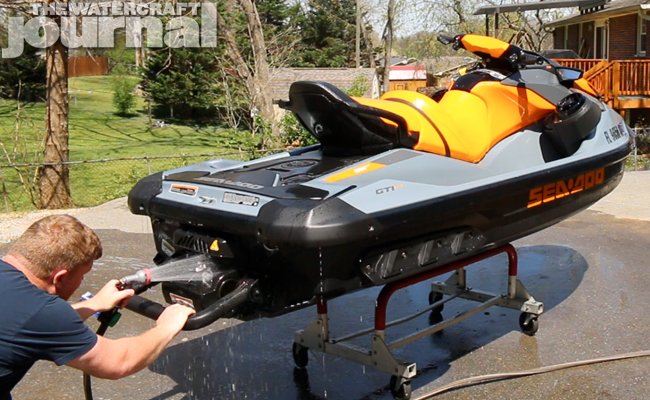
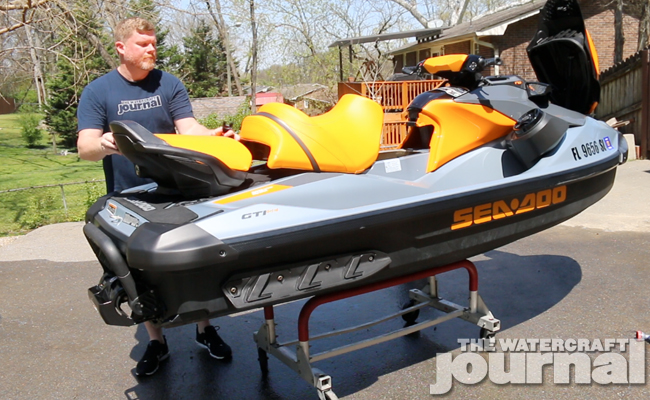
Above: Step 1 is once you’ve reloaded your PWC on your trailer and pulled up to a good spot at the marina, is to unthread your drain plugs.
Thankfully, much of this can be done at the launch ramp with your ski on your trailer. Here we’re going to detail a sequence of steps to take to properly wash, treat and protect your personal watercraft (both inside and out) in between your adventures on the open ocean. None of the steps illustrated require any special tools, equipment or solvents.
The basic items you’ll need are a bottle of Salt-Away, a threaded chemical-distributing/diluting hose attachment, a spray can of XPS Anti-Corrosive Lubricant and/or a can of WD-40 with the “Big Blast” spray attachment. You’ll also need access to a garden hose, a wash bucket, boat wash or soap, degreaser and multi-use cleaner. Also don’t forget a wash mitt and some towels to dry off your ski.
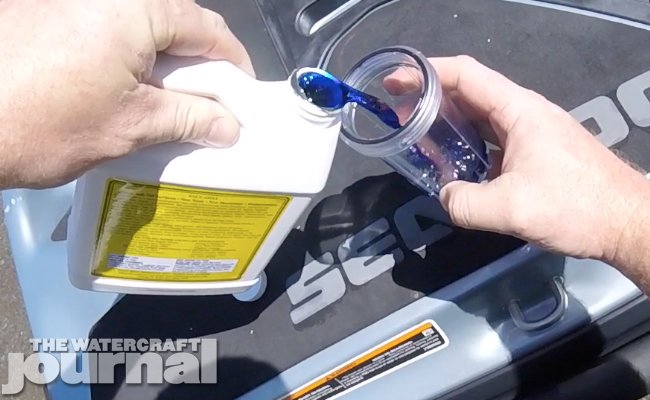
Above: Depending on the level of salt residue, you might want to measure out a more potent mixture of Salt-Away. Thankfully, Salt-Away provides mixture ratios on the label, which are easy to follow using the marked reservoir bottle.

Above: Depending on whether you have a Yamaha fitment or short hose attachment, installing your Salt-Away distributor may require you threading the reservoir bottle after you’ve attached the distributor first (having to clear the folding swim step or trim tab). Once installed, add the reservoir bottle and thread the hose on.
If you’re planning on doing this process just as you come in, most municipal launch ramps will have public access to fresh water spigots. Just pull up nearby, pull the hose from your trailer’s storage box and begin rinsing off the saltwater before it dries into hard waterspots all over your ski. You can choose to wash your watercraft down now or flush out the engine and waterbox. It really doesn’t matter – so we chose the latter.
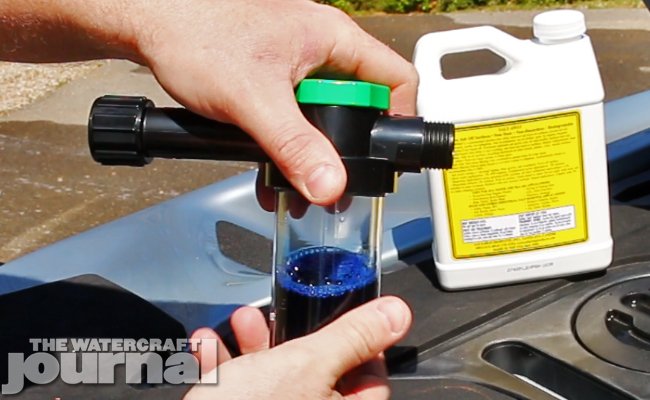
Flushing your ski is pretty easy. First, we filled up the reservoir to our hose attachment with straight Salt-Away (it’ll dilute on it’s own). Properly installing this to the hose fitting on the rear transom depends on whether you have a folding swim step or not. If you watercraft doesn’t have one, like our RXP-X 300 shown here, it spins on pretty effortlessly. If your ski does have one like this Sea-Doo GTI SE 170, you’ll want to install the attachment first and then screw on the reservoir cup before attaching on the hose.

Above Left: Per Sea-Doo’s owner manual, ignite the engine prior to turning on the hose. Turning the hose on before the engine and pressurize the exhaust system without the engine being able to evacuate the water. Above right: With the engine running, quickly turn the hose on, pumping fresh water through the exhaust system. Let the reservoir pump fresh water for 10-15 seconds minimum before switching the green selector over to Salt-Away.

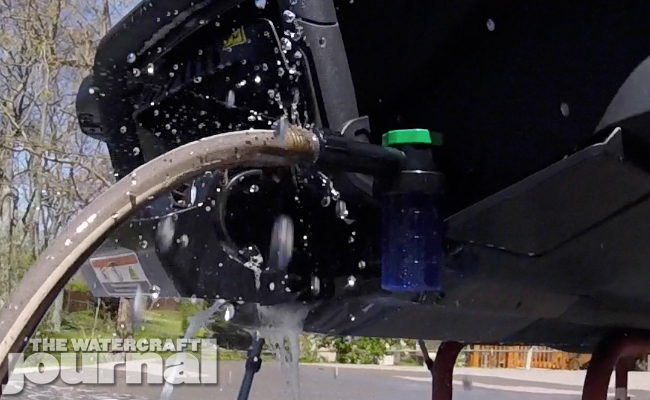
Above: With Salt-Away pumping through the exhaust system, give the throttle a little squeeze (no more than 3,000rpm) for 3-5 seconds at a time. You should run Salt-Away for 30-45 seconds before switching back to fresh water for another 15-20 seconds. Then, turn off the water supply. Rap the throttle once more to purge the waterbox. All of this should take less than 2 minutes total. Do not operate your Sea-Doo out of the water for more than 2 minutes, as this can overheat your carbon ring seal and damage this very sensitive component.
Next, turn on the water (all the way to full for maximum pressure) and let it begin to fill. Fire up your watercraft’s engine and let it idle a little before bringing the RPM up to about 2,000-3,000 for a second or two at a time – there’s no reason to really wring it out. Because we’re working on a Sea-Doo, don’t operate the engine for longer than 30-45 seconds at a time. Prolonged use out of the water can prematurely wear the carbon ring seal, so we only do a couple short bursts.
Once done, we turn off the hose and rap on the running engine’s throttle once or twice to purge the exhaust. We won’t be able to get all of the water out of the waterbox, but that’s OK since the Salt-Away infused water will help keep salt deposits from forming inside. Next, we unthread the hose attachment from the transom and reattach it to the hose along with a good spray nozzle.
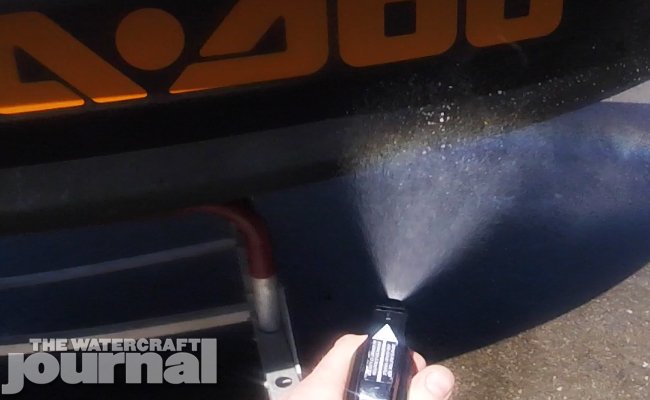
Above: With our reservoir removed from the transom, we attach a common garden hose nozzle and continue spraying down the outside of the PWC with Salt-Away as saltwater deposits can mar and discolor many of the sensitive surfaces. Also spray around the inside of the pump tunnel to spray down the linkage and fixtures.
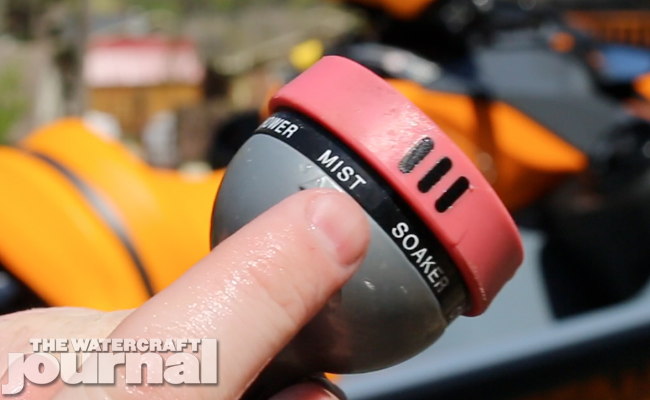

Above: With our nozzle set to MIST we gently mist down the engine compartment. There is no reason to douse the inside of your engine compartment – particularly as electrical components do not respond well to being drowned. Note we also cover our battery and terminals with a small towel to keep them dry. Once done with the Salt-Away, switch the distributor back to WATER and mist the engine compartment with fresh water.
Then we hosed down both the exterior of the Sea-Doo with our Salt-Away sprayer, as well as gently misting the engine compartment. For Sea-Doos so equipped it’s not totally necessary to remove the inspection cover unless you see quite a bit of saltwater in the bottom of the engine compartment or heavy deposits on the engine itself. Otherwise, spraying a steady mist for a few seconds will suffice. (And if your engine has a plastic decorative cover, make sure to remove that now. You can put it back on after you’ve washed and oiled your engine down.)
With that, we poured what little Salt-Away was left in our reservoir into our wash bucket (which wasn’t much) as well as a half cup of XPS Care Wash & Wax. But before we went to town with our soapy wash mitt, we applied a generous coat of XPS Care Hull Cleaner to our GTI. The hull cleaner is a strong, penetrating cleaner formulated specifically for Polytec hulls. XPS suggests letting it soak for a few minutes before scrubbing and spraying it off.
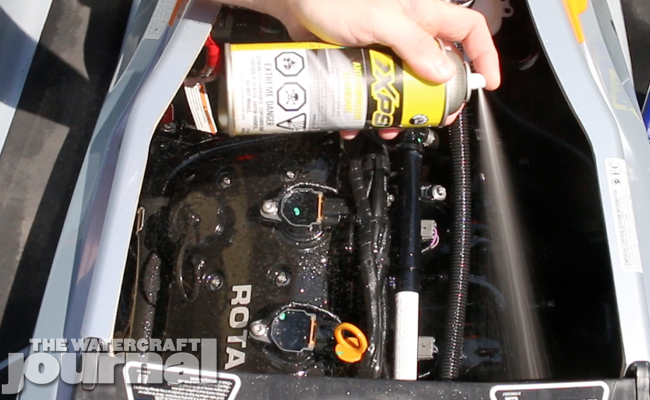
Above: Albeit out of sequence in the video, take this opportunity to generously coat your engine compartment, hoses and hardware with spray lubricant. These lubricants disperse corrosive moisture (water) and coat the surfaces in a protective layer. Contrary to internet gurus, neither WD-40 or XPS have any detergents that will deteriorate rubber or plastics.
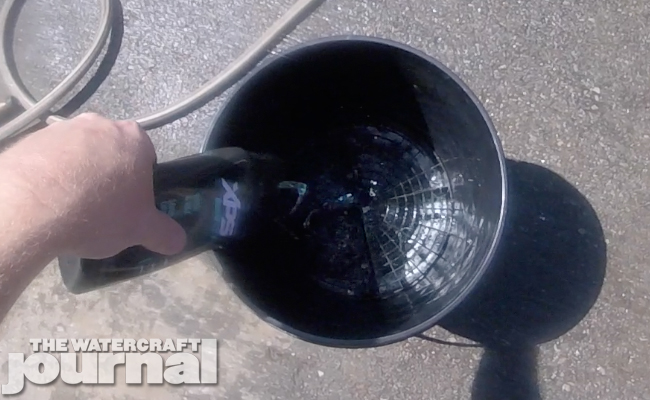

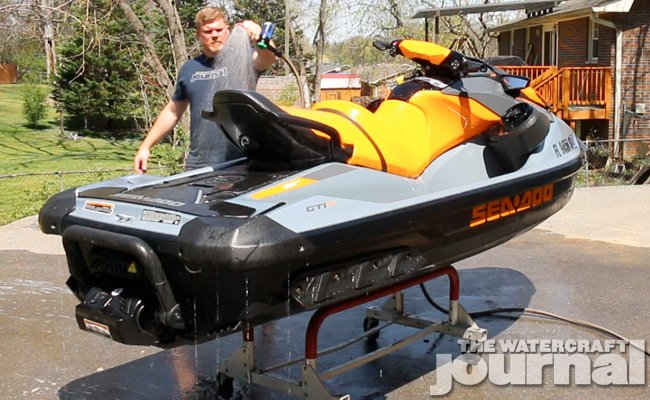
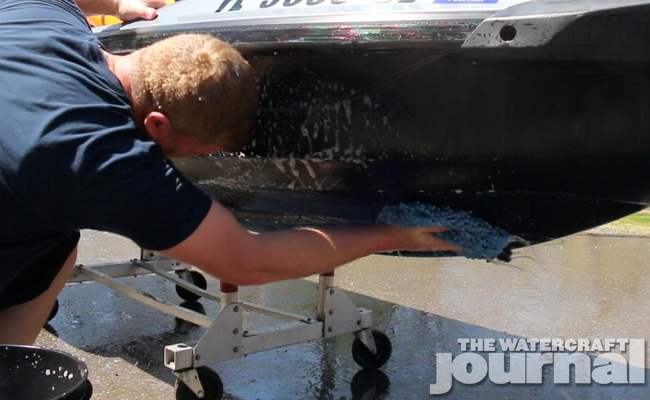
Above Left: We poured a cup of XPS Care Wash & Wax into our XPS wash bucket (as well as a little leftover Salt-Away for good measure) and filled it to a lather. Above Right: Using a microfiber wash mitt, we began lathering down our GTI SE 170. Hand washing your ski will break up dried-on salt deposits that spraying (even with a pressure washer) can’t dilute. Always wash by hand when you can.
With a nice healthy lather, we soaped down every surface of our watercraft – working our way from top to bottom, including the hull from beginning to end. Simply spraying your ski down – even with a pressure washer – isn’t enough to break hard, baked on salt deposits. A wash mitt and some elbow grease are your only tools here.
Finally, we hosed down our Sea-Doo with fresh water. With our mitt, we manually paddled the gallons of water that had accrued in the footwells. (This process alone assures us that Sea-Doo’s engineers are not forced to use the products they design in the “real world” or footwell drains would’ve been made standard equipment years ago.) With a final pass of our spray nozzle (including another misting of the engine compartment), it’s time to begin drying.
Above Left: Prior to scrubbing down our Sea-Doo, we applied a generous coat of XPS Care Hull Cleaner. Formulated specifically for Sea-Doo’s Polytec and Polytec 2 hulls, this a pretty caustic cleanser that breaks up stains and contaminants that have embedded into the Polytec’s porous surface. Above Right: XPS instructs to let the Hull Cleaner soak for 4-5 minutes before scrubbing with a mitt or towel, or spraying down with a pressure washer. We opted for the prior option.
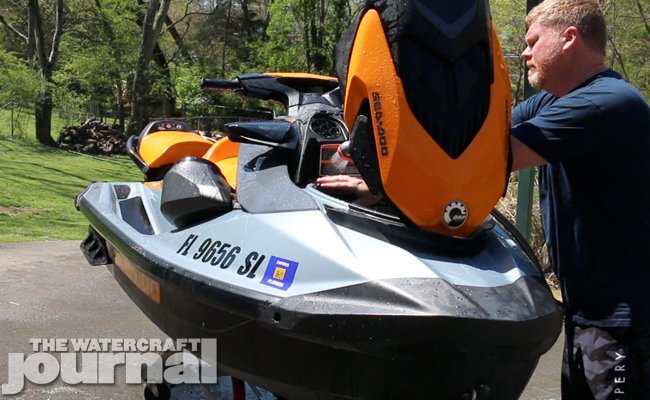
It’s always a good idea to keep dry towels or a chamois in your trailer’s storage bin if you have one. We’ve have tremendous success with the Waves Micro Towels, which are super absorbent and always soft to the touch. Now is a good time to wipe around the edges where the front hood seals and your seats.
Lastly, grab your favorite penetrating spray lubricant and generously spray basically anything metal or rubber inside of the engine compartment. Equally, shoot a little on the steering cable, hinges and front shock, as well as inside and around the pump, intake grate and ride plate. This will coat it all with a protective film until the next time you hit the water.
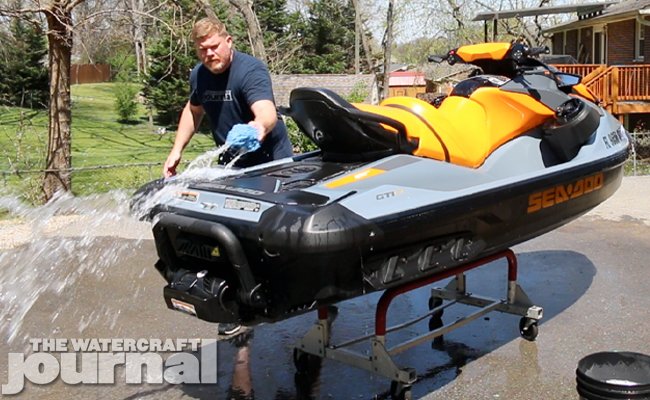
Above Left: Although we love Sea-Doo’s Ergolock seating, the voluminous footwells have no easy way to get the water out besides paddling gallons out of the back. With our mitt, we pushed all of our soapy water out before a final fresh water rinse. Above Right: After soaping down our PWC, we rinsed off the suds, careful to get all of the edges and corners, including the inside lip around the storage bin.
Above: Using a water absorbent chamois to dry our Sea-Doo, we leave our PWC’s hood and engine compartment open to air dry inside of the garage. Obviously, you can’t do this while at the marina but once you get back home. If your skis are not stored indoors, leave them out to air dry for at least 2-3 hours before covering them with a UV-protective cover.
Once home, you’ll want to pop the hood open again, as well as stand the seats up so that the engine compartment can air out. If you can, place a thick wood block or brick beneath your trailer’s front caster to tilt it up at an angle several inches. This will allow any remaining water to seep out of the open drain plugs.
Lastly, if you don’t keep your watercraft inside and plan to store it outdoors, please keep it protected with a good UV-blocking ski cover as plastics and soft materials can quickly fade and crack under the blistering sun. All of these steps will ensure that your personal watercraft will continue looking great and live for many more years of open ocean enjoyment.