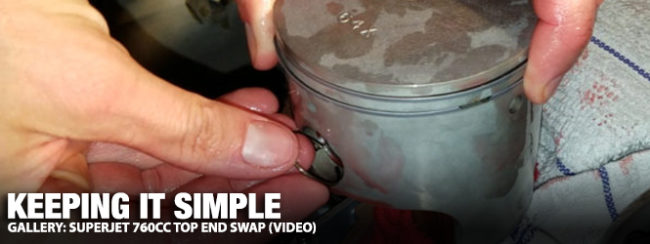
The 701cc Yamaha SuperJet has been an icon in the stand up jet ski world for nearly three decades, and over that time period many modifications have been perfected. Let’s face it, most of us at some point in our jet ski riding careers want to go faster. If you are looking for a reliable, OEM option for you inner speed-freak the Yamaha 64x 760cc top end kit is a great option to consider. Not only is it Stock class legal in Pro Watercross and Lites class legal in IJSBA, it can provide an extra boost in the upper power band and top speed on your freeride or recreational lake SuperJet.
Depending on your budget you can source a used 64x cylinder from a number of Yamaha watercraft including the WaveBlaster 2, GP760, Venture 760, Raider 760, and XL760 or you can purchase all parts new from Yamaha. Since my build was prompted by adhering to race-legal requirements I went with freshly manufactured new Yamaha cylinder and pistons. This ensured nothing in the engine had been modified by a previous owner. The 64x 760cc cylinder drops right on to the modern 62T SuperJet bottom end cases with no modification except a small notch in the stock exhaust bracket I will illustrate later in the article. The 760cc top end differs from the stock 701cc by having a larger bore size and higher port timing. Stock crank shaft stroke is retained, hence being able to drop straight on to the OEM cases. The 701 head can also be retained, with the only difference being a 760cc head gasket taking the larger bore size into account.
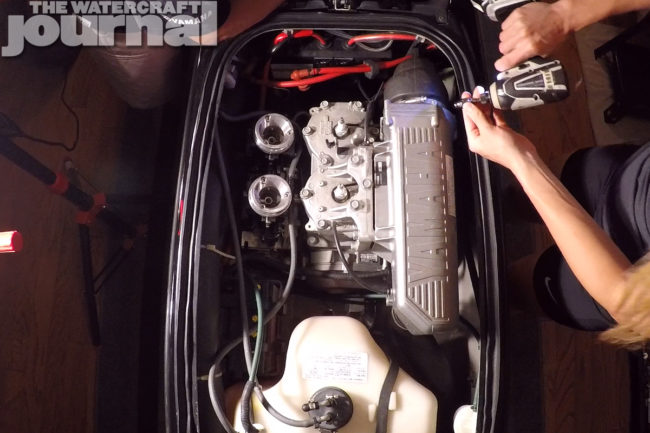
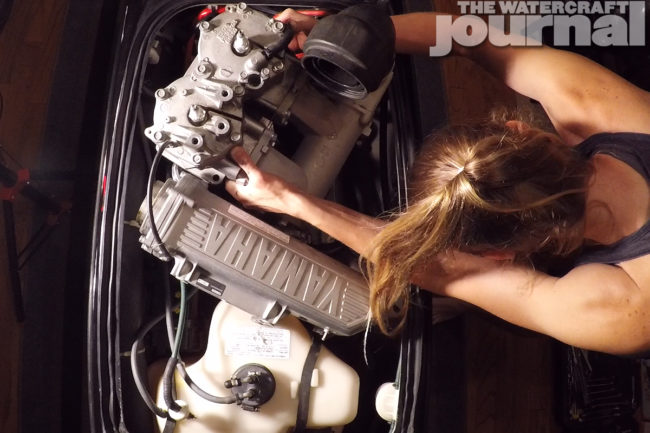
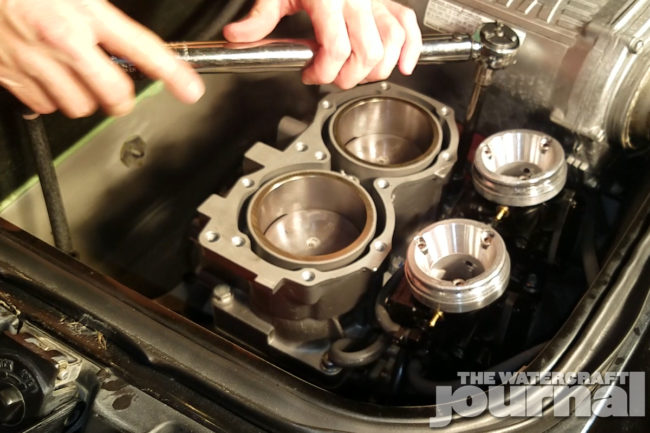
Above left: Begin disassembly by removing accessories and exhaust to reach the cylinder bolts. Above right: Once the six cylinder bolts are removed, the cylinder and manifold can be removed as a unit. Take care to remove the water line on the bottom of the manifold.
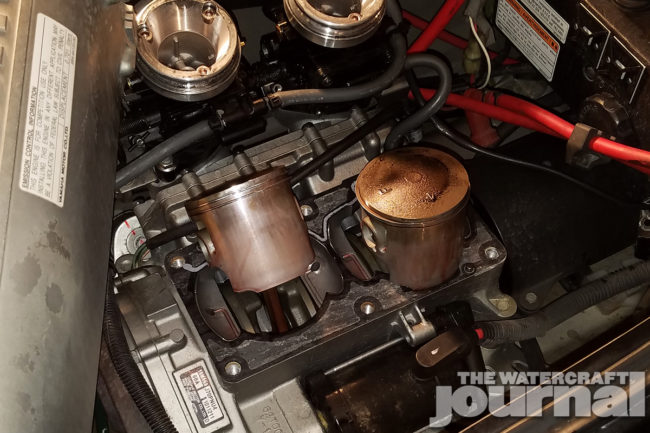
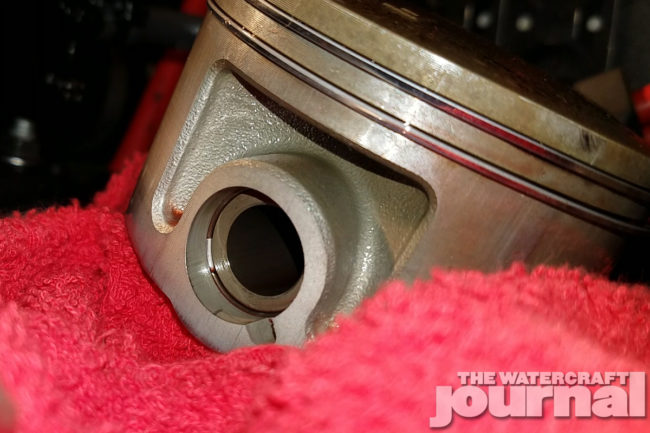
Above: Remove the old pistons and gasket. Clean off any gasket residue before beginning piston and cylinder install.
Parts needed
(1) 64x Cylinder
(2) 84mm pistons
(2) Piston ring kits
(2) Wrist pins
(2) Roller bearings
(4) Wrist pin clips
(4) Wrist pin washers
(1) 760cc Head gasket
(1) Base gasket
Peripheral Disassembly
Disconnect the battery so no switch can accidentally be hit and trigger moving parts. Remove the spark plug boots and place to the side, remove the temp sensor from the head, disconnect all water lines that will restrict removing the cylinder and exhaust from the ski. Loosen the worm clamp on the outer rubber exhaust boot, peel back to expose the two inner worm clamps. Loosen the front one to allow the expansion chamber or “breadbox” part of the exhaust to separate from the U shaped tube.
Remove the three bolts holding the breadbox to the exhaust bracket mounted to the head. Loosen the worm clamp on the small rubber exhaust tube on the front of the breadbox to allow it to be rotated out of the way. You can also fully remove the breadbox if you wish, I chose to just rotate it. To limit the amount of wrenching I needed to do within the limited space of the hull I removed the cylinder and exhaust as one unit. Be mindful of cylinder bolt sizes, the front and rear most bolts on the exhaust side are longer than the remaining four.
Above left: Place towels around the rods to keep small parts from falling into the crankcase. Pop out the circlip using a pointed tool such as a pick or small screwdriver. Wear eye protection in case the circlip springs out. Above right: Note the two cylinder alignment dowels should remain with the crankcase. Do not allow them to fall into the crankcase.
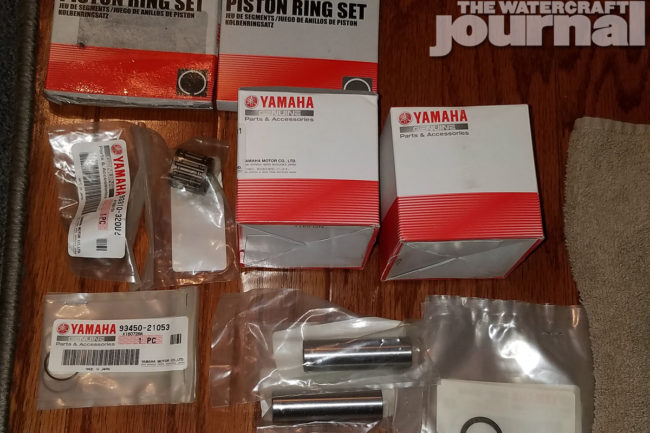
Above: Replace all piston-related parts with new ones. Cheap insurance knowing your top end will be fresh.
Cylinder Removal
Once all bolts are loose and removed you can start to separate the cylinder from the cases. Depending on the age of your engine, corrosion, heat cycles, etc. you may need to apply a few sharp taps to shock the cylinder loose. Careful not to drop the two alignment dowels (one on the front intake side and the other on the rear exhaust side) into the bottom end if they stick in the bottom of the cylinder rather than the cases. Pull upward slowly, taking care to not let the pistons bind and flop out of the cylinder. Once the cylinder and exhaust is removed from the hull you can take off the exhaust and head if you will be reusing the OEM parts, I chose to use an electric impact driver to speed up the process.
Piston Removal
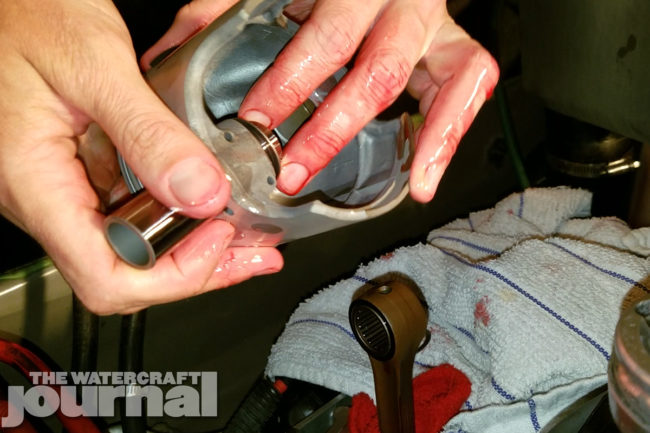
Now for the fun part of removing the springy piston circlip without sending the circlip into orbit the dimension where missing socks go. Cover the bottom end around the crank rods so no small parts can drop down. I started with the rear piston, rear circlip. Once removed, press the wrist pin backwards and out, taking care to not let the two wrist pin bearing washers drop. Remove the piston and roller bearing from the rod. Repeat the process for the front piston.
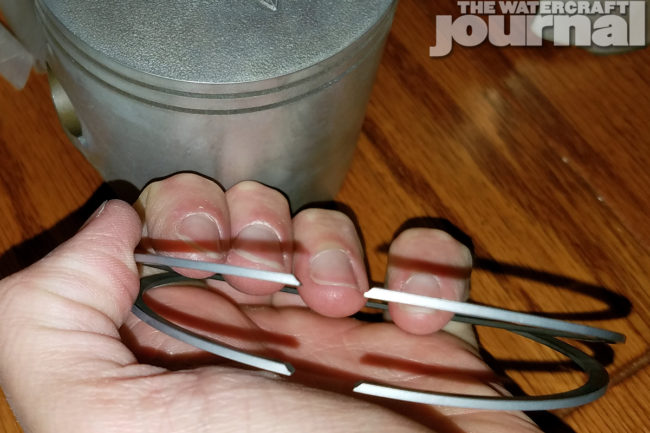
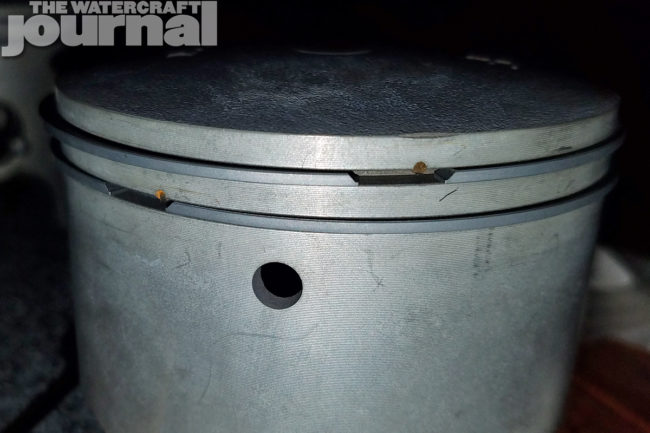
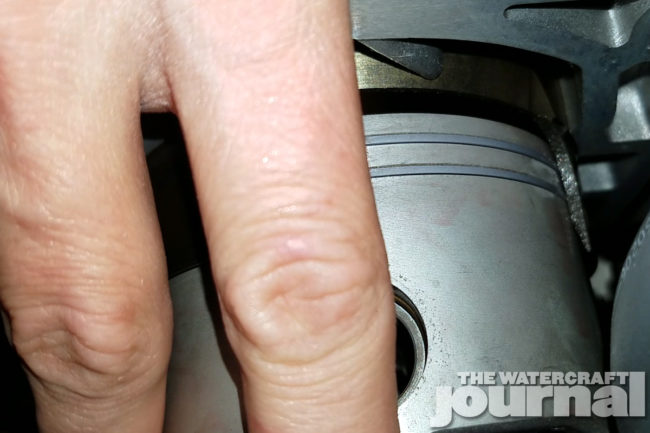
Above left: Note the angle of the piston rings. Above right: Note the ring limiters on the piston. Install the rings with the opening falling in this area to prevent ring binding.
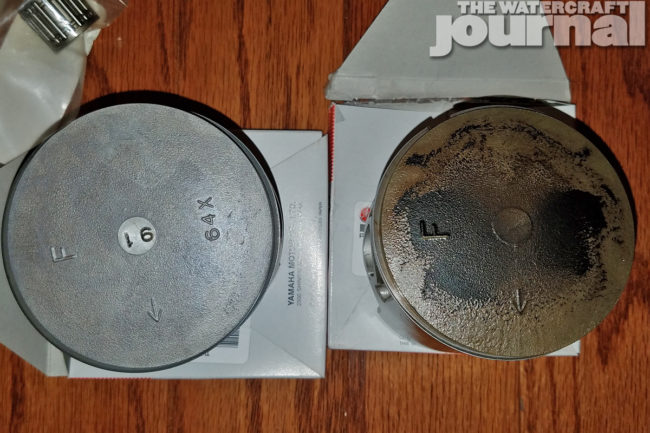
Above: Front: OEM Yamaha 760cc piston Rear OEM Yamaha 701cc piston
Surface Preparation
This is my least favorite stage of any engine work – prepping the mating surfaces. Remove all gaskets, taking care to document their orientation. All excess material and debris has to be removed from A: the engine case to cylinder mating surface, B: Exhaust manifold where it will mate to the new cylinder, and C: head that will mate to the top of the cylinder. Fortunately I went with a new OEM cylinder so I only needed to wipe the light oil off instead of scrape away old gasket material. When cleaning do not use heavy abrasives that could gouge and create divots in the relatively soft aluminum. These surfaces have to seal against engine combustion so flatness and cleanliness are key.
Piston Install
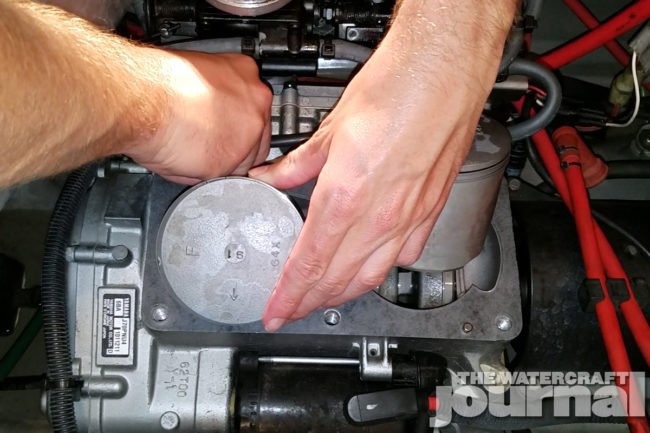
Both rings on each piston need to be installed with the end angles facing upwards as illustrated in the photo. The OEM pistons have stoppers that limit ring movement, make sure to place the openings at these stopping points to avoid pinching or damaging the ring. The wrist pin roller bearing, wrist pin, and washers should all be lubricated in oil before installation. Keep in mind these parts will need lubrication on initial startup and the pre-lubing install process will keep the new engine parts from starting oil starved. With towels still protecting the bottom end, start with the front piston. Pistons are installed with the “F” facing the front of the ski and the arrow symbol pointing toward the exhaust side.
Above left: Lubricate fresh parts and cylinder walls with oil for ease of installation. Also keeps the top end from starting oil-starved. Above right: This illustrates the start of the piston install process onto the rod. Take care not to let any small parts drop into the crankcase.

Above: Face the circlip opening downward and use an aggressive angle to compress it into the piston groove. Remove towels once pistons are installed.
Before installing the piston on the crank, place the front circlip in the piston groove with the opening facing down. It helps to press the circlip in from the top of the piston opening at a significant angle to keep it from springing back. It helps to have a friend for installing the piston on the rod because of the amount of parts you have to wrangle, but not impossible by yourself with patience. Place the lubricated roller bearing in the rod. Preinstall the wrist pin from the rear of the piston, then the rear wrist pin washer. Have the front wrist pin washer ready as you push the wrist pin through the roller bearing. Once the wrist pin bottoms out against the front circlip install the rear circlip in the same manner. Repeat for the rear piston and remember – have patience and make sure your towels firmly protect the bottom end from the inevitable dropping of small, oily washers and clips.
Heli-Coil Install
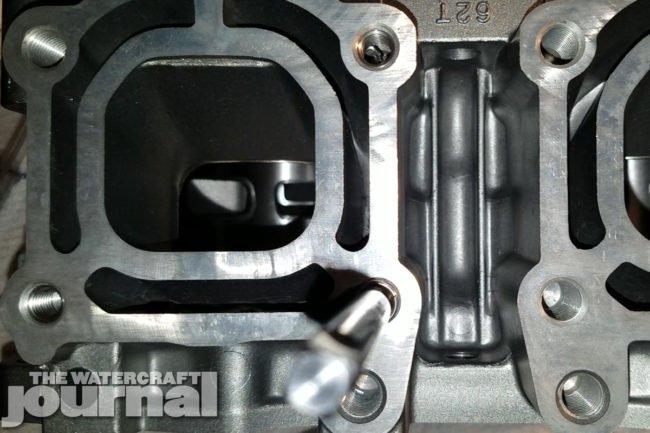
Before installing the cylinder in the hull a small, yet very important step must be addressed – the exhaust bolt size discrepancy. A SuperJet’s 701cc cylinder has eight exhaust bolts which are M8 x 1.25 thread size. The 64x 760cc cylinder comes from the factory with M10 bolts/holes. There are a number of ways this can be alleviated, my clear choice on multiple engines so far has been to install a M8 x 1.25 Heli-Coil kit. The outer threads of the M8 Heli-Coil fit perfectly into the M10 threaded holes in the cylinder and the smaller OEM bolts can be utilized.
Top left: M8 x 1.25 Heli-Coil install to allow for smaller 701 exhaust cylinder bolts to be utilized. Top right: With the pistons installed, wipe any excess assembly oil off the surfaces and install base gasket. Take care to align on the two dowels. Bottom left: A ring compressor is recommended, but if you do not have one gently compress the rings and guide the cylinder over one elevated piston. Follow same process for lower piston. Bottom right: With the cylinder seated, make sure the pistons rise and fall without any binding.
Cylinder Install
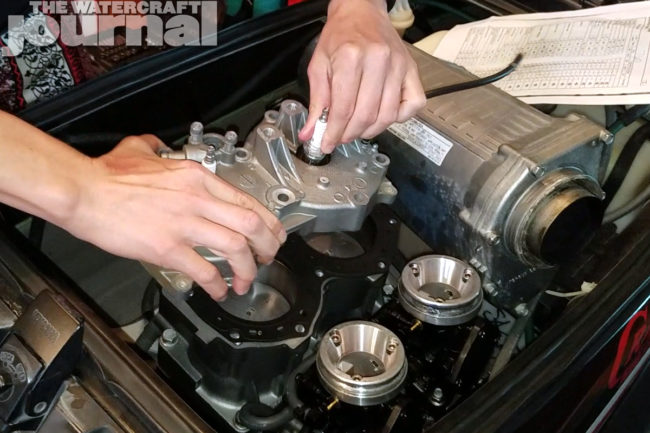
Do a final cleaning on the case to cylinder mating surface with alcohol or similar cleaner to remove all oil residue. If using a new cylinder, be sure to swap your diode from the old cylinder. Install the new base gasket in the same orientation the old one came off, make sure to have the dowels installed on the case side to keep the gasket in place. A piston ring compressor is recommended for this step to minimize damage to engine parts from incorrect installation. If you do not have one, a helper is the next best option. The bottom of the cylinder sleeves are angled to help compress the piston rings and allow the pistons to slide into the cylinder without binding.
However, compressing the rings, keeping the pistons straight, and guiding both pistons into their respective sleeve can be tedious. It is best to start with one piston being slightly higher than the other, compress it’s rings and gently guide the cylinder down around the piston. Repeat with the lower piston and slide cylinder down onto the crankcase. Install cylinder to case bolts, taking care to note the different lengths. Follow the Yamaha shop manual’s guidance on torque specs and tightening pattern. Clean the head mating surface and install head gasket and head, taking note of the original gasket orientation. Follow manual’s guide for torque specs and tightening pattern.
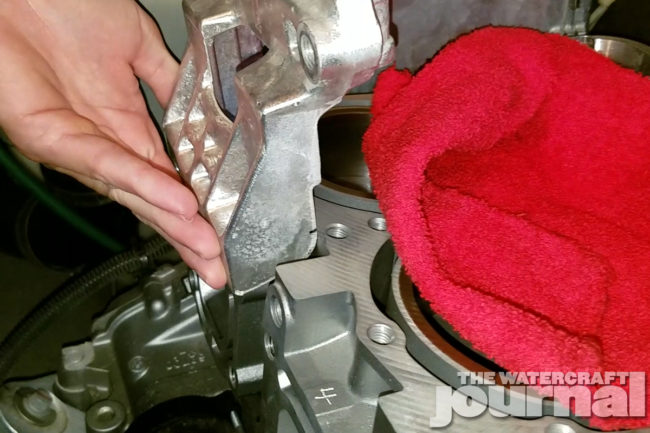
Top left: Follow the Yamaha shop manual for torque sequence and values. Top right: With the cylinder installed mark the exhaust bracket for clearance. The 760c cylinder has extra material in this area whereas the 701cc cylinder does not. Bottom left: Remove excess material on bracket and test fit before exhaust installation. Bottom right: Clean all sealing surfaces, install head gasket and head, taking care to align the same as the original gasket. Reference Yamaha’s shop manual for torque sequence and values.
Exhaust Bracket Modification
This is the only “custom” modification that will have to be made when installing all OEM 760cc parts on your SuperJet. The photo illustrates the cut that has to be made in the OEM breadbox exhaust bracket to clearance the 64x cylinder. Place the bracket up to the 760 cylinder, mark your cuts, and use your tool of choice to remove the material. An electric grinder makes quick work of the soft aluminum.
Peripheral Install
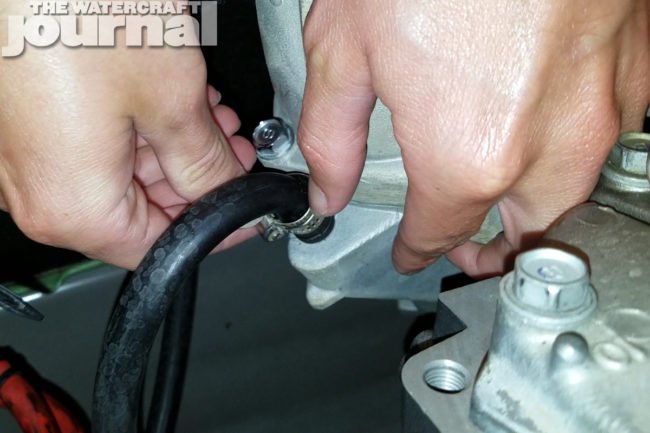
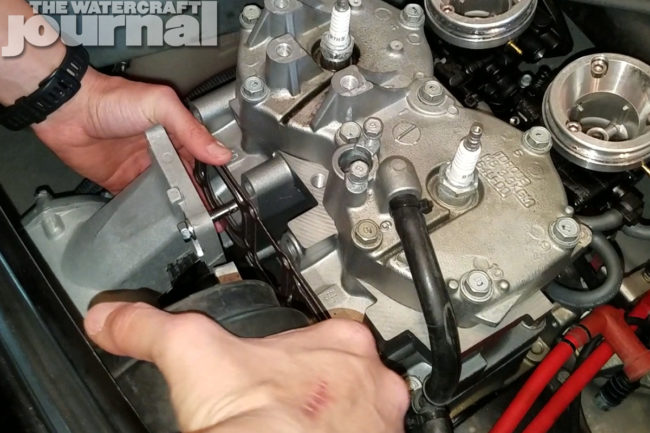
Almost there! The exhaust install is the last large step before you can fire up the fruits of your labor. Do a final cleaning on the exhaust manifold and cylinder exhaust mating surface, place gasket, and install the manifold. The rear lower exhaust bolt is the most difficult to thread because of the limited space, it helps to install a few of the easy front bolts to hold the weight of the manifold while slowly working the difficult bolt into place. Once all manifold bolts are tight simply follow the same disassembly process in reverse – install and tighten worm clamps, bolts, sensors, hoses, plug wires, and battery connection.
Above left: Begin the exhaust install by attaching and tightening all water lines while they are easier to access. Above right: Clean all sealing surfaces and install exhaust manifold.
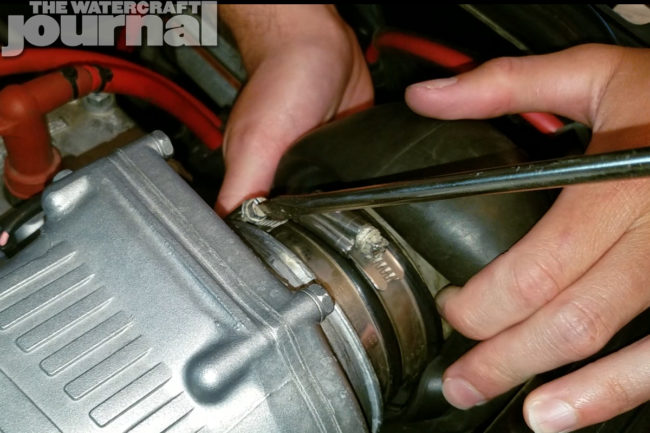
Above: Reverse the removal process with all connections. Tighten all worm clamps, exhaust bolts, and peripheral hoses and sensors. Make sure no tools are left in the bilge area.
Final Thoughts
There is an old adage that goes something like this: “you can have two of the three – cheap, fast, reliable.” In motorsports something can be cheap and fast, but not reliable. Fast and reliable are usually not cheap, and cheap and reliable is usually not fast. Sure, some aftermarket bolt on parts such as exhausts, heads, etc will get you more speed – but at the expense of reliability and longevity of your engine. In the SuperJet’s case, a Yamaha 760 swap combines OEM reliability with limited expense and a small increase in speed. And hey, who says you can’t spend more money later for those bolt on go-fast parts once you have the larger 760cc top end thumping away in your trusty SuperJet. Braaap on, my friends!










[…] and I had a great time learning the ins-and-outs of building a working Lites class ski including:Installing 760cc cylinder and pistonsRemoving carb chokes, drilling EPA needle stops, and rejettingExhaust insertImpellerOlder Superjet […]