
Seeing how today’s personal watercraft enthusiasts are looking to push the boundaries of long distance traveling and exploration, The Watercraft Journal sought to develop the easiest, most non-invasive auxiliary fuel system possible. The goal was to provide a secondary fuel supply that would automatically siphon extra gasoline from the rear tank into the factory fuel cell without the need of cutting, drilling or permanently modifying the watercraft in any way.
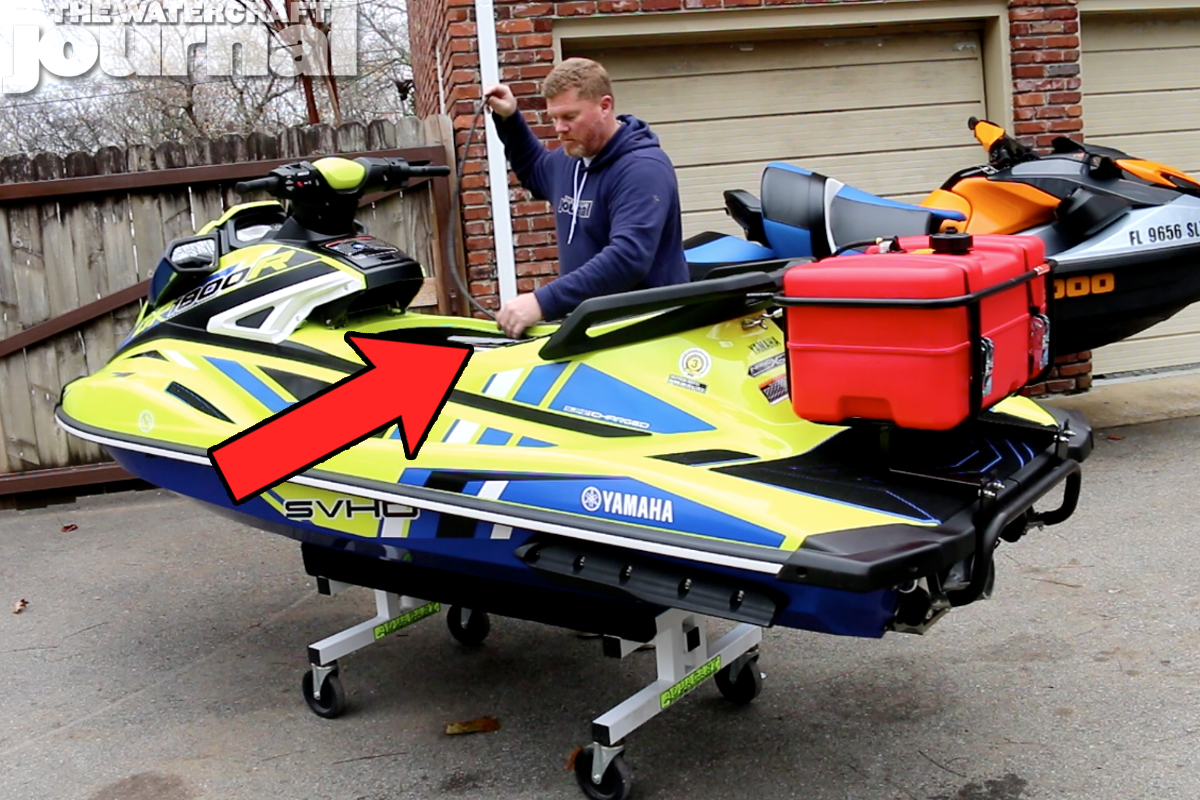
The Watercraft Journal’s “Long Hauler” Auxiliary Fuel System Kit is the single-most comprehensive yet simple package we could devise. It was purposely engineered so that the least mechanically-savvy can install it in a matter of 10-to-15 minutes using common hand tools. Here we’ll demonstrate each step of the installation process, using this 2020 Yamaha GP1800R SVHO WaveRunner.
Because our system operates using the mechanical vacuum created in the factory fuel cell to organically siphon fuel from our auxiliary tank mounted on the rear deck, our kit will work on all 2004-and-up 4-stroke Kawasaki and Yamaha runabouts, as well as all 2003-through-2011 Sea-Doos. Changes made to the fuel pickup by Sea-Doo in 2012 makes use of our system impossible without major changes to the factory fuel system, which we didn’t want to require.
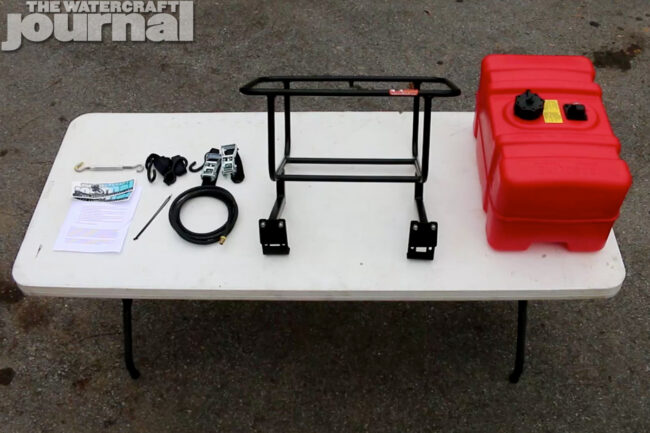


The Long Hauler Auxiliary Fuel System consists of 9 pieces: a cold-rolled stainless steel-and-black powder coated rack from Kool PWC Stuff, featuring its patent-pending Z-bar adjustable base, lined with thick Hydro-Turf padding; a stainless steel double-hooked turnbuckle; a USCG-certified 12-gallon auxiliary fuel tank featuring a ventilated locking gas cap, internal pickup and even a floating fuel level gauge; two ratchet straps to secure the tank to the rack; 11-feet of non-EFI 50psi-rated fuel line fitted with a brass 5/16-inch hose barb; and two zip-ties to secure the fuel line.
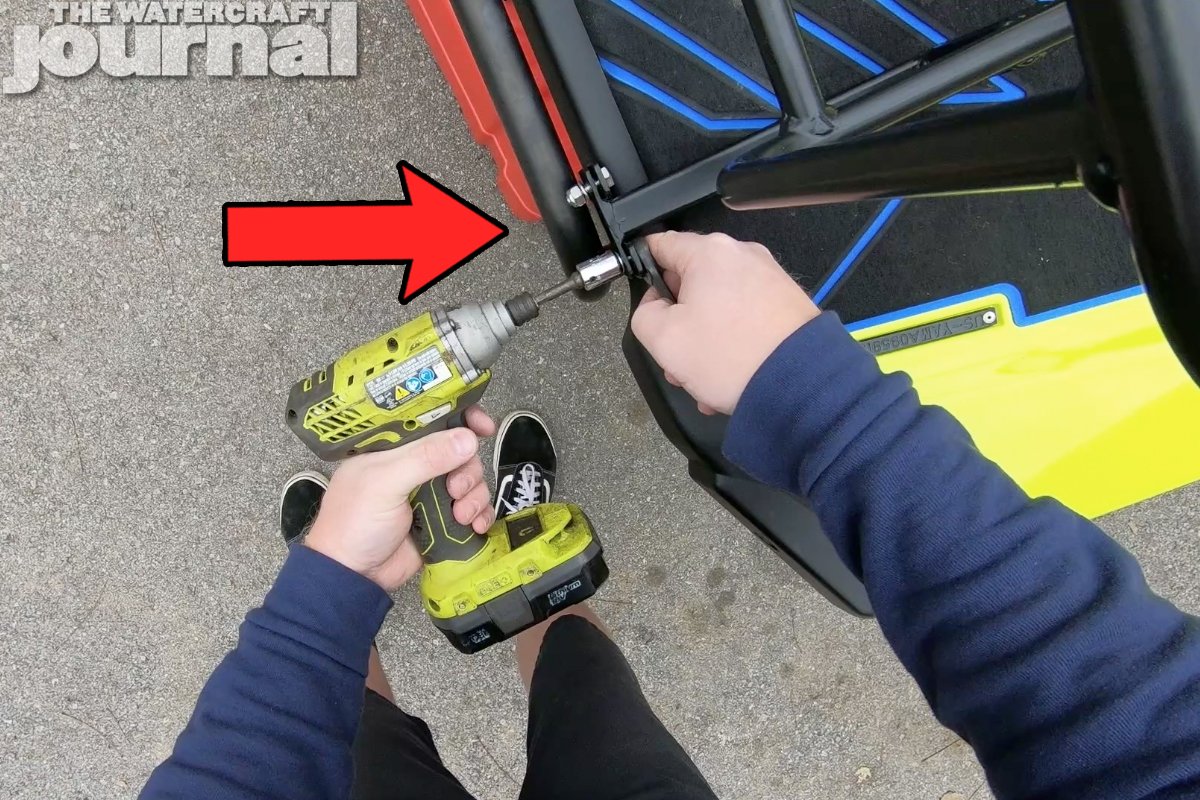
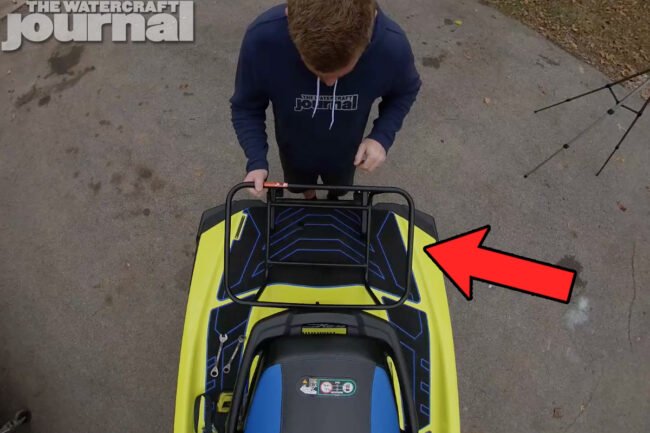
Installation begins by placing the empty rack on the rear swim platform. Make sure that the legs are flat against the deck before adjusting the rear hooks around the bottom of the rear bond rail. Tighten each of the (4) nylock nuts using either a pair of 1/2-inch sockets or wrenches, careful to make sure the adjustable brackets do not loosen in the process.
Once snug, install the turn buckle by inserting one of the hooks through the loop on the front of the rack. You’ll need to loosen the turn buckle to reach the tow eye on the rear of the ski. Once looped through the tow eye, begin tightening the turn buckle by hand by twisting the center section clockwise. You will immediately feel the rack begin to tighten down.
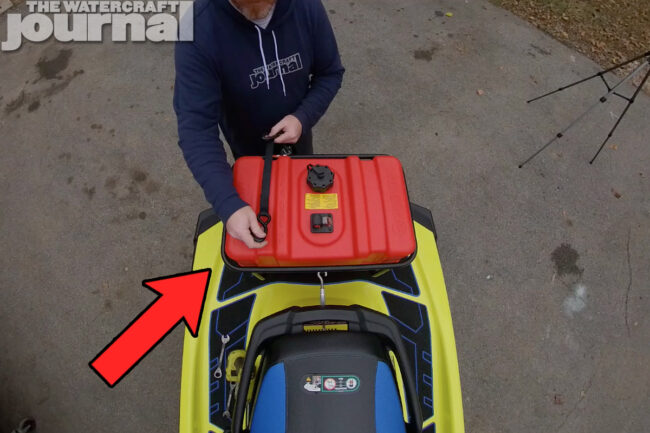

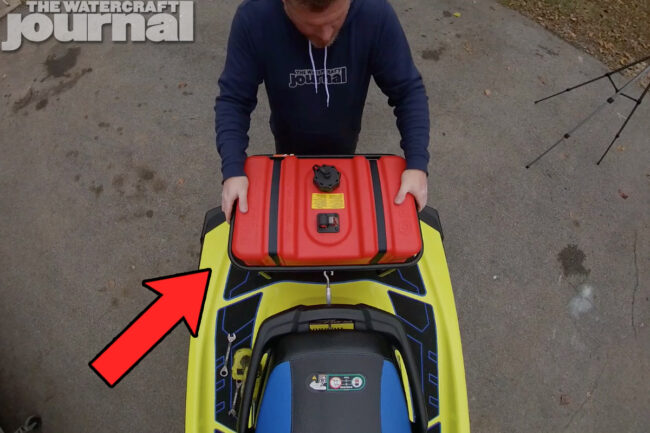

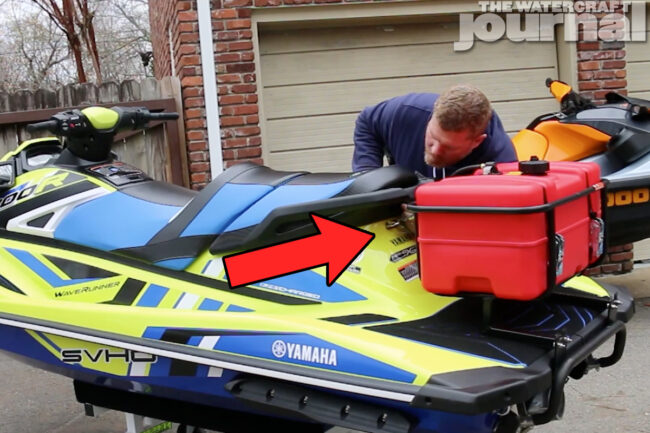
Next, install the auxiliary fuel tank into the rack, with the ventilated gas cap towards the rear, and the fuel gauge towards the front of the watercraft. Now loop the ratchet straps around the tank, feeding the strap inside of the upper rails and around the bottom bars. The hooks hook together on the bottom, letting you tighten down the straps, securing the tank to the rack.
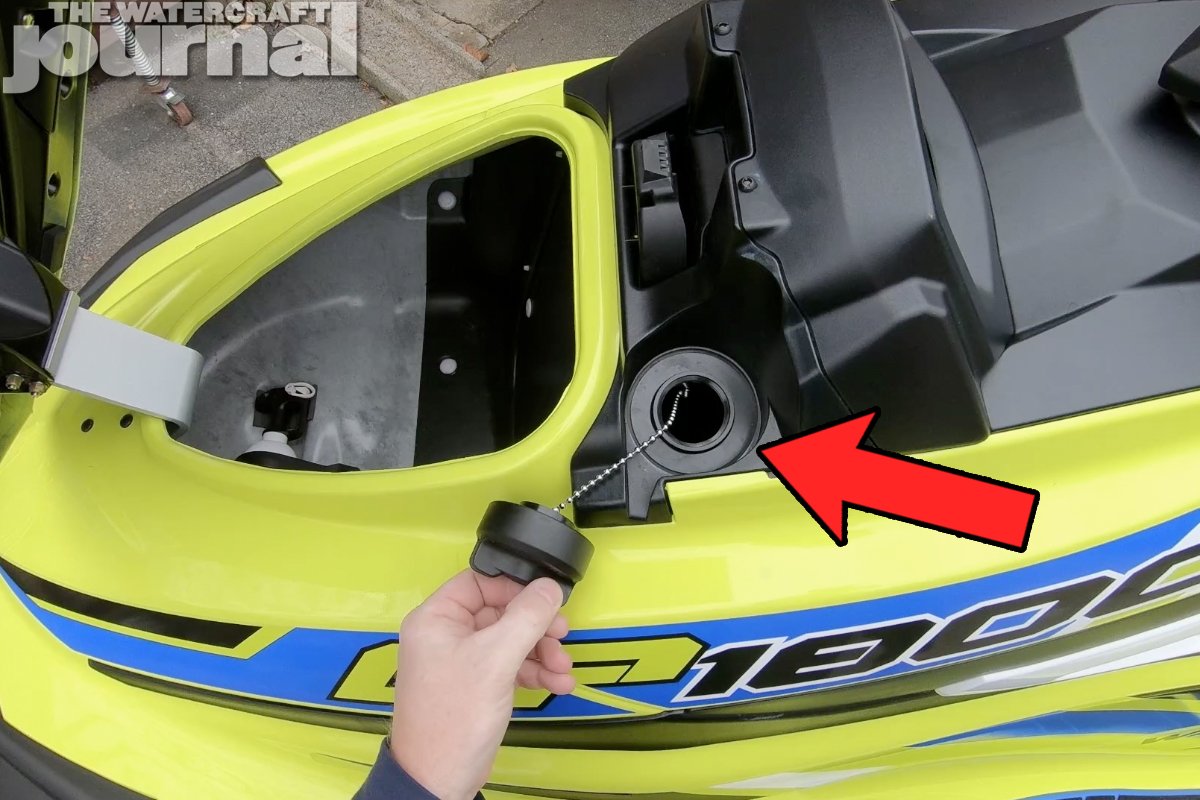
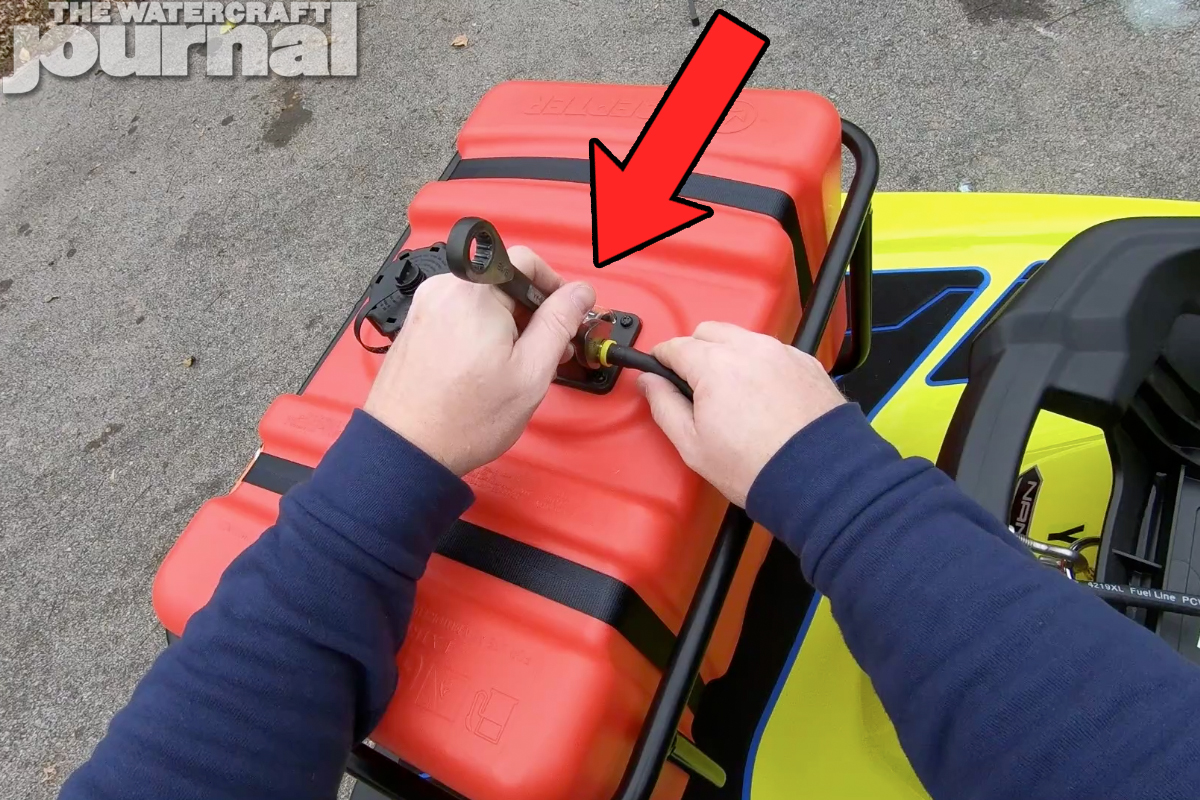
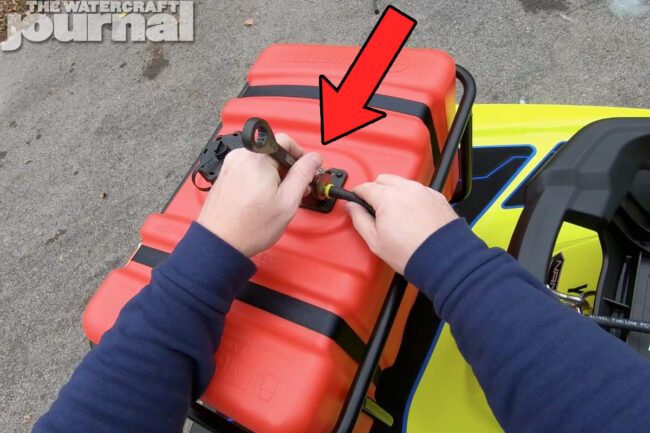
With your rack secure and your tank installed, remove the seats from the watercraft exposing the engine compartment. Begin to install the fuel line by first removing the red safety cap from the tank pick up; then threading in by hand and then tightening down with a 9/16″ wrench the brass fitting into the fuel tank. Because this fuel line isn’t pressurized, there’s no need to add thread tape or plumber’s glue to the threads.
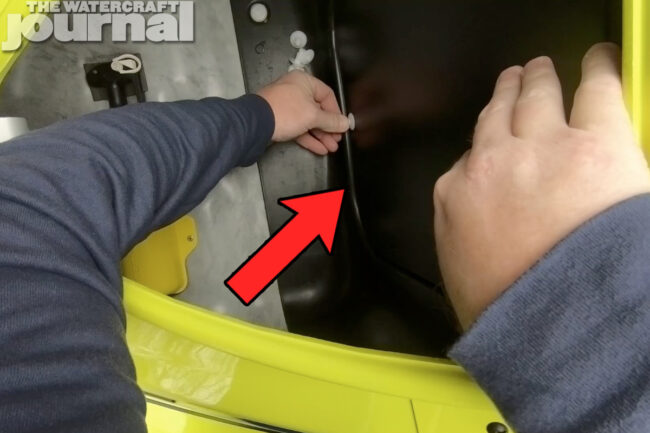
Once tightened down, feed the fuel line from the tank into the engine compartment, running the fuel line away from the exhaust side of the engine. For Yamahas, this often means having to remove the rear storage bin to allow the line to enter in beside the bulkhead. For Kawasakis, we recommend backing off one of the engine compartment vent hoses.


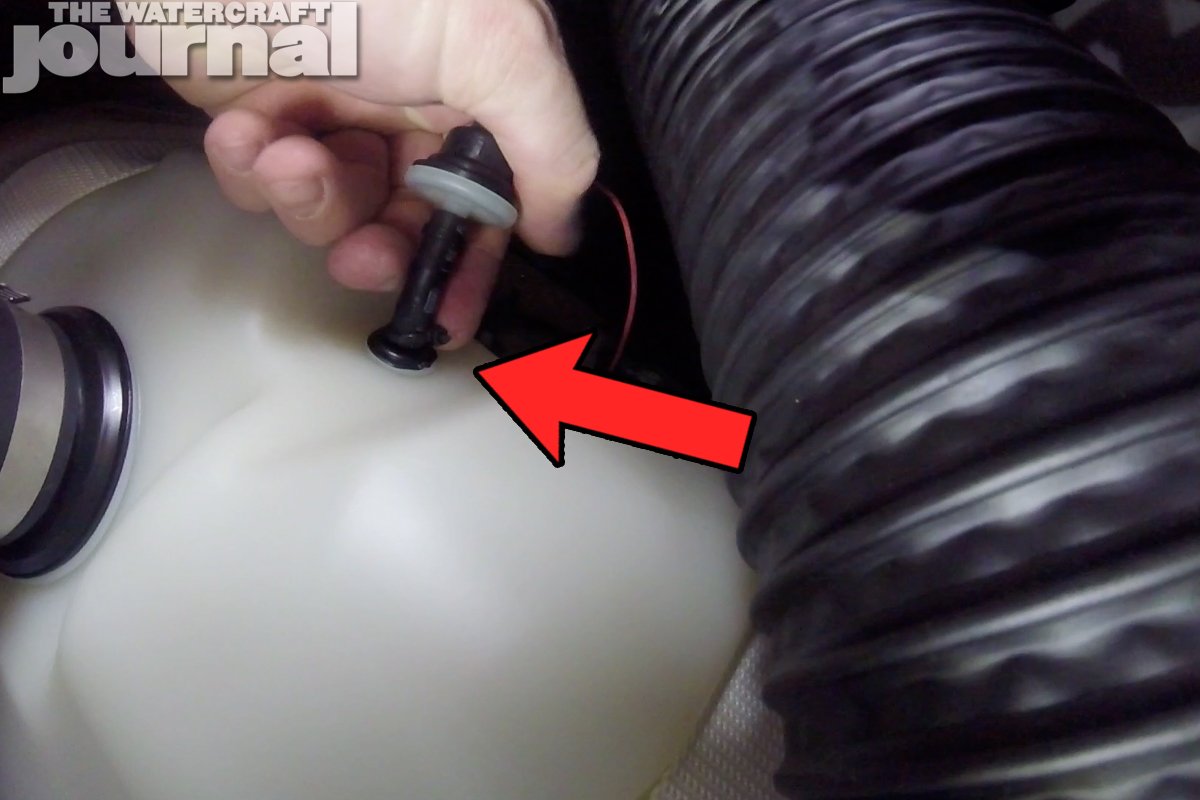
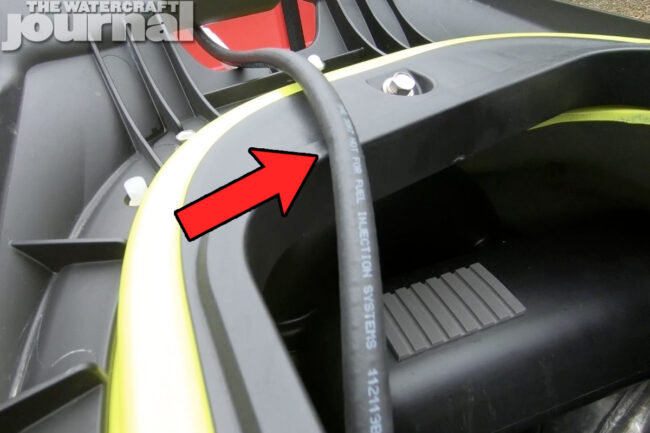
Remember: if the hose is kinked or compressed, fuel will not flow from the fuel tank into the ski’s fuel cell. Route the fuel hose along the intake manifold side of the engine, feeding it forward to the front of the fuel cell. Next, open up the front storage compartment and remove the forward bulkhead. This is often held in place by several plastic push pins. Simply press in the center pin until you hear an audible “click” and the panel will be able to be removed. (For Sea-Doos, the pin needs to be pried out half way before being removed.)
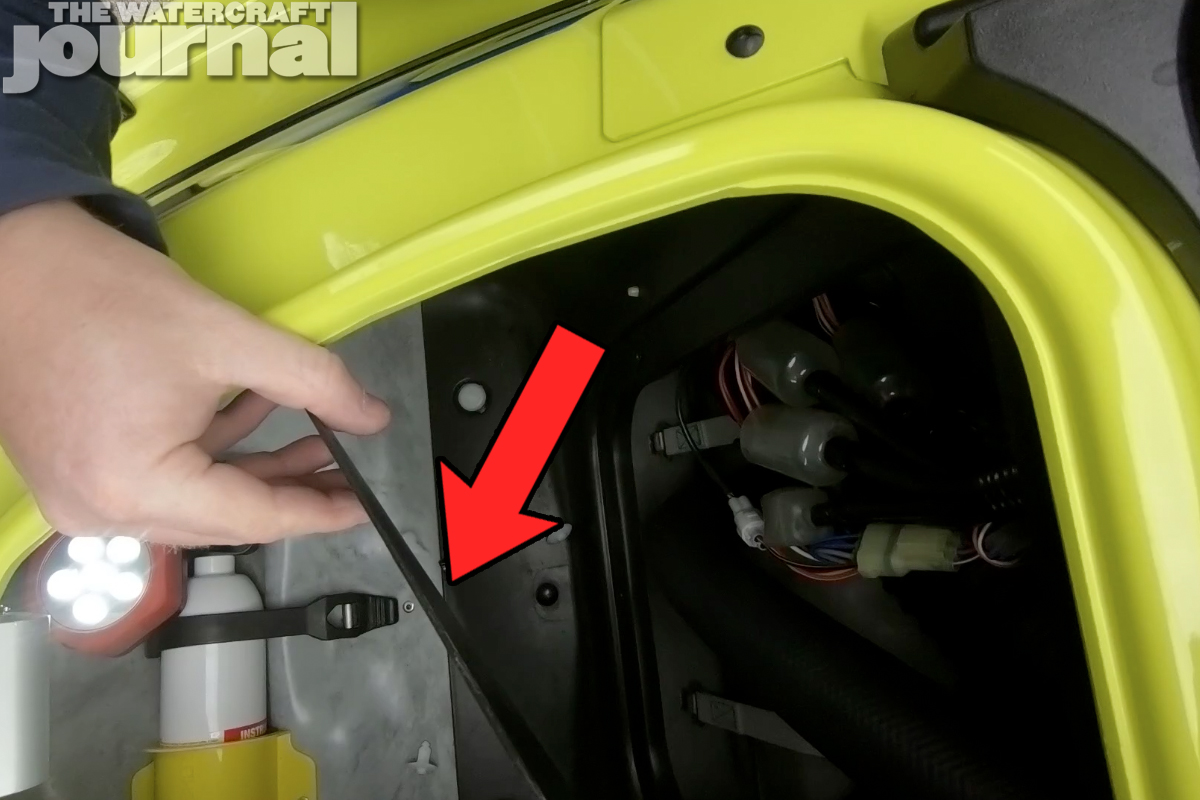
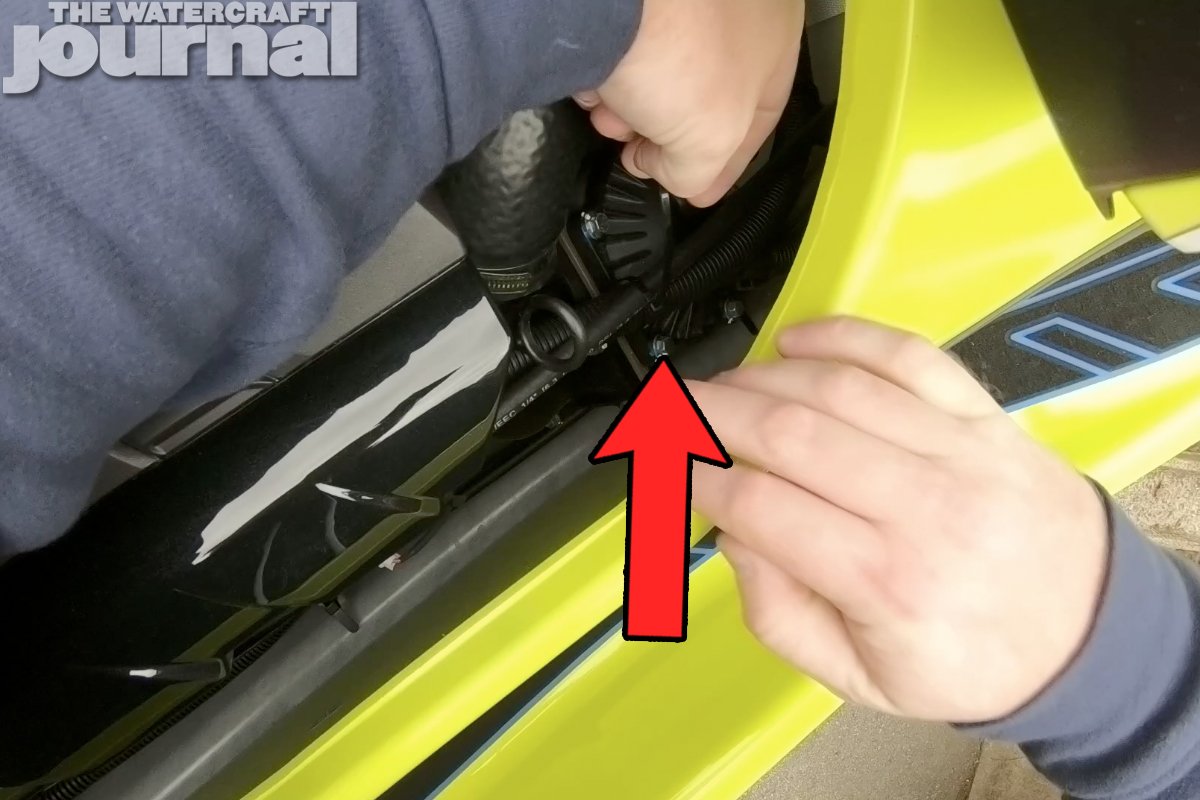
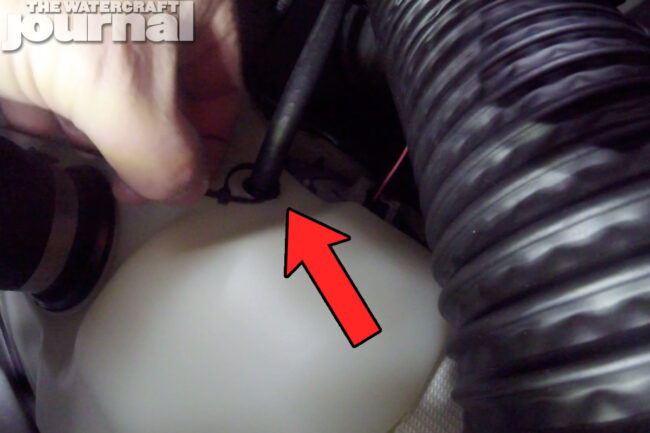
For Kawasaki and Yamaha applications, the removed panel will reveal a thin gauge vent line. This rubber line supplies the factory fuel cell with air as gasoline is mechanically drained out of it by the fuel pump. Prior to removing this line, crack open the factory gas cap to depressurize the fuel cell.
The vent line is not pressurized and is held on by a small black zip-tie. Often the line can be removed without cutting the zip-tie, as it is often loosely installed. Remove the vent line and push it aside – then install our new fuel hose to the tank’s vent nipple. Secure it using one of the supplied zip-ties. Once installed, go back towards the engine and use the second supplied zip-tie to secure the fuel hose away from the engine where possible. You do not want the fuel hose to make contact with any heated surfaces.


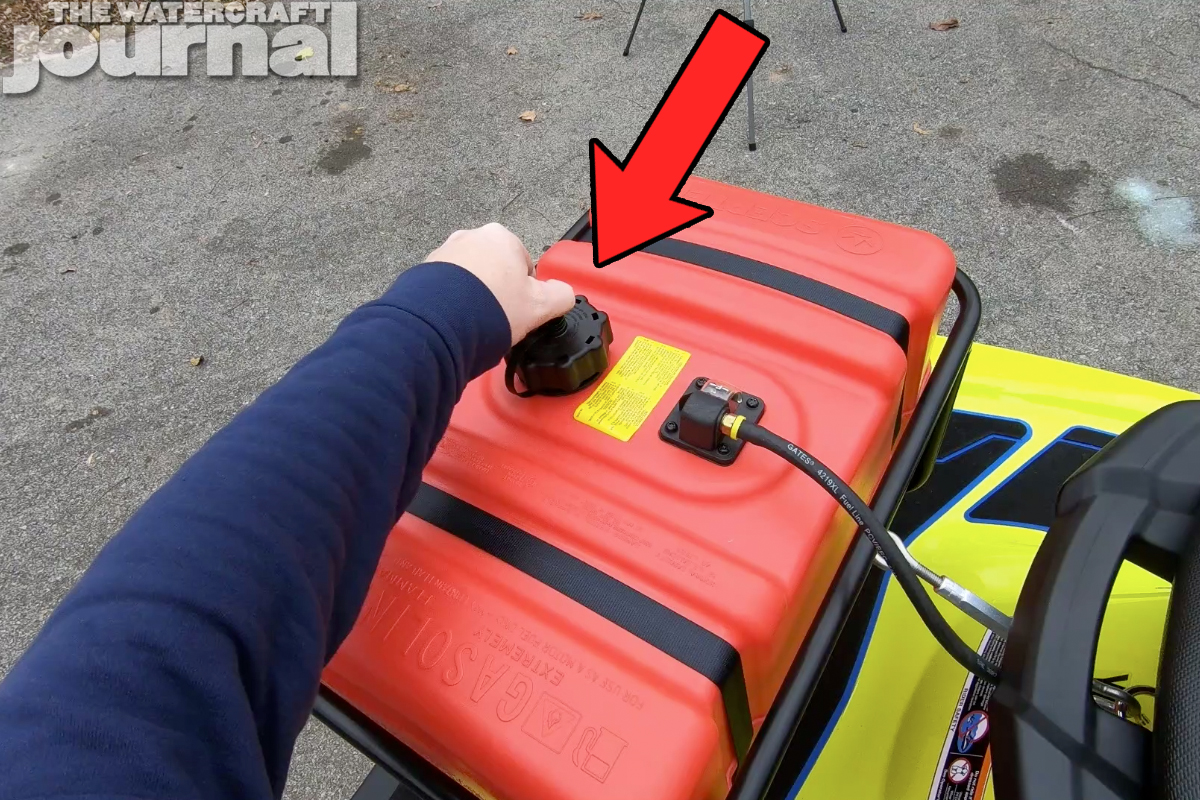
Now you can reinstall the front bulkhead and pushpins, as well as your seats, careful not to pinch the fuel hose. Finally, double check the tightness of your turn buckle and rear brackets before filling the auxiliary tank with fuel. Before beginning your ride, always remember to open the threaded vent on the auxiliary tank’s gas cap. If this remains closed, the fuel system will not work, and potentially hurt the fuel pump.
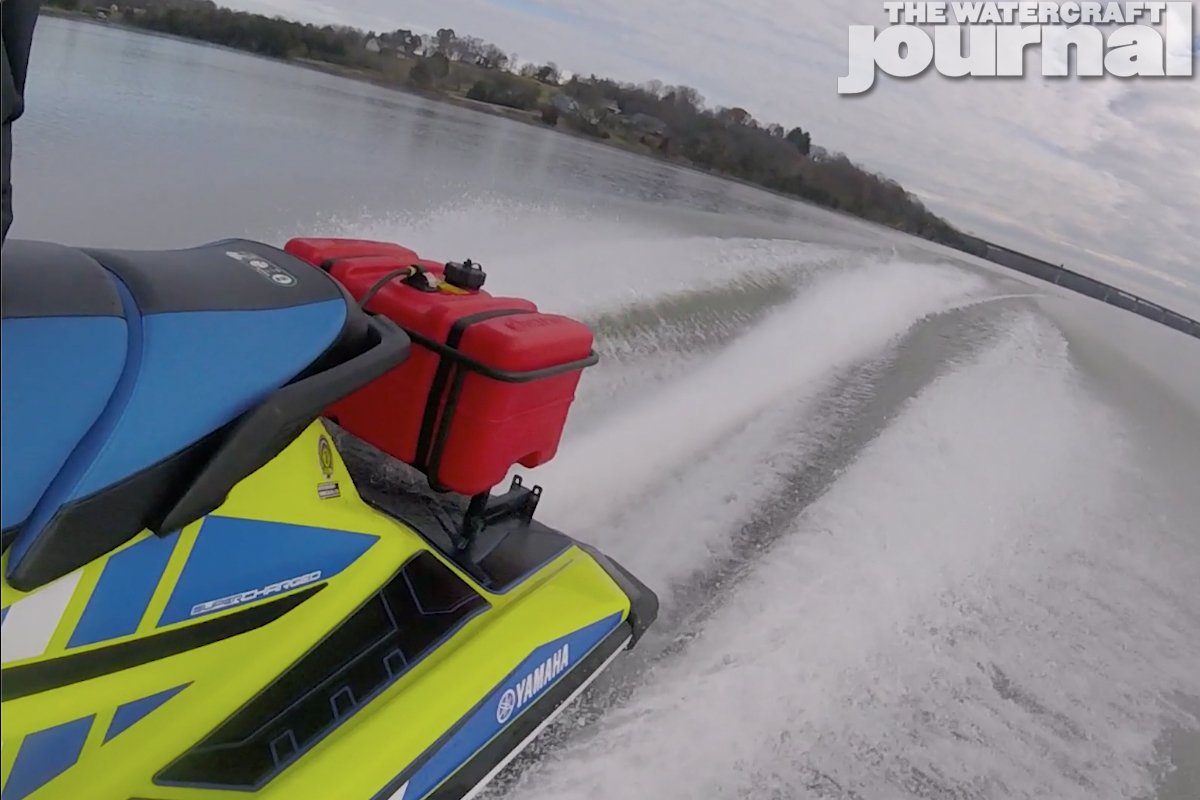
As you ride, the fuel gauge on your watercraft’s dashboard will not move until the auxiliary fuel tank is drained dry. When refueling, always refill your ski’s factory fuel cell first, as an empty fuel cell will NOT produce the vacuum necessary to siphon fuel from the auxiliary tank in the rear. If you haven’t bought your Long Hauler Auxiliary Fuel System Kit yet, you can find it for purchase exclusively HERE.
https://www.youtube.com/watch?v=Irym6RRM8kA&feature=youtu.be