


In addition to the sheering uniqueness that the Exoskel architecture provides the Sea-Doo Spark, it also shaves off considerable weight thanks to its open cage design. Combined with the injection-molded Polytec material that its made from, and there’s little to understand how the Spark (in its most minimal trimming) can weigh slightly over 400 pounds.
Over its first two years, the Spark’s unique layout and build material has proven to be a winner, as the entry-level Sea-Doos have outsold more units than the entirety of the Kawasaki lineup. Unfortunately, the experimental Polytec does have its downsides (albeit minor): it can be a pill to keep clean and looking fresh if you’re using the wrong cleansers, and its softness can be gouged easily if treated roughly.
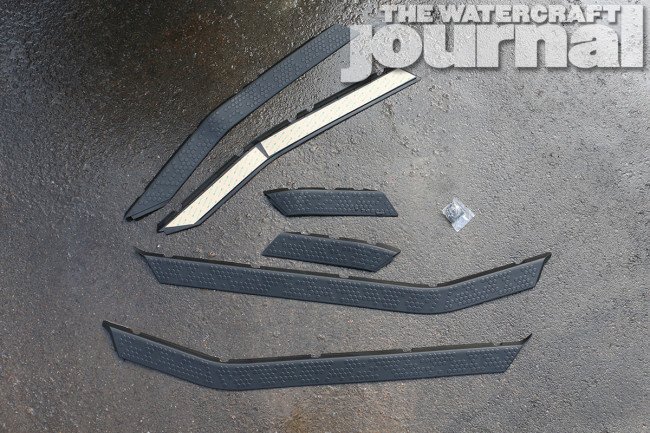


Above left: The Side Protector Kit comes with six panels (two medium-length front panels, two long-length side panels, and two short-length rear) and a small baggie of 12 plastic “darts” (knurled push-in tabs). Above middle: Each panel comes prepared with 3M heavy-duty adhesive backing. Above right: Simply peel and apply.


Above left: The forward and rearward-most panels are designed to be overlapped by the front nose bumper and rear bumpers. BRP suggests unbolting the furthest most screws, but we had enough gap to slide the edges beneath. Above middle: Be mindful to line up the side protector with the body screws. Above right: The smallest panels not only tuck beneath the rear bumpers, but also mate up with the edge of the rearward colored panel as an end cap.
Because we want to keep our two-seater 90-horsepower Spark looking its best, we considered several protective measures. Thankfully, Sea-Doo’s parts and accessory division is awash in add-ons and items that will not only retain your Spark’s luster, but add some personal flare and character to your Rec Lite watercraft.
Our Pineapple Yellow 2-up HO came with the triangular low-speed Sun Shade option, which gives our little Spark some character in and of itself, but we were looking for a little something to better keep its panels from any further scrapes and scratches. We opted for the BRP Side Protector Kit. Because of the bolt-together construction, the Spark doesn’t have a glued deck and hull, thereby not needing the typical bumper rail to cover up the unsightly bond line.
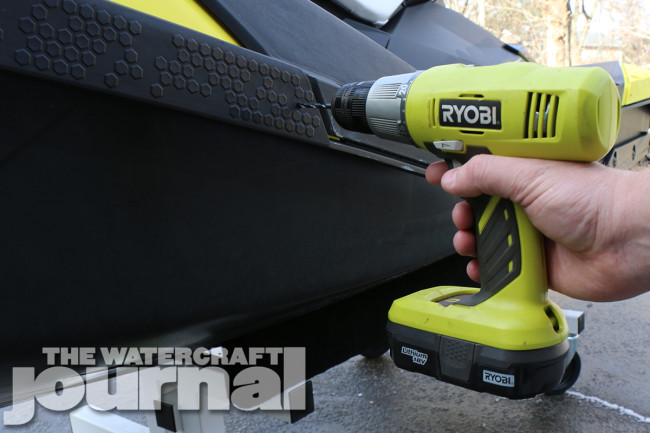
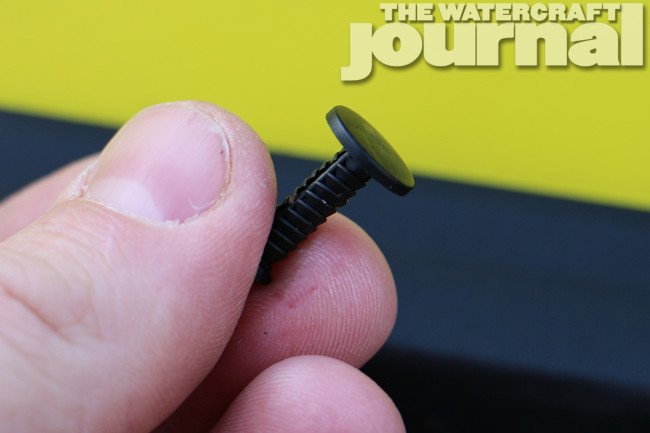


Top left: The only permanent modification made to your Spark is drilling these holes along the railing to properly secure your new side protectors in place. A 4mm (11/64-inch) drill bit is required and not included in the kit. Top right: The kit does include (12) of these plastic push pins – called “darts” in the instructions. Bottom left: The pins simply press in, their knurled sides securing it and the panel to the rail’s edge. Bottom right: You’ll need to make two holes in each panel, totaling 12 holes and pins. BRP’s instructions give good direction where the holes should be made.
The Side Protector Kit acts like a bond rail, being the first point of contact against a dock, mooring or other ski while out on the water. The Side Protectors are more malleable and thereby mold to the contours and curves of the Spark’s outer railing better. The installation took less than a half an hour, and that’s including the time it took to snap photos along the way, so we’re pretty sure it’ll take you less time than us.
The only tools you’ll need is an electric drill with a 4mm (11/64-inch) bit, as well as a spray cleaner and rag to prepare the surface before attempting to adhere the 3mm-backed panels to the Polytec panels. The kit comes complete from BRP with six panels (two medium-length front panels, two long-length side panels, and two short-length rear) and a small baggie of 12 plastic “darts” (knurled push-in tabs).
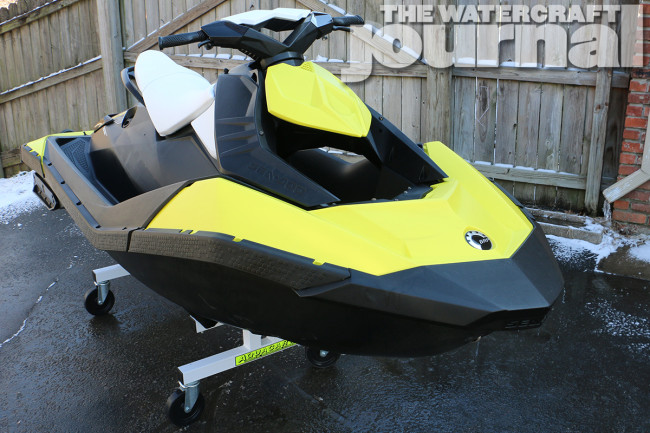

Above: We’re very happy with how the new Side Protector Kit turned out and helped break up the large yellow panels. The protectors are certain to keep our Spark’s sides safe when pulling up to the dock.


Hello, seeing you drilling the holes in the body and than just “cover” those with a plastic darts, makes me think over such option at all. But what I really would love to know is how did you lift the IBR bucket without running it…??
The drilling doesn’t intrude into the craft’s seal. And as for the iBR, that was its “default” position when turned off. Our GTR-X does the same thing.
Do brand is this????
You mean WHAT brand is this? It’s Sea-Doo.