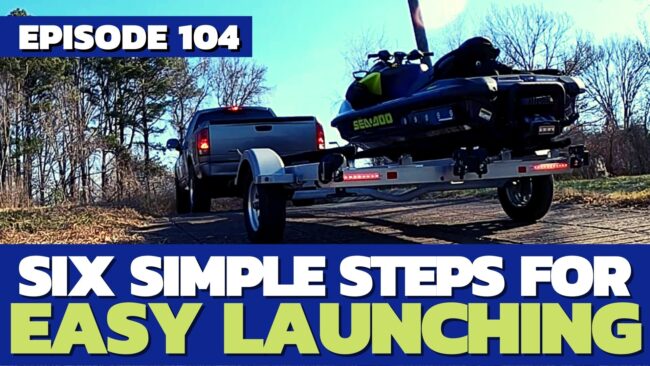
It’s amazing to think that in the last two and a half years, 54-percent of all new personal watercraft sales have gone to first time buyers. These are people who have never owned a personal watercraft before – and in many case, have never owned a boat either. So what we’d like to provide are some simple tips that will help those neophytes the most stress-free experience possible when it comes to launch your new personal watercraft.
With YouTube channels dedicated to filming mishaps at popular launch ramps, it’s bound to seem a little intimidating at first – especially if you’re not comfortable backing your truck or SUV by itself, not to mention with a trailer. While this won’t cover how to operate your vehicle with a trailer, we’re focus here on getting your ski in the water without many hiccups. Lastly, not everything covered here will be exact for your application so we’re going to try to keep most of these pretty generalized.

Step One: Staging Lane
Nobody wants to be “that guy” who holds up the ramp as he routes around inside of his truck for a dock line, or is fumbling to cram a towel in his ski’s front storage bin. Thankfully, most all launch ramps offer a dedicated lane for “staging” or getting your personal watercraft ready for launch. This lane is often marked by a large unbroken line where a vehicle can safely pull in, open its doors and begin preparing a boat or watercraft for launch.
If you find yourself at a ramp without such a lane, do not pull into the line to launch and begin your preparations there. The line will move faster than you’re able to jump back in and pull forward. Rather, find an open parking spot and complete your preparations there. Sure, it’s a little inconvenient but it’s better than holding up the flow of the queue. Plus, you won’t feel rushed, and mistakes happen when you’re in a rush.

Step Two: Double Checks & Preparations
Before anything, get down on a knee and take a look at your hull for damage, as well as your pump inlet for debris. It only takes a second for a weed or a piece of wood to get in there. Now, unlash the tie-downs holding your watercraft to the trailer – except the front winch. Unless you have a friend aboard the PWC as you launch it, who will ride it off of the trailer and tie it up to the dock for you, you’ll want to keep that winch hooked to your bow eye. Nobody wants to chase a wayward watercraft.
Next, verify that your drain plugs are tightened firmly. Even though most modern PWC come standard with one-way check valves in the drain plugs, you’ll want to tighten these down. Finally, you can remove your fitted PWC cover and stow it either in the bow compartment or in your vehicle. Personally, we at The Watercraft Journal are split whether you should drive with a cover on or off, as we’ve seen detriments first hand for both arguments.

Step Three: Packing & Provisions
Your immediate need for a few items should take priority here. The first item should be your dock line. Since you are launching at a ramp (in this scenario) you should expect to tie up at a dock cleat. A good rule of thumb is to place your dock line somewhere immediately accessible, like in the footwell or even on your dashboard – careful that it isn’t dangling in the water where it could get sucked up into the pump. Equally, place your PFD (life vest) in the footwell or drape over the seat so its within reach.
If you plan to visit a beach or sandbar in your ride, it’s a good opportunity to pack an anchor in the front bin. We’ve had good luck with Sand Docker anchors as they are lightweight, affordable and American-made. Now you can begin packing other items such as sunscreen, an extra bottle of water and snacks, your wallet (at minimum ID, credit card and/or cash), and your smart phone. Many runabouts offer waterproof boxes these days, but if not, try to keep your phone in a durable, watertight case.

Step Four: Backing Up & In The Water
Getting used to backing up your vehicle with a trailer may take some time. We’ve suggested practicing in an empty parking lot before. Although many cars feature backup cameras, we suggest getting familiar with using your mirrors to align your trailer so you can back up straight without the use of a camera (in case the lens is obscured or in low visibility). Equally, dropping the tail gate of your truck (or opening the rear hatch of your SUV) is an easy way to back up while looking over your shoulder.
Knowing how deep to set your trailer into the water is often dependent on the type of trailer you own, the kind of PWC you’re launching and the tide level. If you’re too shallow, the watercraft will struggle to slide off of the bunks. If you’re too deep, the PWC will lift from the bunks and try to float away. It’s OK to get out, check the depth, and if necessary to get back in and pull in or out a little. Better that than make a since trying to wrangle a runaway runabout.

Step Five: Launch Control
Back the tension off of your winch and unhook your bow eye. Winch up the slack and attach your hook on a lip so it won’t drag on the ground or flop around. If your trailer is backed in “just right” you should be able to move your PWC a little without it slipping off of the bunks. Carefully climb up on to your watercraft either from the side (many trailer fenders have steps on them) or walking down the runway between the bunks (if you have a 2-bunk trailer).
Once aboard, put on your PFD (most ramps require this for safety), attach your lanyard to your person (this is by law) and fire up your watercraft. Give it a few seconds to warm up and begin circulating coolant/water through the engine and exhaust before backing off of the trailer. Most new PWC have “smart reverse” systems, but if not, pull the reverse handle and give your ski a little throttle (not too much!) – just enough to pull off of the bunks. Switch to the forward position and idle up to the dock where you’ll tie to a cleat.
Step Six: Pull Out, Pack Up and Play
With your PWC tied to the dock, you can hustle back over to the ramp and pull your vehicle out of the water and into a parking space. Make sure to lock up, as there may be some unsavory folks around. Place your keys in the glove box or another safe storage compartment. Here you can put on your PFD, sunscreen and glasses, as well as arrange your items as you see fit. If you’ve got a sound system, it’s a little easier to sync your phone or Bluetooth device here than out on the water.
Once you’re all squared away, you can untie your dock line from the cleat, store it in either a wet storage bin in back (common for Yamahas and Kawasakis) or in your front (or center, if a full-sized Sea-Doo) storage bin. And with that voilà, you’re all set for a great day out on the water. Again, launching a PWC might feel overwhelming at first – particularly if its a busy day – but with a few practice runs, it’ll become second nature like pulling into your home garage.


