Unfortunately, someone had to come along and be responsible.
GreenHulk has revisited its longstanding Yamaha winterization guide, updating the advice to account for changes in engines, cooling systems and maintenance requirements across modern four-stroke WaveRunners, including the VX, FX and GP families.
The guide walks owners through everything from fuel stabilization and cooling-system flushing to engine protection, battery maintenance, corrosion prevention and proper storage. It even remembers the trailer — because nothing says “welcome back to riding season” quite like discovering a bad wheel bearing on the way to the launch ramp.
More importantly, GreenHulk emphasizes something that can get lost in the sea of online maintenance advice: Not every Yamaha should be winterized the same way.
Procedures can differ significantly among Yamaha’s MR-1, TR-1, 1.8-liter and newer 1.9-liter engines. Fogging procedures, in particular, require attention to the specific engine configuration, especially on supercharged models.
The guide also distinguishes between warm-weather storage and genuine freeze protection. After all, a WaveRunner spending December in South Florida faces somewhat different challenges than one tucked away for a Michigan winter.
And winterization isn’t exclusively a cold-weather concern. Fuel degradation, moisture, corrosion and neglected batteries can cause trouble whenever a watercraft sits unused for months, regardless of the temperature outside.
GreenHulk’s updated guide includes a handy checklist and references to Yamaha’s official maintenance resources, making it a worthwhile read whether you’re preparing to put your WaveRunner away now or simply planning ahead.
We’re still not particularly enthusiastic about admitting the season is winding down. In fact, we’d happily entertain arguments for another ride or two.
But when some of the brightest minds in PWC performance have already done the homework, you don’t take a pass on a gift like that.
STEP 1 – PREP THE FUEL SYSTEM
If your model has a serviceable fuel filter and replacement is due, now is a good time to replace it.
Add a quality marine fuel stabilizer to the fuel tank according to the stabilizer manufacturer’s instructions.
Add fresh fuel and follow Yamaha’s fuel-storage guidance for your model. Avoid storing the craft with old or contaminated gasoline, and do not overfill the tank; leave adequate room for fuel expansion. Follow the stabilizer manufacturer’s instructions for the fuel type and amount in the tank.
Do not intentionally run a modern fuel-injected Yamaha out of fuel for storage.
If possible, add the fuel stabilizer before your final ride of the season. This allows plenty of time for treated fuel to circulate throughout the entire fuel system.
If the ski is already out of the water, that’s okay. The engine can be run during the final cooling-system flush, which will also circulate stabilized fuel through the system.
STEP 2 – FLUSH THE COOLING SYSTEM
If the WaveRunner has been operated in salt, brackish or dirty water, thoroughly flush the cooling system before storage.
A product such as Salt-Away can be used during the final flush to help remove salt and mineral deposits.
The basic Yamaha flushing rule is extremely important:
ENGINE ON → WATER ON
When you’re finished:
WATER OFF → ENGINE OFF
Never turn the flushing water on before starting the engine.
Never leave the flushing water running after shutting the engine off.
Doing so can potentially allow water to travel backward through the exhaust system and into the engine.
Follow the flushing duration and procedure specified for your particular Yamaha. Never run the engine without cooling water beyond the limit in your owner’s manual; some Yamaha procedures specify approximately 15 seconds maximum without water. Excessive dry running can overheat exhaust components. Running on a hose is not equivalent to normal operation in the water.
WARM-CLIMATE STORAGE – ABOVE FREEZING
If your WaveRunner is being stored somewhere that will not experience freezing temperatures, you generally don’t need to introduce antifreeze solely for freeze protection.
When using Salt-Away or a similar product for the final flush, follow the manufacturer’s directions.
The goal is to remove salt and mineral deposits while leaving the cooling and exhaust systems properly prepared for storage.
Some salt-removal products are designed to leave a protective film on internal surfaces. If the product instructions tell you not to follow the treatment with another fresh-water flush, don’t immediately wash the treatment back out.
For warm climates:
Flush → Salt/mineral treatment if needed → Remove residual water → Store
COLD-CLIMATE STORAGE – BELOW FREEZING
Yamaha WaveRunners generally use open-loop cooling systems designed to discharge cooling water after operation. Proper flushing and removal of residual water according to Yamaha’s instructions are the primary storage procedures. Antifreeze is not a universal Yamaha requirement, even in freezing climates.
Some owners choose a compatible marine antifreeze as an additional precaution against water that may remain trapped in low points of the cooling or exhaust system. If you choose this approach, first verify the procedure for your exact year, model and engine, including where antifreeze must be introduced and how it flows through the system. Simply pumping antifreeze into the flushing connection does not guarantee it will reach every area where water may remain.
Use only a product suitable for the watercraft’s aluminum components, seals, gaskets and cooling-system materials. Do not assume ordinary automotive antifreeze is suitable, randomly disconnect hoses, or introduce liquid into the engine without an approved procedure. Capture and dispose of antifreeze responsibly; do not discharge it into waterways or onto the ground.
For freezing climates:
Flush → Remove residual water following Yamaha’s instructions → Consider additional model-appropriate freeze protection only if needed → Store
Someone storing a WaveRunner in South Florida does not have the same freeze-exposure risk as someone storing one in Michigan, but the correct procedure still depends on the particular craft and its manual.
STEP 3 – REMOVE EXCESS WATER
After the final flushing procedure, turn the water supply OFF while the engine is still running.
Follow Yamaha’s procedure for your particular model for briefly increasing engine speed to help expel residual water from the exhaust/cooling system.
Then shut the engine off.
Do not repeatedly or excessively rev a WaveRunner out of the water.
Some traditional winterization procedures recommend several brief engine starts or “blow-outs” to discharge remaining water. These should not be treated as a universal requirement for every Yamaha engine. Follow the draining procedure and dry-running time limits in your specific owner’s manual; excessive operation without cooling water can cause damage.
If the ski will be exposed to freezing temperatures, follow the cold-climate guidance above rather than assuming repeated dry-running sessions guarantee complete freeze protection.
Raising the bow slightly while the ski is sitting on the trailer can also help residual water drain naturally.
STEP 4 – CHANGE THE ENGINE OIL & FILTER
If the engine oil change is due—or you’re preparing the ski for several months of storage—this is an excellent time to change the engine oil and filter.
Changing it before storage removes used oil containing combustion byproducts and contaminants rather than allowing those contaminants to remain inside the engine for several months.
Warm oil is also easier to extract.
Use the oil type, viscosity, filter and quantity specified for your exact Yamaha engine.
Don’t automatically use an oil recommendation from an older VX/FX post for every current Yamaha engine.
This is also a good opportunity to perform any other scheduled maintenance that is due based on engine hours.
STEP 5 – PROTECT / FOG THE ENGINE INTERNALS
Fogging can help protect internal engine surfaces from corrosion during extended storage.
However:
THERE IS NO UNIVERSAL YAMAHA FOGGING PROCEDURE.
This is one area where you should not blindly follow an old generic internet procedure.
Yamaha has used numerous engines and intake configurations, including:
– MR-1
– TR-1
– 1.8L HO
– 1.8L SHO/SVHO
– 1.9L HO
– 1.9L SVHO
– Other engine/configuration variations
The correct fogging method can vary depending on the engine.
ESPECIALLY IMPORTANT FOR SUPERCHARGED MODELS
We are not publishing a universal instruction telling owners to spray fogging oil through the supercharger/compressor inlet.
Older winterization procedures sometimes recommended this method, but that does not mean it should automatically be performed on every current Yamaha supercharged engine.
Introducing liquid into an intake or supercharger incorrectly can potentially create problems.
Use the Yamaha-recommended fogging/storage procedure for your exact year, model and engine.
When in doubt, consult the Yamaha service information or have an experienced Yamaha/PWC technician perform this portion of the winterization.
CYLINDER PROTECTION
Depending on the engine and Yamaha’s storage procedure, extended storage may include protecting the cylinders directly.
A traditional procedure may involve:
1. Disconnecting/removing the ignition coils.
2. Removing the spark plugs.
3. Applying the specified amount of appropriate fogging oil into each cylinder.
4. Covering the plug openings with a clean rag.
5. Briefly cranking the engine to distribute the oil, only if Yamaha’s procedure for that engine specifically calls for it.
6. Installing the correct spark plugs according to Yamaha’s specified gap and torque requirements, replacing them if necessary.
7. Reinstalling the ignition coils.
Do not automatically assume this procedure or a particular amount of fogging oil applies to every Yamaha engine.
Verify the correct procedure for your exact engine.
If Yamaha’s procedure calls for cylinder fogging, don’t restart the engine afterward and immediately burn off the protective oil you just applied.
STEP 6 – BATTERY STORAGE
A neglected battery is one of the most common reasons a perfectly good WaveRunner won’t start after sitting for several months.
For extended storage, disconnect the battery according to Yamaha’s procedure.
The battery can be removed and stored in a cool, dry, well-ventilated location, or maintained appropriately in the craft if your storage conditions and battery type allow.
Use a quality automatic battery maintainer compatible with your battery type.
When disconnecting a conventional negative-ground battery, disconnect the negative (-) terminal first, then positive (+). When reconnecting, connect positive (+) first and negative (-) last. Follow Yamaha’s instructions and the battery maintainer manufacturer’s safety recommendations.
Don’t leave an old-style conventional charger continuously connected unless it is specifically designed for long-term battery maintenance.
Periodically check the battery throughout storage.
STEP 7 – WASH & COMPLETELY DRY THE SKI
Thoroughly wash the WaveRunner inside and out.
Pay particular attention to salt and grime around:
– Jet pump
– Ride plate
– Intake grate
– Pump tunnel
– Steering nozzle
– RiDE/reverse components
– Engine compartment
– Hull fittings
– Trailer bunks and hardware
Be careful when washing around the engine compartment.
Do not allow water to enter the engine’s air intake.
Cover or otherwise protect the intake opening if necessary while washing the engine compartment.
After washing, thoroughly dry everything.
Pay particular attention to the:
– Engine compartment
– Bilge
– Storage compartments
– Footwells
– Seat area
– Flush connection area
Don’t seal a wet ski underneath a cover for several months.
Moisture trapped inside the craft promotes corrosion, mildew and electrical problems.
STEP 8 – APPLY CORROSION PROTECTION
Once the WaveRunner is clean and completely dry, apply an appropriate marine corrosion protectant to exposed metal components.
Pay attention to:
– Exterior engine components
– Hose clamps
– Fasteners
– Electrical connectors
– Metal fittings
– Jet pump components
– Latches
– Steering components
– Cables and linkages
Wipe away excessive product. Use corrosion-protection products appropriate for the surfaces being treated. Avoid spraying into sensitive electrical components, sensors, air intakes, or other areas where a coating could interfere with normal operation. Follow the product manufacturer’s instructions.
Don’t spray corrosion protectant onto belts, friction surfaces or other components where a lubricant/coating isn’t appropriate.
This step is especially important for WaveRunners regularly operated in salt water.
STEP 9 – INSPECT THE ENGINE COMPARTMENT
While everything is clean, inspect:
– Cooling hoses
– Hose clamps
– Fuel hoses and connections
– Electrical connectors
– Wiring
– Battery cables
– Engine mounts
– Exhaust connections
– Signs of water intrusion
– Oil leaks
– Fuel leaks
– Corrosion
– Loose hardware
Look for anything cracked, rubbed, loose, melted or damaged.
Make a note of anything that needs repair.
It’s much better to address those problems during the off-season than discover them the morning of your first ride.
STEP 10 – INSPECT THE JET PUMP & INTAKE
Get underneath the ski and inspect:
– Intake grate
– Pump tunnel
– Impeller
– Wear surface/liner
– Ride plate
– Steering nozzle
– Reverse/RiDE components
Remove weeds, rope, fishing line or other debris.
Pay particular attention to fishing line wrapped around the driveshaft, which can eventually damage seals.
Inspect the hull for damage at the same time.
STEP 11 – LUBRICATE REQUIRED COMPONENTS
Lubricate the service points specified in the maintenance schedule for your particular Yamaha.
Depending on the year/model, these can include steering, control and other mechanical components.
Don’t assume that the lubrication points on an older FX are identical to those on a current GP, VX or FX.
STEP 12 – STORE THE WAVERUNNER PROPERLY
Store the WaveRunner:
– Clean
– Completely dry
– Covered
– Protected from direct sunlight
– Protected from precipitation
– In a reasonably ventilated location
Don’t completely seal moisture inside the hull.
When the storage environment allows it, leaving the seat and/or hood slightly propped open can help prevent trapped moisture and condensation.
Drain plugs should be handled according to the storage situation and your particular craft.
The goal is simple:
Don’t trap water or condensation inside the hull.
If rodents are a concern, inspect possible entry areas and take appropriate precautions without blocking necessary ventilation or drainage.
DON’T FORGET THE TRAILER
Winter is also a good time to inspect and service:
– Tires and sidewalls
– Tire pressure
– Wheel bearings
– Bearing protectors
– Bunks
– Winch
– Winch strap
– Bow stop
– Safety chains
– Trailer jack
– Lights and wiring
– Tie-down straps
A perfectly maintained WaveRunner isn’t much use if the trailer leaves you stranded on the way to the launch.




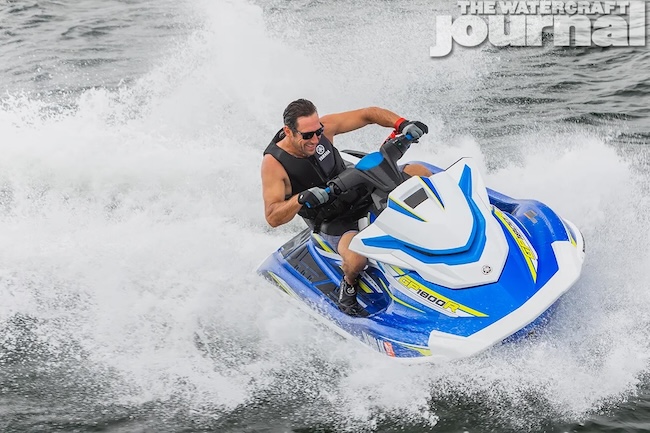 We’ve been doing our best to postpone the inevitable. A few more weekends on the water. One more ride before the temperatures drop. Maybe even a little creative denial about the calendar.