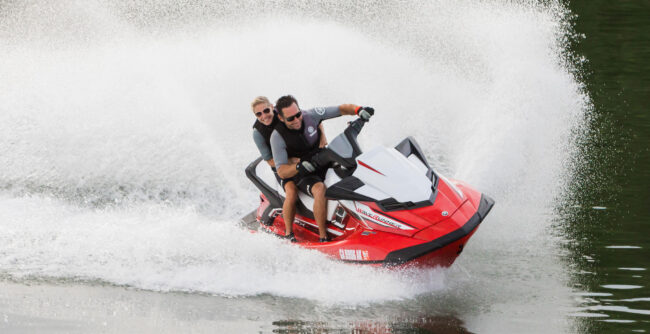
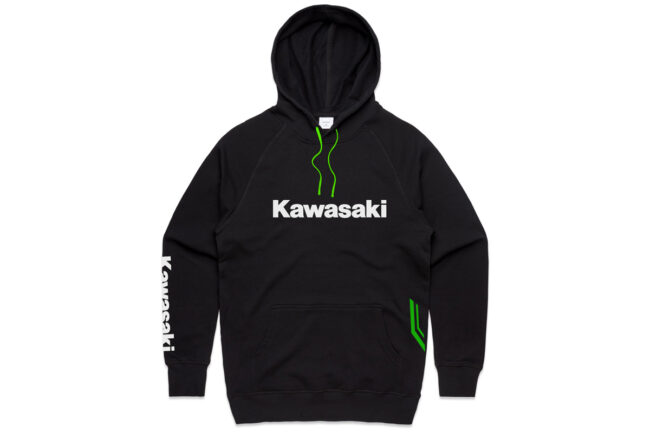
Check out these quality Kawasaki RPM Hoodies available at Brisbane Kawasaki. They retail for $69, and they look great in the Kawasaki black and green colorway. The hoodies are a heavy cotton polyester blend with a kangaroo pocket for keeping your hands warm. The Kawasaki logo is printed in a bright white and featured across the front and down the sleeve. A small logo is on the back of the hoodie.
One of these would be great to wear on a cool day when out checking the water conditions or just hanging out. The hoodies are available in large, XL, 2XL, and 3XL and they are cut small, so Brisbane Kawasaki recommends that you order a size up.
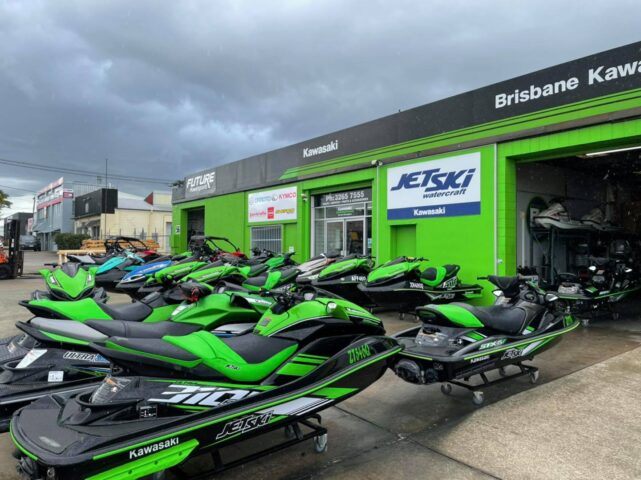
While you’re checking out the hoodies, take a look at all of the Kspeed performance parts available to spice up your jet ski. Their selection of performance parts is hard to beat when it comes to prices and getting more speed and power out of your Kawasaki watercraft.
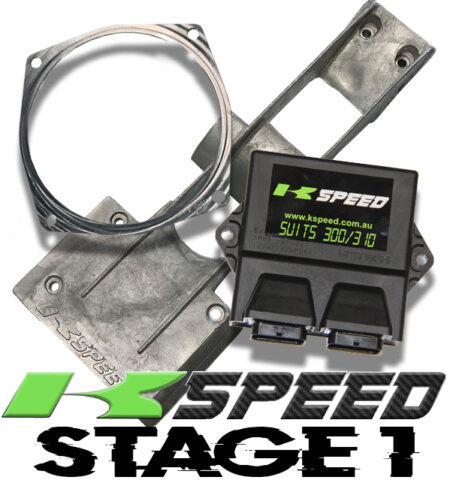
The KSpeed Stage 1 Ultra 300/310 Reflash Service can be scooped up for as little as $1200. Send in your ECU and Key, and Brisbane Kawasaki will return it with the additional kit after they reflash your ECU.
See the site for additional KSpeed Performance parts. In the meantime, head over to Brisbane Kawasaki and grab a good looking Kawasaki RPM hoodie or two to take the chill off!
What happens when all existing industry materials fail to meet the standards of NASA for a special command module project? They simply turn to the watercraft industry for solutions!
During a recent project involving the Orion Command Module, NASA’s prototype development branch was having trouble finding existing market materials that would live up to the strict standards for this project. That’s when they decided to turn to Hydro-Turf for solutions.
Jeremy Parr is a former jet ski racer and freestyle rider who now works for NASA in their prototype development branch. While working on a cradle design for the Command Module, Jeremy recalled some of the excellent properties of Hydro-Turf traction mats and noted that they might fit the bill for this design.
When The Watercraft Journal heard about this development, we decided to reach out to Jeremy to get some insight. Here’s why Hydro-Turf was chosen for this project.
Following the conclusion of its mission, The Orion Command Module re-enters Earth’s atmosphere and touches down in the ocean. Before the recovery team can even approach the capsule, it must be deemed safe by mission control.
That usually is no walk in the park especially when you’re dealing with possible unexploded ordinances and rocket propellant traces explains Parr. You definitely want to make sure it’s all safe to approach.
Once the recovery team takes over, the module is then towed back to a ship where it is then placed inside on top of a recovery cradle.
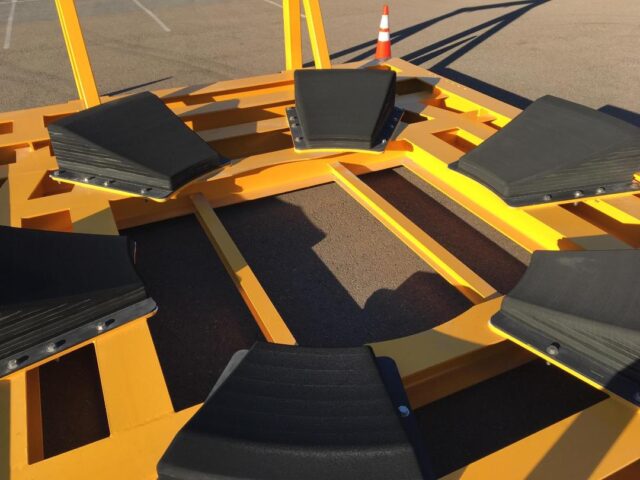
The cradle’s job is exactly what it sounds like. It securely cradles the module atop a soft spongy surface. This is where the Hydro-Turf came into play.
According to Jeremy not only must the cradle surface be made of a soft and easily shapeable material, but it must also lead to low surface stress on the module’s heat shield which is the bottom surface that rests on the cradle.
Initial designs for the cradle pad material were based upon common industry materials. After modeling the predictive stresses upon the module heat shield using Finite Element Analysis software, NASA realized that these materials would impart too much stress and possibly cause damage to the Orion module.
After exhausting all available options, that’s when Jeremy decided to utilize a play out of his prior Jet Ski racing days. He turned to the folks at Hydro-Turf and had some of their traction mat materials shipped in.
The turf material obviously has a spongy nature to it. It is also easily shapeable and could be layered and machined to match the shape of the module belly. After a series of software calculations on the material properties showed promising results, it appeared NASA had a good candidate material for their needs.
Jeremy went to work designing the cradle with the new Hydro-Turf pad material. The pads were layered up to a specified thickness and 3-axis machined to the dished shape of the Orion module’s belly.
The final result worked as intended. The Orion Command Module could now rest securely on the cradle ensuring even pressure distribution between the module belly and the Hydro-Turf pads.
Jeremy eventually hung up his watercraft racing and freestyling wetsuit after years of competition and show riding due to his family and work becoming the main focus in life. Even though he no longer competes in sanctioned events, he still rides recreationally with his stable of Yamaha SuperJets.
He still also finds every excuse to look up watercraft products on mission critical projects at work. Sounds like a true personal watercraft enthusiast to us!
An article from 7 News in Australia, shines the light on another jet ski crackdown in New South Wales. This time the NSW Maritime officers are going after riders who modify their jet skis in order to reach higher speeds. “It’s got a modified exhaust … you need to get it changed back, then patch the hole,” an officer told one rider in video obtained by 7NEWS.
The COVID-19 pandemic has led to a 93 percent increase in the number of jet ski riders. Moreover, the surge in jet ski purchases has created a 147 percent increase the number of tickets issued on the waterways. It’s chaos on the waters with all of the new riders and riders and who have no concern for others.
As a result, SW officers have their hands full, trying to keep the peace on Sydney waterways. They are extremely concerned about the number of new jet ski riders who don’t know the rules. However, the biggest complaint is PWC riders intimidating other waterway users with their noisy turbo powered skis.
Damian Logue from NSW Maritime told 7News that boat and safety officers have taken a zero-tolerance approach to the guys on modified skis. It is illegal to modify a jet ski for recreational use. If a rider is seen and caught driving a modified jet ski, they will be taken off the water. The NSW Maritime Officers are not playing.
Okay so not everyone does a great job of keeping track of things rarely used such as your Yamaha owner’s manual. Maybe your spouse was the last one to ride and now you can’t find your manual. Maybe you saw your kid jumping up and down on the watercraft two days ago in the garage and the manual is suddenly misplaced.
Whatever the case is, Yamaha makes it painless and easy to get a copy with their downloadable digital owner’s manuals. Now is a great time to brush up on certain topics prior to riding season such as operation and pre-ride checklists.
Perhaps this will be the first time riding your new WaveRunner. Be sure to check out the section on break-in period of your new engine as well as familiarizing yourself with all of the functions of your particular model.
If you have found yourself having trouble starting your unit after the long winter storage, check out the troubleshooting tips in your owner’s manual. For more in depth knowledge about troubleshooting and servicing your WaveRunner, you can even purchase a service manual.
Let’s face it, we find a lot of misinformation and downright shady advice from online forums and videos about how to work on your unit. Eliminate the guesswork and get factual details by purchasing a factory service manual. Trust us, you’ll be glad you did.
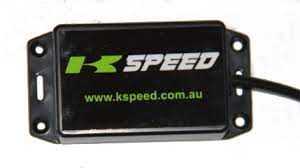
Removing speed restrictors from Kawasaki PWC usually require a complete tuning kit in order to gain 6-8 mph over normal speeds. Purchasing a flash kit takes more time and money, putting a damper on your water time. With the Kspeed SCOM, you don’t have to spend close to a $1,000 or more by purchasing a tuner or taking your JetSki in to have its restrictive speed control function removed.
That’s where Brisbane Kawasaki comes in to save you time and money with their affordable and easy way to modify your stock ski. They save you the hassle of trying to find a place to flash your speed modification or spending the extra money for a complete flash kit.
Save money while still getting the benefit of attaining higher speeds on your Kawasaki Ultra. Also, the Brisbane Kawasaki website notes that the Kspeed SCOM does not affect Eco Mode or Cruise Control Functionality. All original dash functions are retained.
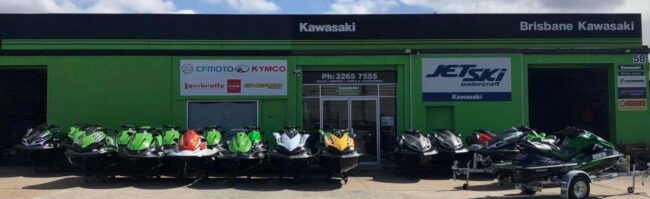
If you have any questions or want any information, give them a call at +61 07 3265 7555 or send an email to: [email protected]. You can visit the shop at 58 Delta Street, Geebung QLD.
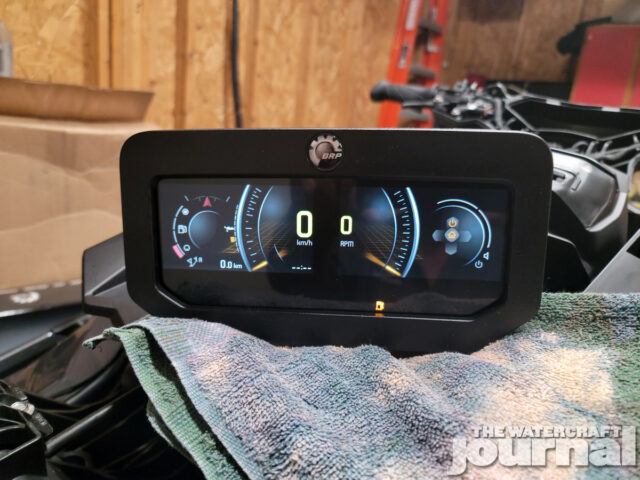
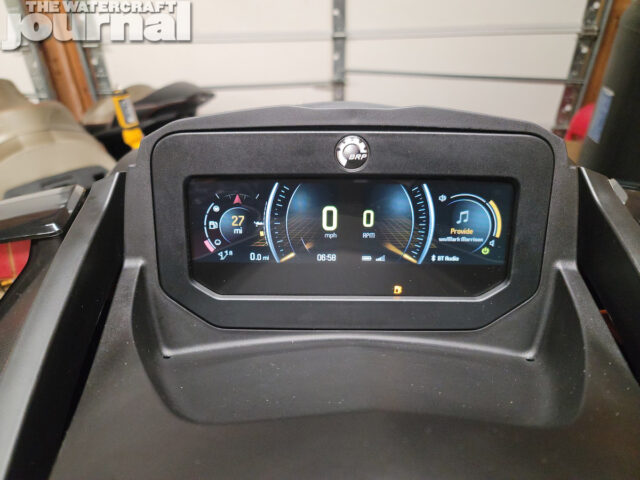
From the guys that brought you the 18.5-gallon fuel tank upgrade for 2018/2019 Sea-Doo ST3 hull models, now comes the new 2021 GTX Limited color display swap! And just like the fuel tank swap, this full-color dashboard will also find its way into lower-equipped models in the coming years – but we didn’t want to wait!
We accomplished this swap using all factory Sea-Doo parts, with the exception of one harness that needs to be custom made (which this author will be making this harness available via a harness swap program). So without further ado, let’s get into the swap!
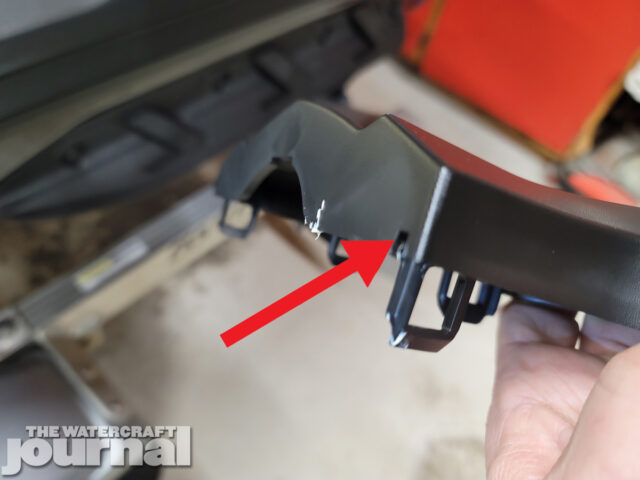
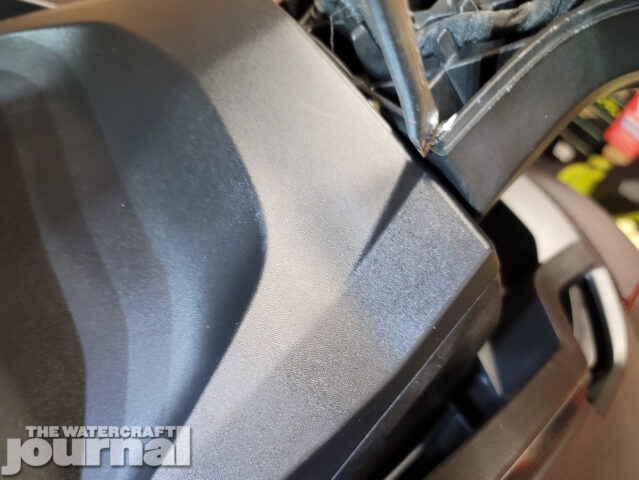
Above left: First we start with disassembly of the handlebar covers as well as the gauge support, front hood, speakers, trim and storage compartment. To remove the handlebar pad on GTX/Wake Pro style pads, pull from the bottom of the pad to release it. On the RXT-X pad, remove the two T-30 screws from the bottom of the pad, then pull from the bottom. Above right: Next remove the two 8mm screws that hold the switch covers on. Pull them off from the bottom.
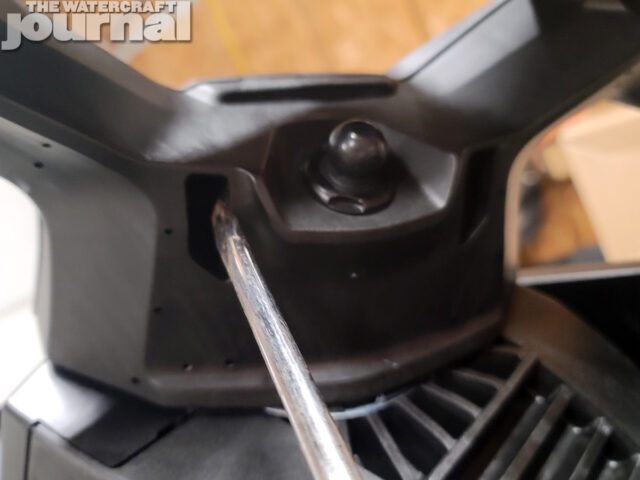
Above: To remove the cover on top of the handlebar, insert a screwdriver into the slots shown to release the clips.
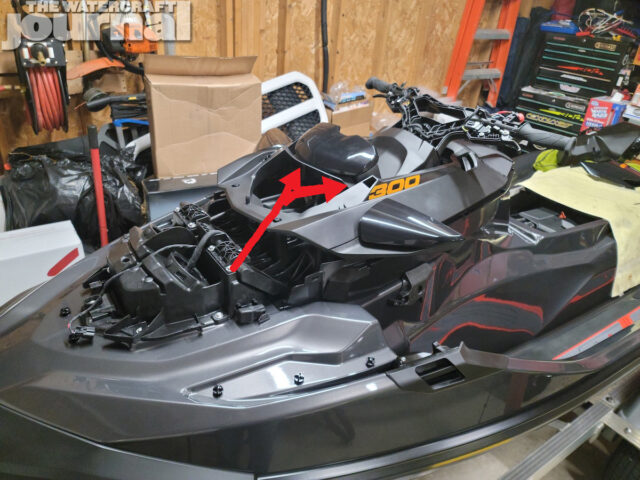
Above: Next, remove the gauge support, again, insert a screwdriver into the slots to remove the clips. Remove the front hood and top cover in front of the gauge support. There are two 8mm screws inside the storage compartment that secure the front hood, remove those screws and the hood will slide off. For the top cover in front of the gauge support, remove the two T-30 screws and lift off the cover.
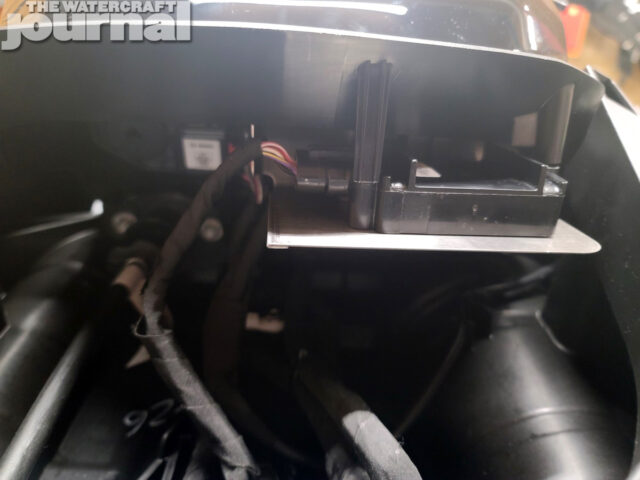
Above left: Now you have access to the two tabs to remove the gauge support. Above right: Remove the gauge support and unplug the old gauge cluster. Remove the speakers and storage compartment as described in the 18.5-gallon fuel tank install write up.
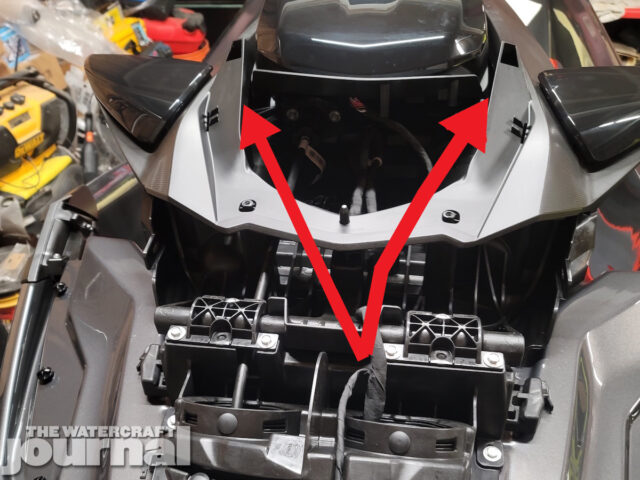
Above: Remove the handlebar wiring harness. Unplug and remove the left and right multifunction switches, remove the Christmas tree fasteners holding the harness to the handlebar, and unplug the DESS plug in the center of the handlebar. Feed the wires carefully through the handlebar, remove any tie-wraps or fasteners holding the harness to the storage compartment lid.
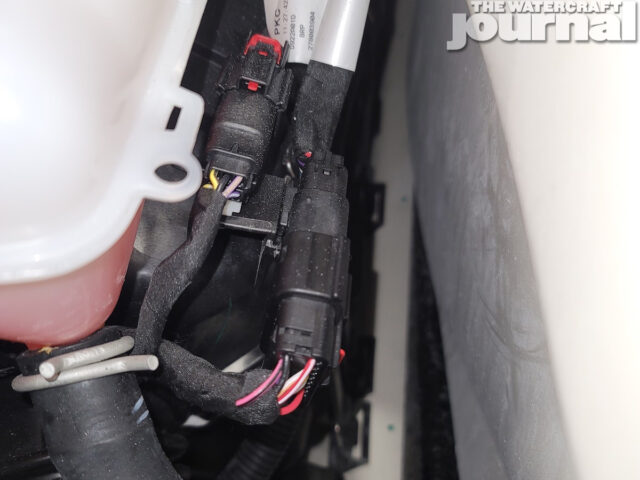
Above: Unplug the handlebar harness from the main harness inside the hull next to the coolant reservoir and remove it from the clips that hold it to the side of the hull. Feed it up and through the hull vent tube and remove the harness from the ski. Now we can begin reassembly by installing the new 2021 GTX Limited handlebar harness. Reverse the removal steps of the original handlebar harness by carefully feeding the end of the new harness with the two connectors on it into the hull vent tube and route it and plug it in the same way the original harness was installed.
Above: Route the new harness up through the handlebar and route it across to each side. Install the new multi-function switches (if your model requires replacing them), Start/Stop switch (on the left), and the new BRP connect switch (on the right where the 2018 “Cruise” button would go) Install the switch covers and reassemble the handlebar cover and pad.
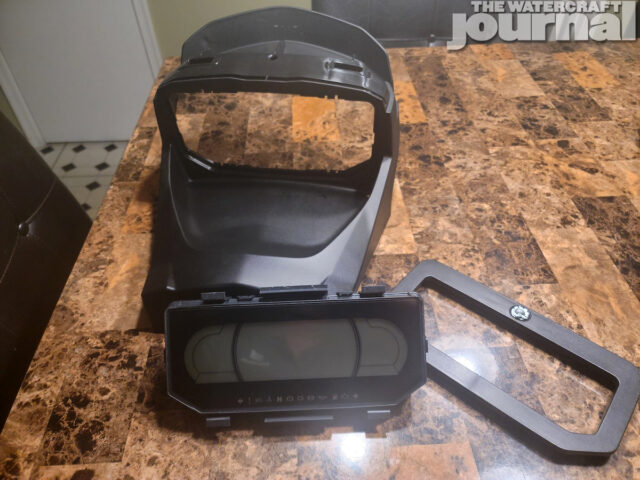
Above: Before you install the new gauge support, install the GPS module and shield onto the new gauge support. Now you can plug in the GPS plug and install the new gauge support by reverse of the removal procedure. Remove the new gauge from the box and plug it into the new harness, carefully install it into the gauge support. Do NOT push on the gauge face to snap it into the support.
Above: After the gauge is securely snapped into the support install the new gauge bezel. You can now reinstall the storage compartment. Next you’ll need to install the new harness into the left speaker to add the new plug for the display to control audio to the sound system. (I will be offering a harness swap service to enable this install to be truly “plug and play” by anyone installing the new color display themselves.)
After the new harness is installed into the speaker, the speakers can now be reinstalled, and the rest of the ski can be reassembled. Congratulations, your new color display is installed! It may need to be married to the ECM, this can be accomplished by any Sea-Doo dealer.
Above: Enjoy the updated look to your Sea-Doo, and have fun discovering everything this new display can do!
With those warm afternoon temperatures inching upward for many folks, that can only mean one thing. Time to pull off those watercraft storage covers, fire up the engine, and get that thing ready for riding season.
Equally important, is to make sure your boating safety knowledge is up to date. With Yamaha’s Resource Page, it’s easy to find local waterway laws according to your state.
You can even take online courses through their resource page or by directly visiting BoatUS.org. At the very minimum you can take the free boating safety course which is tailored to your specific state’s laws.
This is a great time to brush up on boating and water safety to ensure that you and everyone around you can enjoy their time on the water.
If you have recently taken a safety course or would like to learn about other boating-related topics, you can also check out the various other courses offered including courses related to navigation, weather, and planning for long trips through tricky waterways such as rivers and locks.
You can never have too much knowledge when it comes to safety on the water. Get prepared now so that you’re ready to hit the water when the weather is right.
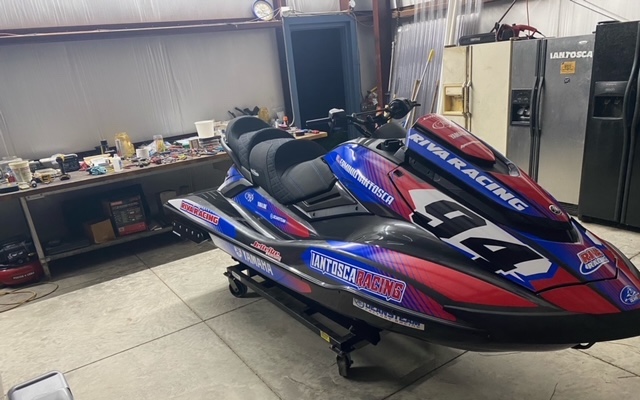
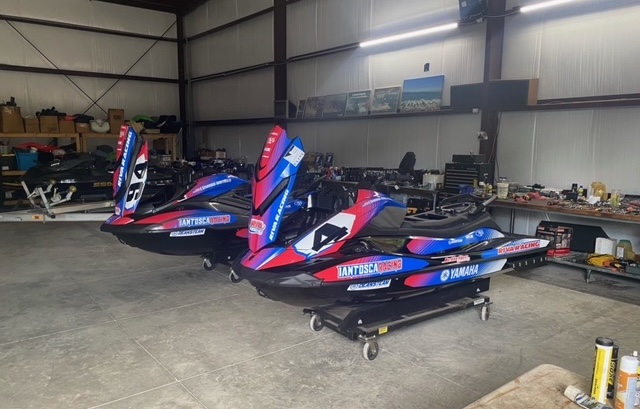
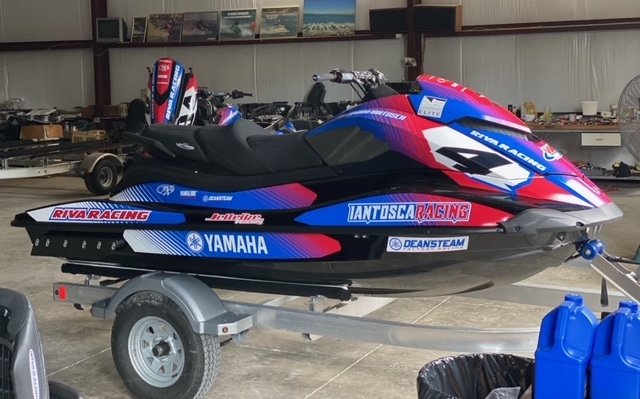
Disputes over money continues to be the leading cause for divorce in the United States, and one of the most surprising splits to hit the world of professional PWC racing happened just over a month ago. Longtime Sea-Doo X-Team racer, product developer and brand ambassador, Erminio Iantosca has hung up his yellow jersey for 2021. Rather, the iconic Pro Runabout racer has crossed the aisle to Yamaha.
The split is unexpected given Iantosca’s involvement in developing the new 2021 Sea-Doo RXP-X 300 and even earning the ski it’s first win in last year’s Pro Watercross World Championships. “It really came down to budgeting,” Iantosca told The Watercraft Journal. “Sea-Doo is having great success with its ambassador program and wanted to focus their effort there – and I wanted to put all my effort into racing.”
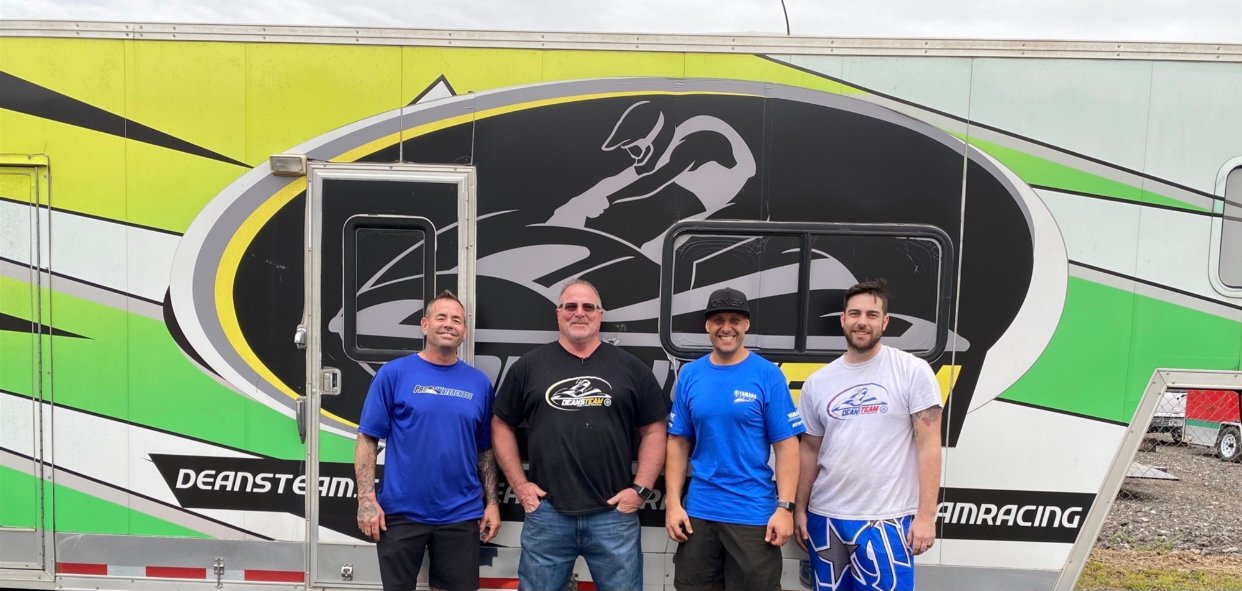
Major shifts like these can be a political landmine in the intimate world of racing, and Iantosca knew what he was up against. “I spoke with Yamaha and was lucky to have them make me part of the team,” he continued. “I signed a deal with RIVA Racing to run their parts. [Then I spoke to] Dean Charrier and Dean’s Team. They have helped me so much in such little time with setting up my skis, tunes, props etc.”
“I can’t wait to start racing a full season again,” Iantosca smiled. “I’ll be racing P1 AquaX on a 2021 Yamaha FX SVHO and Pro Watercross on a 2021 GP1800R SVHO.” Transitioning from the RXP-X 300 to both a FX and GP is taking up quite a bit of Iantosca’s training time. “I can’t wait to see what I can do aboard my factory Yamahas!”
Each seat has been rewrapped in Jettrim covers and mats, BP Concepts vinyl graphics and co-sponsored with JetX Powersports products. Equally, Jettribe will be providing the pro with wetsuits and PFDs.
Hydro-Turf Freerider Mark Gomez has been stepping up his vlog game lately. After a successful trip to the Daytona Freeride early this year, Gomez’s latest journey takes us along with him to Pismo Beach, California for the Pismo Spring Freeride.
No day starts without a good ole’ cup of freshly brewed coffee…or if you’re World Champion Rider Mark Gomez, an ‘MG’ emblem cup of espresso-based coffee, pressure brewed using freshly ground sponsor beans inside a state-of-the-art espresso maker. Hey Mark, what’s the retail on one of those?
Scrambling things together, Mark picks up a freshly rebuilt engine after the Daytona ride and installs it in his ski. Then after staging and packing everything up, he and the team are off to Pismo.
After doing some free ride sessions and jetsurf riding, the crew is able to relax and even do a little goofing off that evening. Hanging out and jumping over campfires with dirtbikes, what could be better!
Let’s just hope that they weren’t doing any illegal camping judging by the hefty fines posted in the background. Another successful trip in the books for Gomez.
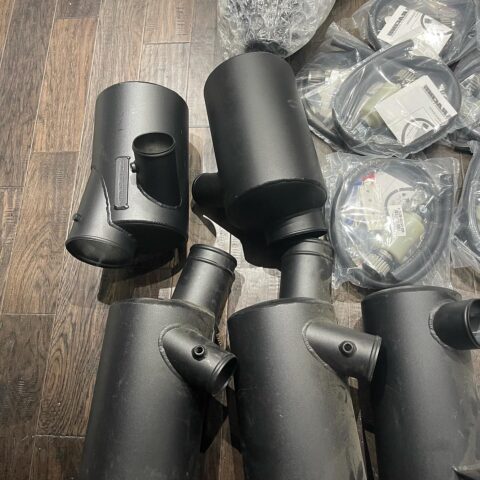
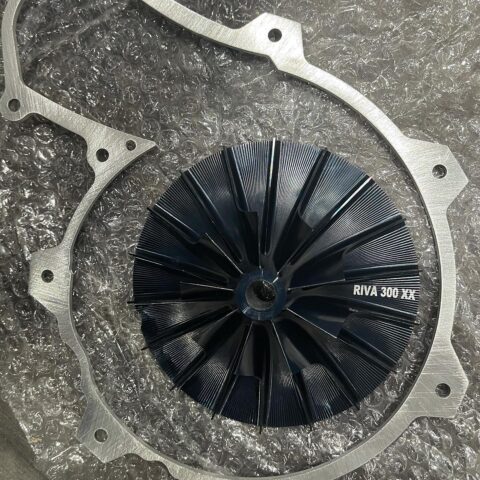
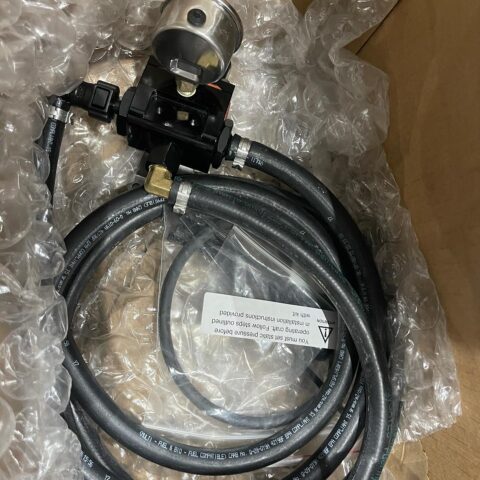
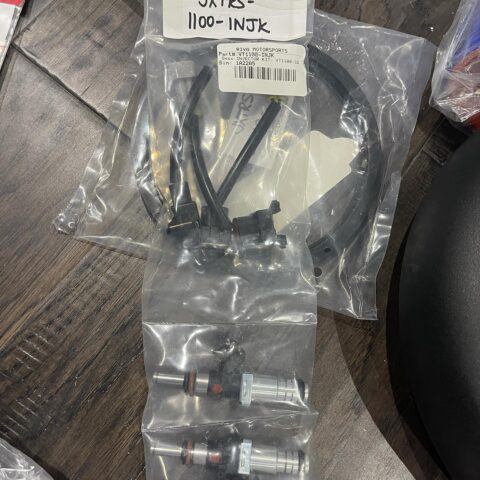
JetX Powersports is stoked to announce their early spring order of RIVA Racing parts. They can meet your performance parts needs without the wait. You can buy all of your parts from JetX and they can take care of you.
The guys have over 25 years of experience in the watercraft industry and if you’re in Ontario, definitely hit them up for service. The technicians are highly trained and some of the best in the business. They have the means to modify stock PWC into powerful racing machines that win world titles.
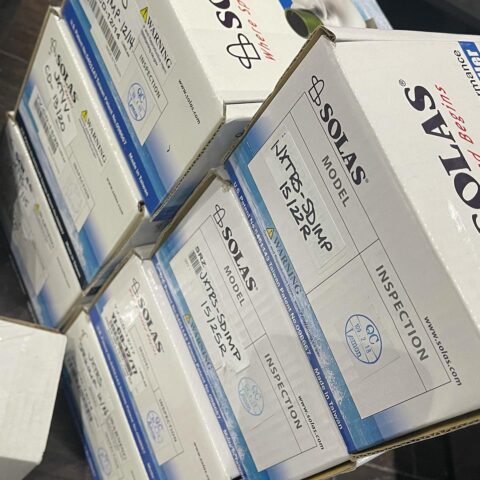
Now let’s go through the current RIVA Racing parts list that we grabbed from a Facebook post. The JetX crew received some fantastic goods.
The JetX modifications department is the leading and most trusted place to take your watercraft for turning up the speed. Contact them to learn about their go-fast packages or a custom build. JetX Powersports is located in Woodbridge, ON and can be reached by phone at: 647.280.7850.


 During a recent project involving the Orion Command Module, NASA’s prototype development branch was having trouble finding existing market materials that would live up to the strict standards for this project. That’s when they decided to turn to Hydro-Turf for solutions.
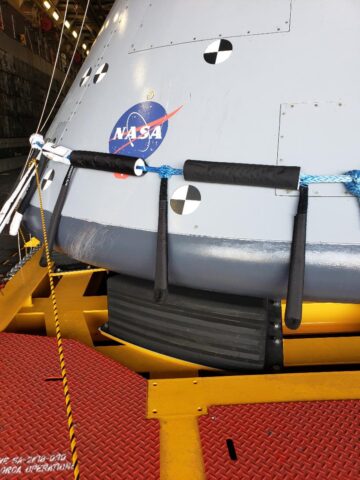 Once the recovery team takes over, the module is then towed back to a ship where it is then placed inside on top of a recovery cradle.
 he turf material obviously has a spongy nature to it. It is also easily shapeable and could be layered and machined to match the shape of the module belly. After a series of software calculations on the material properties showed promising results, it appeared NASA had a good candidate material for their needs.