Every day, people around the world wake up and start brewing a pot of coffee. After drinking their morning coffee and taking a shower, they proceed to put on some clean clothes.
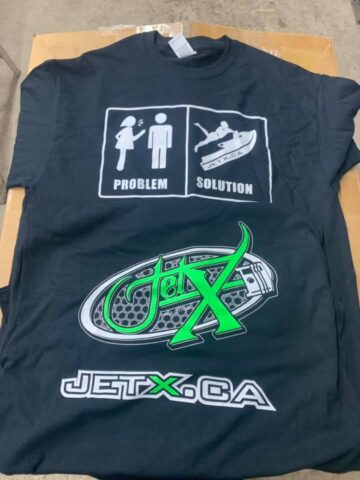
The clothes you choose to wear will make a statement, whether you prefer to wear dressier clothes or overalls as your attire of choice. Whatever you prefer, why not make a statement with a new JetX Powersports T-Shirt.
These t-shirts are hot off the press with a funny comic on the front along with the JetX logo. Sometimes people can get into disagreements with their spouse, so one way to cool off is to hop onto your PWC as depicted in the comic. While we are unable to offer relationship advice here at The Watercraft Journal, we do hope you still find time to get out and ride.
Ryan Dalli is the man behind JetX Powersports. Having started as a Sea-Doo repair man, he was able to get into the world of racing and make his name known.
While Dalli is a great racer, he is known for his ability to fix anything. This is how he was given the nickname; Doctor.
You can get these t-shirts through their Facebook. Don’t wait, these will not last long, so check out this link to place your order now.
Unless you’re living within a temperate climate where a “cold front” means you’ve gotta zip up a hoodie and finally wear socks and shoes instead of flip-flops, chances are that the brisk and often icy conditions of winter are enough for you to pack up your life vest and sunscreen, and winterize your watercraft for the next few months.
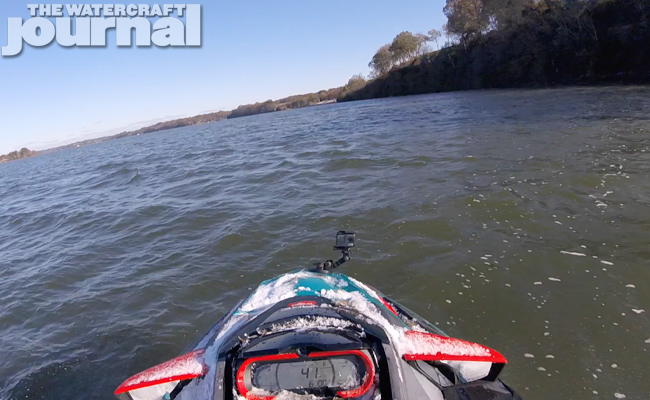
One recent cold snap blanketed The Watercraft Journal’s home office in Nashville, Tennessee, surprising us with a few inches of snow overnight. Unfortunately, sheets of freezing rain the night before meant a thick layer of ice lay below that fresh powder, making the roads pretty much too hazardous to traverse.
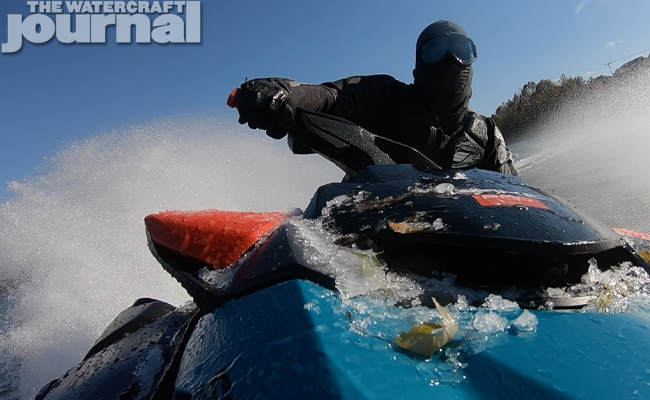
Above: Back in late November, an unexpected cold snap coated The Watercraft Journal’s Tennessee home office in a thick layer of ice and a bit of powdery snow. We couldn’t pass up the chance to hit the lake since we knew nobody would be as stup…daring as we were!
With nowhere to go, and certain that we’d be the only ones foolish enough to venture out on Old Hickory Lake in sub-freezing temperatures, we decided to take The Watercraft Journal’s long-term test model, a 2019 Sea-Doo Wake Pro 230 out for a spin.
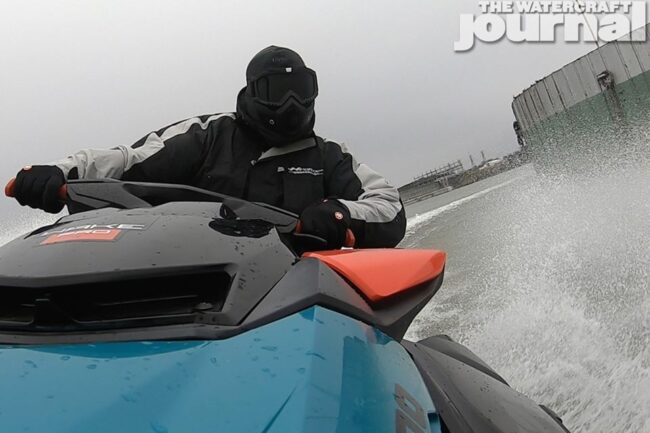
Dusting off our trusty old Jobe dry suit, we donned a head sock, goggles, thick gloves and our best riding boots to bear the brunt of below 20-degree-wind chills. Although we certainly had plenty of fun churning up the completely empty lake, we did note that even our best cold weather riding gear simply wasn’t enough to keep us comfortable against the chill.
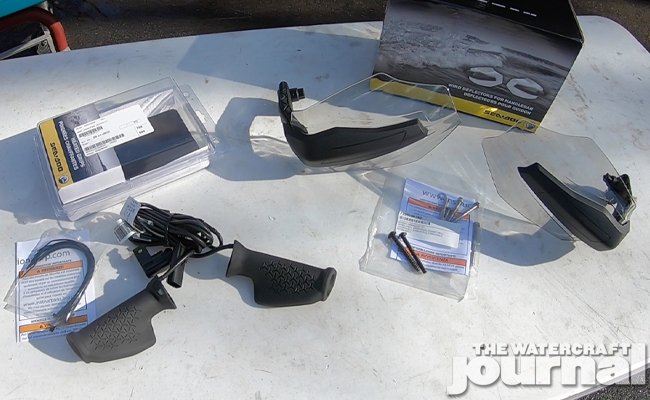
Above:Learning from BRP’s Ski-Doo line, Sea-Doo’s new cold weather offerings for chilly PWC enthusiasts include these Heated Hand Grips and Wind Deflectors (which can be installed on all ST3-based Sea-Doo PWC and new GTI-based models); both are available through Sea-Doo Parts & Accessories Catalog. Not shown is the Extension Harness necessary for models equipped with more than one electronic accessory.
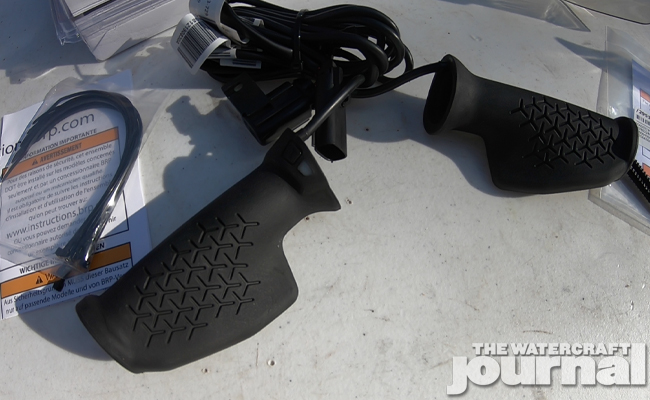
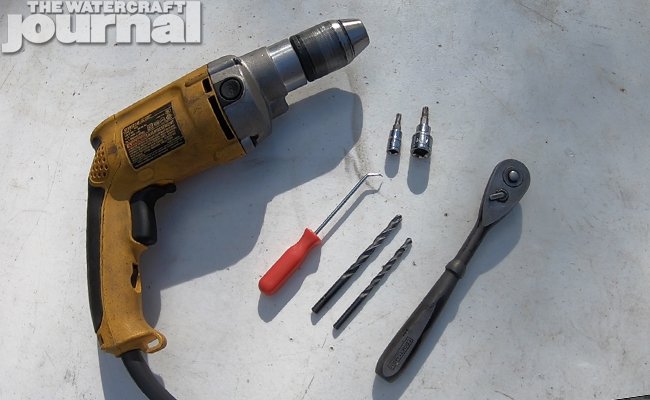
Above left: Amazingly, installation of the heated grips is incredibly easy, requiring only minor modification to a couple decorative panels; wiring the grips is literally a plug-and-play affair, with Sea-Doo providing a detailed schematic to follow (please see highlighted hyperlink below). Above right: Tools for installing the deflectors are a 10mm socket, 10mm wrench, dental tool, 3/16-inch drill bit, 1/4-inch drill bit, T20 Torx socket, T25 Torx socket, T30 Torx socket, socket wrench, Phillips head screwdriver and flat head screwdriver.
Thankfully, Sea-Doo has two items – new for 2020 – in its Parts & Accessories catalog that were exactly what we needed to keep our most important extremities warm. No, our hands. The first are Sea-Doo’s adjustable handlebar deflectors, priced at $104.99 (PT# 295100762), followed by Sea-Doo’s heated hand grips, priced at $199.99 (PT# 295100812).
Uniquely designed to fit all makes and models of Sea-Doo watercraft, Sea-Doo’s new hand guard kit borrows heavily from its Ski-Doo and Can-Am line; designed to deflect spray and wind from wetting and chilling your hands as you speed across the water.
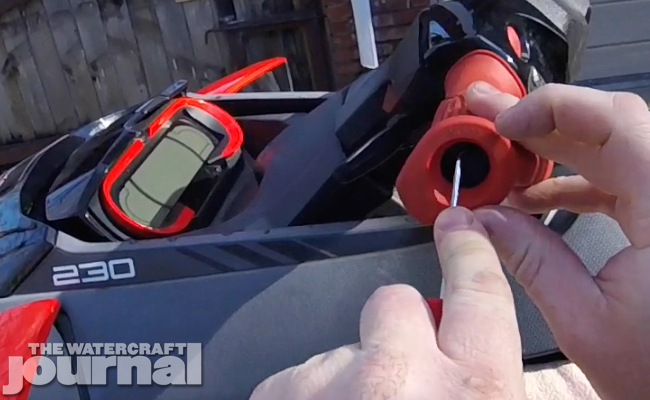
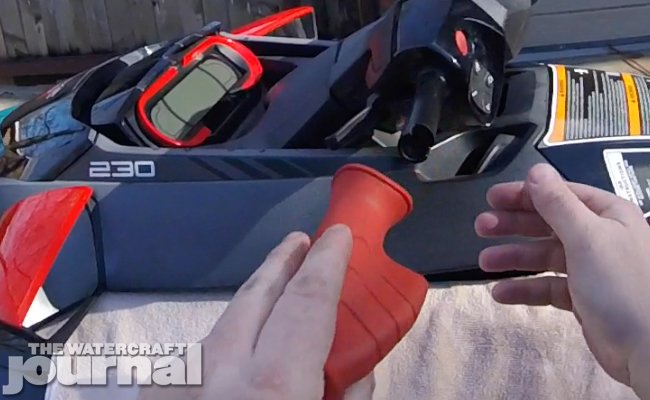
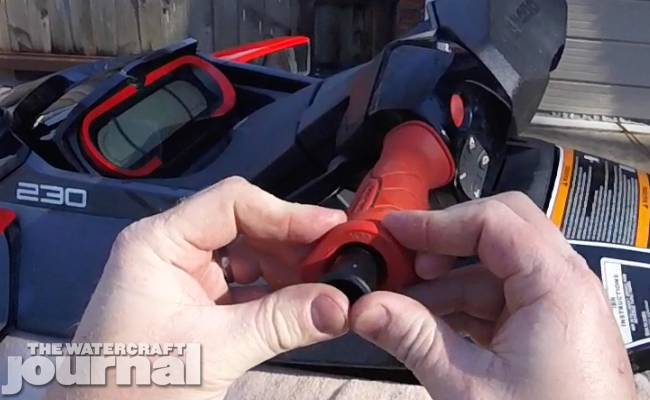
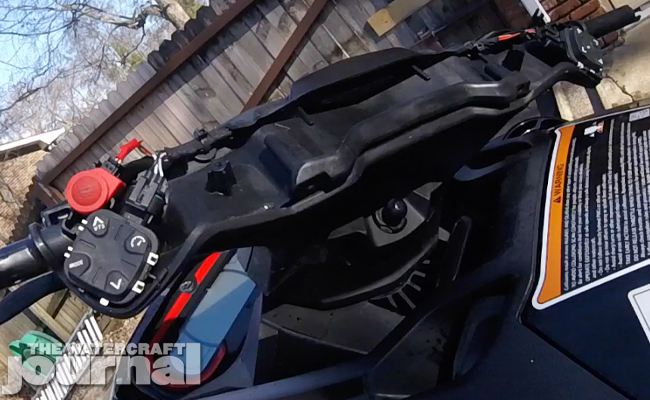
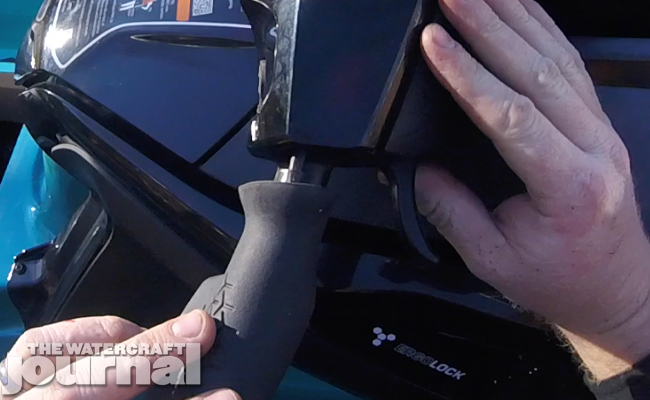
Above left: Because installation of the deflectors require some drilling, we tucked a ratty shop towel under the storage lid to catch the metal shavings. Trust us, you’re gonna want to do this. Above center: Use your dental tool to pop out the end cap. Above right: Using the big T35, remove the hex head screw holding the original grips on. Your grips will slide off effortlessly.
With so much of Sea-Doo’s ergonomics dedicated to keeping the rider’s hands planted on the handlebars; all of that goes out the window if your grip is cramping under the cold. Thankfully, installing the deflector kit takes less than 30 minutes with the proper tools, and when following Sea-Doo’s detailed instructions, which we’ve linked here.
Thankfully, the kit also comes complete with all of the hardware to install it, whether you’ve got a top-of-the-line GTX Limited 300, a sporty RXP-X with the X-steering handlebars, or a base-model Spark. So don’t count on having to make a couple trips to the hardware store. It’s all here.
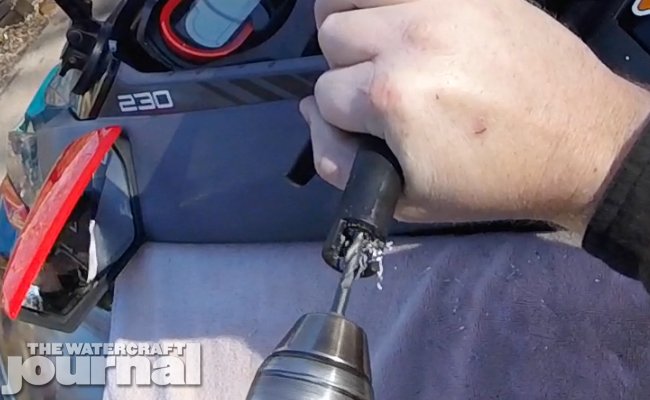
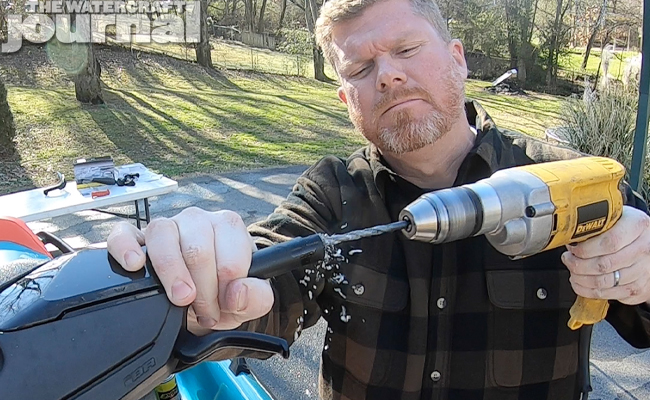
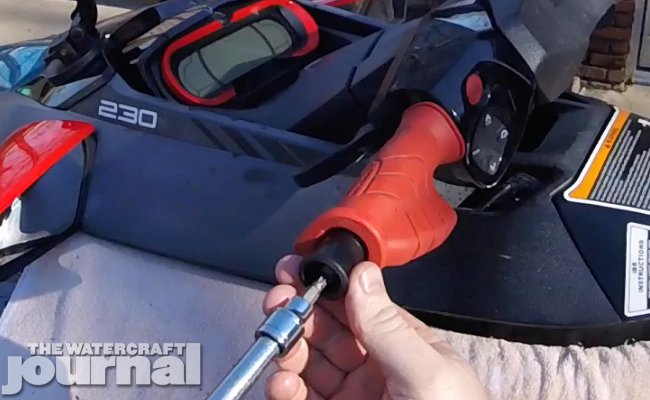
Above left: We’re big believers in adding small-yet-simple extra steps if it means doing a better job. BRP requires that you drill out the hole with a 1/4-inch bit, but the hole is so small that a chance of biting and breaking the bit was enough for us to want to start with a smaller 3/16ths-inch bit. Above center: The smaller diameter bit helps us get the prescribed depth (2 3/16-inch) while opening up the hole a little more. Above right: Now we can hog out the hole for the new Torx screw without the heat and chatter that comes from forcing a bit too large into a tiny hole.
Start by removing the black rubber plug covering the T30 torx screw holding the palm rest grips to the handlebar. With the screw removed, the grip can slide off, revealing the handle bar. Before going any further, we laid down an old shop towel to catch any shavings.
At this point, Sea-Doo instructs to take a 1/4-inch bit and drill 2-and-3/16ths of an inch into the bar, opening up the mounting hole. Since the original hole is so much smaller, we opted to “play it safe” and begin with an intermediary 3/16-inch bit, opening up the hole slightly larger before using the recommended 1/4-inch drill to hog out the hole. This process produces a lot of metal shavings which you really don’t want floating around in your footwells, so make sure to cover up as much of the Sea-Doo as you can before you start drilling.
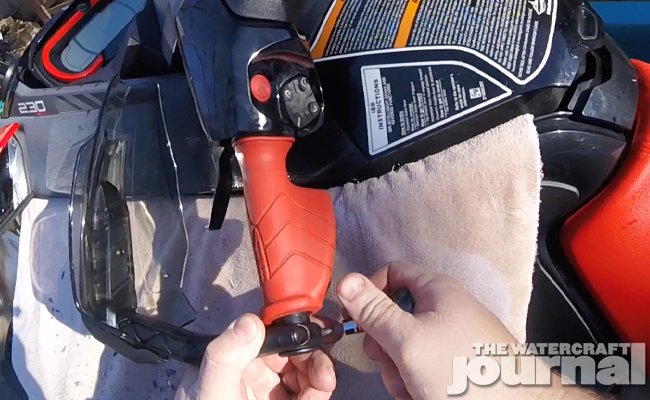
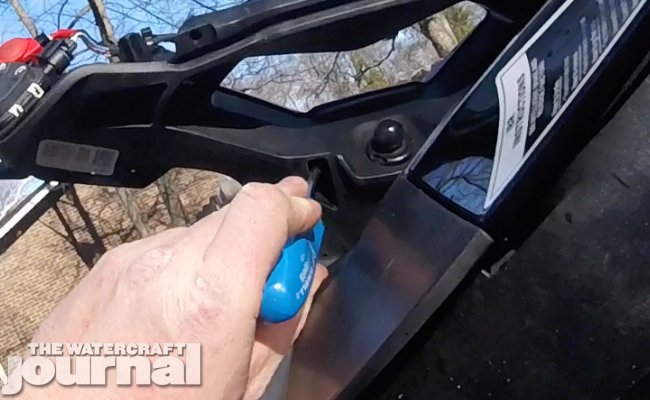
Top left:With our enlarged hole, we sprayed in a little XPS lubricant and threaded the hole with our deeper Torx screw. Next we reinstalled the palm rest grip with the new black plastic clamp support. Top right: Using the new Torx screw, we tightened down the grip and clamp support. Bottom left: The two-piece clamp at the end of the Deflector is held on by two smaller Torx screws. Bottom right: The clamp’s screws are tightened down to the recommended 35 lbs. in.
Next, we sprayed a little XPS penetrating oil into the handlebars before hand-threading the new plastite Torx screw supplied in the kit. With fresh threads cut into the hole, we slipped our factory hand grips back on, and installed the black plastic clamp support with the Torx screw to the recommended 35 lbs. in.
Finishing the deflector installation, the angled arm slips into the shield, and is tightened together with the supplied Torx screw, and a T25 Torx socket. Attaching the clamp to the support is as simple as tightening the cap down using the supplied Torx truss screws and a T20 Torx socket.
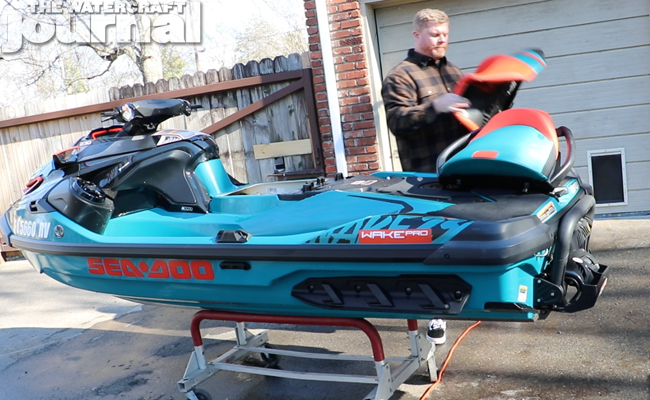
Above: Since we were going to be installing heated grips, we reversed our steps and removed the hand deflectors. Obviously, we’ll be repeating the installation steps when the new heated grips are installed (that is, besides needing to drill anything out). Then we removed the seats.
Wait to tighten down the truss screws all the way after verifying that the shields won’t make contact with the fairings when turning the handlebars to their stops. Once they’re set to your liking, go ahead and tighten down the clamps to 22 lbs. in. Since we had the heated hand grips left to install, we removed the shields, clamp support and factory hand grips and began our next step.
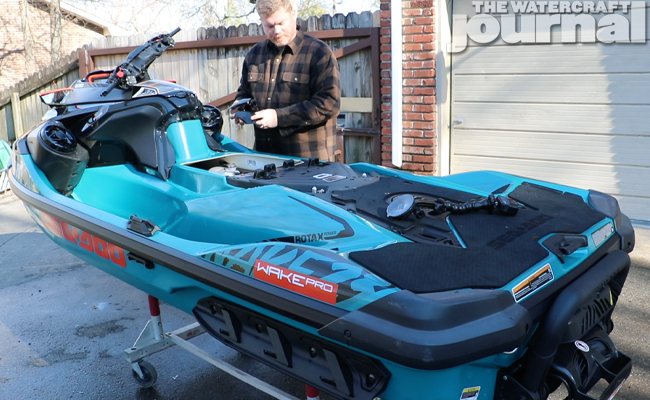
When dealing with anything electrical on your Sea-Doo, always start by removing the seats and disconnecting the battery, with the negative terminal first and then the positive – as per BRP’s detailed instructions found online here.
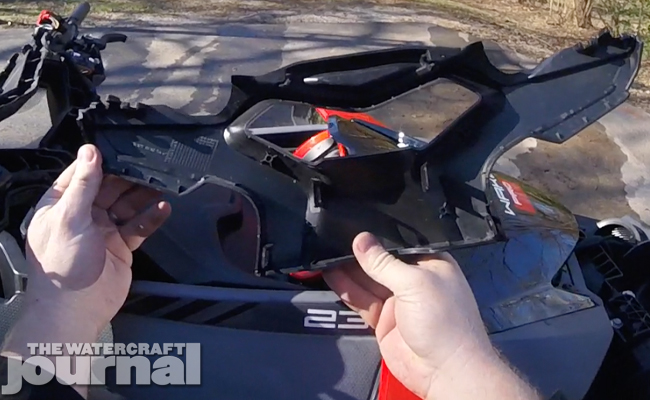
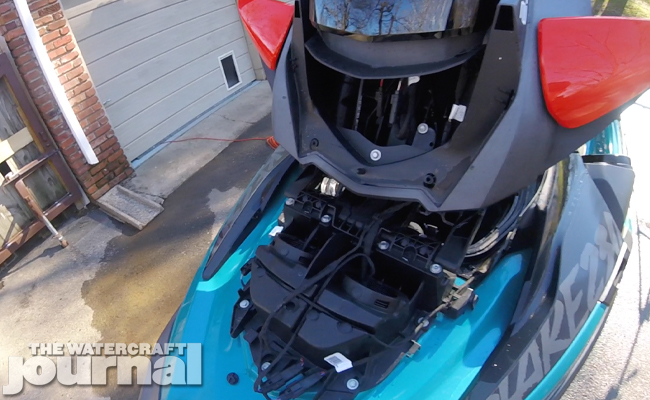
Above left: As is with working on anything electrical on your Sea-Doo, begin by disconnecting the battery; negative terminal first and then positive.Above right: Removing the front cover is necessary, so unscrew the two 8mm screws found inside of the storage compartment. The front cover slides out forward.
Next, we opened the center storage lid and removed the 8mm screws fastening down the front cover. The front cover slips forward, revealing the wiring harness for the handlebars, gauge cluster, and if equipped like our Wake Pro 230, the accessory harness for the BRP Premium Sound System and USB charger.
Since our grips were already removed, we went ahead and removed the handlebar pad. It comes out easily by simply pulling down to release two bottom tabs, and then pushing up, freeing it from the handlebar. With the pad off, two 10mm screws holding down the left and right iControl covers are revealed. With the screws removed, the covers come out pretty effortlessly.
Above left: The soft handlebar pad is easily removed by pulling down to unhook the two plastic prongs (illustrated) and then pushing upwards. Above right: The two accessory (or iControl) covers are held down by two hex screws.
Above: The two hex screws hold down the accessory control (or iControl) covers. With them removed, the covers come off with a little bit of pressure. No tools are necessary.
The steering neck is shrouded in a two-piece clamshell-like cover, held together by 8 retaining tabs. These need to be unsnapped using a small flat screwdriver or similar tool. A longer screwdriver is best used to unsnap the two tabs on the underside of the cover. Finally, use a dental tool or jeweler’s screwdriver to pop the key connectors at the front of the cover. This will free the top cover to be removed.
Now we could install our new Heated Hand Grips, following the steps from before, installing them with the new clamp supports for the deflectors, and torquing them down at the required pounds-per-square-inch.
Above left: The steps we were most concerned about were properly removing the clam shell-like cover over the steering neck. A long flathead screwdriver is needed to reach two of the snaps on the underside of the cover. A dental tool or jewelers screwdriver is ideal for dislodging the final two front tangs. Above right: This shows you were all of the tangs are located from the inside of the cover. Be very careful not to break these off or bend them too far, or your cover won’t reinstall back as nice as it did.
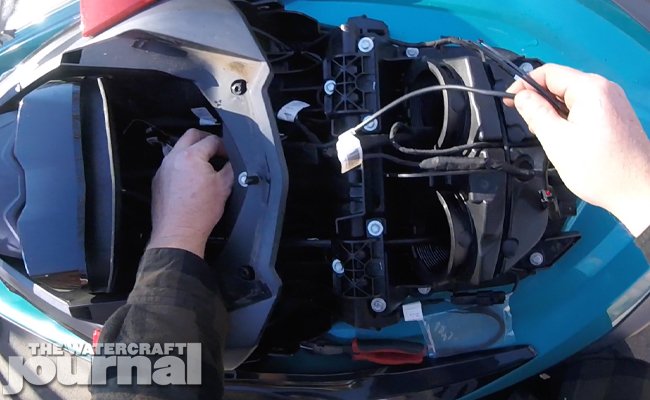
Above left: With the covers all removed, you can see how the handlebar is arranged and the accessory (iControl) controls are laid out. Above right: We can now install our heated grips, carefully threading their wiring harness between the existing wires, and feed it through the open portal in the steering neck. It’s tight but doable with a little bit of patience.
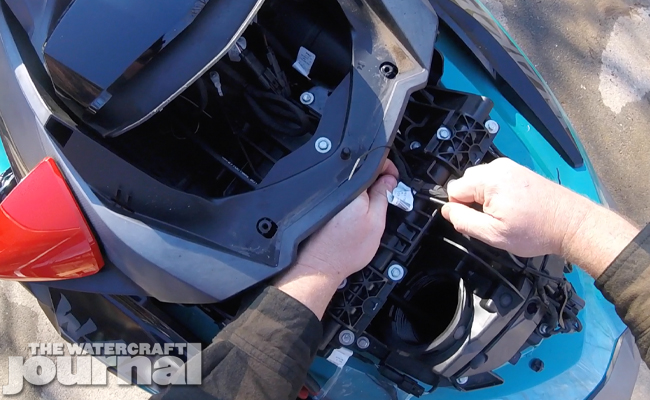
Next, we had to feed each grip’s wiring connector through the open portal in the steering neck. It’s tight, but won’t require any tricks to feed them through one-at-a-time. Because access to the wiring harness can get tight, we also took the extra step of removing the gloss black hood cover. The cover’s held on by two Torx screws and makes routing the wiring a lot easier. It’s not in Sea-Doo’s instructions, meaning it’s not mandatory, but the 30-seconds it takes to remove it was well worth it.
We laid out the harness for our heated hand grips loosely, carefully mapping where we wanted to route our wiring, connectors and fuse so they wouldn’t interfere with the steering controls or other accessories.
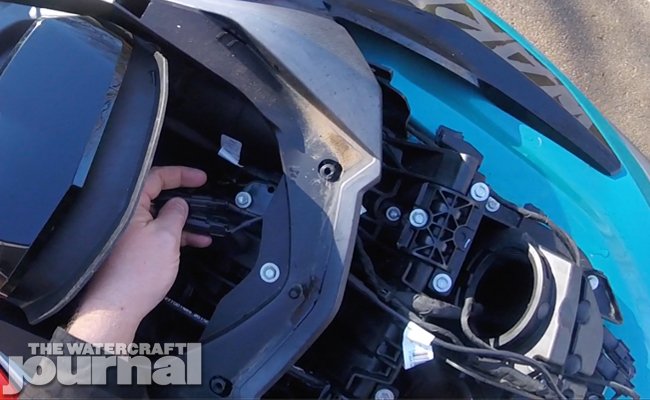
Above: Although not outlined in the instructions, we also removed the decorative panel (or cover) exposing the entire wiring harness that passes through the steering neck. It’s not entirely necessary, but this simple step made feeding the harness for the heated grips immensely easier that we really recommend it – it’s only two screws!
Above: BRP doesn’t outline a specific route for the heated grip harness, so basically do your best to route it in such a way that it won’t interfere with other wiring or the hinge mechanism. We ran ours alongside the USB phone charger harness we had installed earlier in the season and eventually, zip tied the two together.
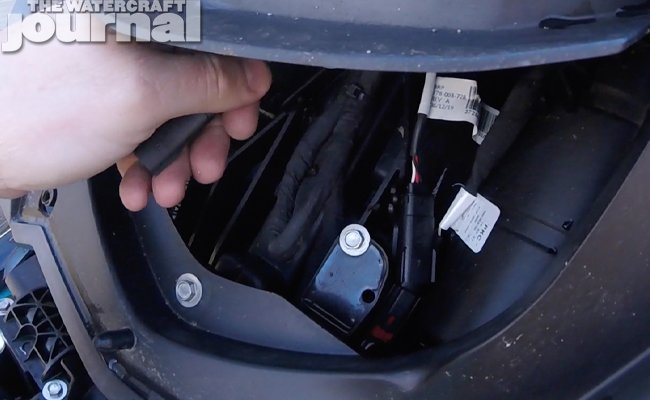
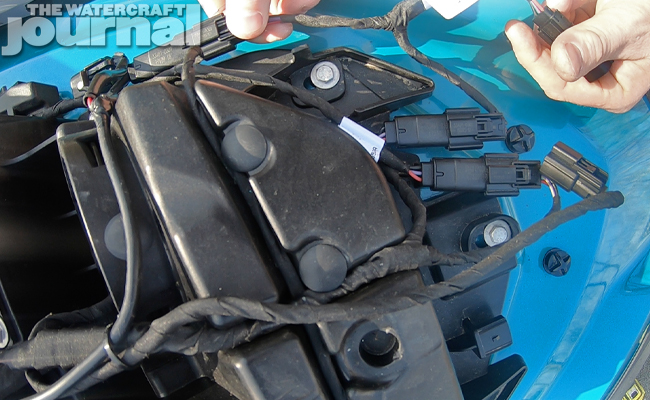
Speaking of which, since our Sea-Doo already had its accessory port occupied by the USB charger and BRP Premium Sound System, we had to order the supplementary Extension Harness (PT# 278003684) to allow us to use all 3 accessories simultaneously. The Extension Harness interrupts the harness for the other accessories to provide a secondary terminal where we can plug our heated hand grips into.
Each plug consists of a male and female end, the latter having a molded-in slide that clicks into one of the many pronged perches found under the front cover. We routed our heated grips’ harness to the driver’s side, mounting the fuse block down with an existing bolt, and snapped the female plug near it. Connecting the Extension Harness was as easy as one-two-three, and we were back in business.
Above: Because our Wake Pro 230 came to us equipped with the BRP Premium Sound System, there wasn’t an open accessory port available. When we installed the USB charger port a few months ago, that accessory has it’s own splice with a secondary female accessory port, allowing us to run both the sound system and USB. This means we needed to order the Extension Harness that interrupts the second accessory harness, giving us a third socket to plug our heated grips into. We mounted it and its standalone fuse block to an existing perch (illustrated at top of images).
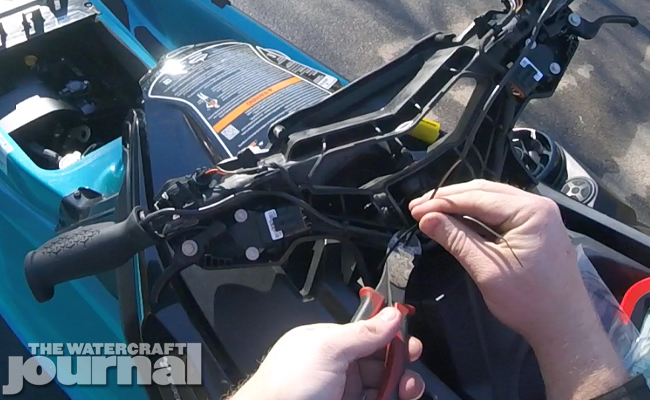
Above: We’re pretty meticulous about our zip tie work. When you trim the excess (slack) off, make sure you cut it all the way down to the nub so you don’t have any sharp edges to surprise you on a later day. We snugged down our new accessory harness so nothing would flop around or chatter inside.
With our wiring laid out loosely across the substructure, we began zip tying down our harnesses, carefully trimming off the excess slack off down to the nub (nobody likes sharp zip tie ends). Then, we needed to retrace our steps by reinstalling the steering neck cover and hood cover. Yet, before we could finish up, Sea-Doo requires that you drill out two small reliefs in your accessory covers to let the loom for the heated hand grips to pass through.
Although we used a pneumatic grinder instead of the suggested 13/64ths-inch drill bit, the result was the same. With these properly notched, both covers were installed, as was the handlebar pad, front cover and the hand shields over the heated grips. Finally, the rubber end caps and battery terminals were reinstalled so we could review our work. With the lanyard in and the start button bumped, our USB plug began charging our phone while the BRP Premium Sound System chirped to life. Success!
Above left: Before final reassembly, Sea-Doo requires that the accessory control (iControl) panels are relieved to let the wiring harness of the heated grip pass through. Official instructions suggest using a 13/64-inch drill bit, but we had our pneumatic grinder handy and allowed us to chamfer the edges a little better. Above right: With the control panels reinstalled, you can see how the heated grips’ harness slips through our beveling.
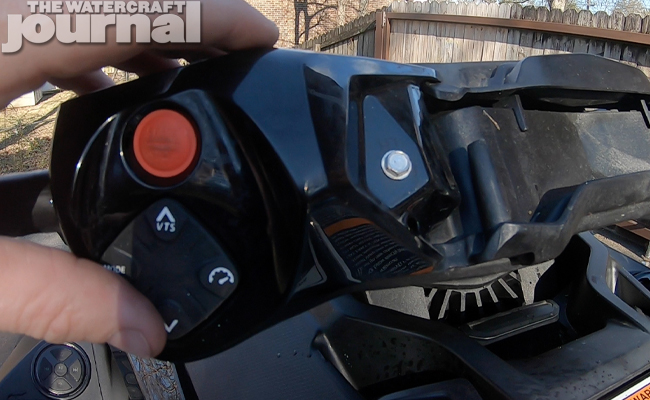
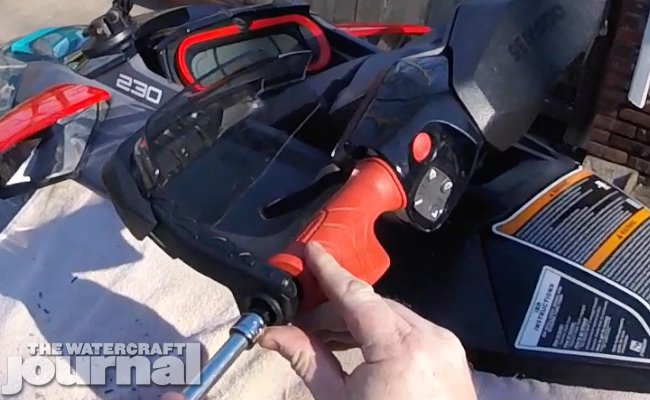
Above: The heated grips need to have the engine running in order to work. Yes, the LED will light up (illustrated) to tell you that it’s getting power, but you won’t feel anything until the engine is idling – allowing you to toggle through the 5 different heat levels.
Understand that the heated grips require the engine to be running to operate. Simply press and hold the button on the left hand side grip for 3 seconds to turn them on. The heated grips feature 5 heat levels, with the LED light indicating which level you’re set to; Blue being Level 1 (20% operation), Green Level 2 (40%), Yellow Level 3 (60%), Orange Level 4 (80%) and Red being Level 5 (100%). And pressing and holding the button for 3 seconds will turn the heated grips off, regardless of the level.
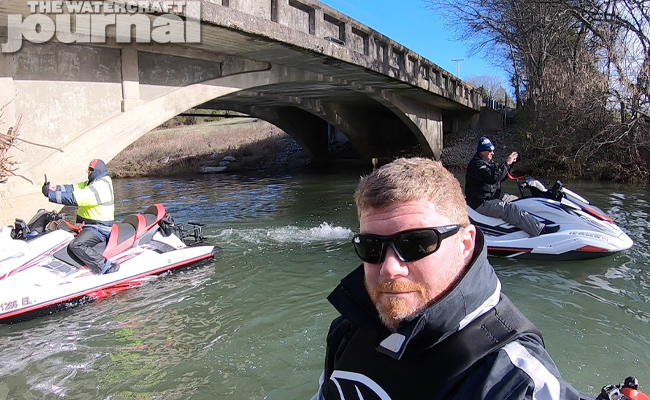
With our Wake Pro 230 fully outfitted with the new hand shield deflectors and heated grips, we thought it best to put them to the test by joining the Middle Tennessee Personal Watercraft Club’s New Year’s Day winter ride. Although the club was set to meet at 9am sharp at Flipper’s Bait & Tackle in Galatin, Tennessee; we decided to set in at home and ride the extra miles through Old Hickory Lake until reaching the rendezvous point up the Cumberland River.
Above: Not wanting to waste a golden opportunity to test our newest add-ons, we joined the Middle Tennessee Personal Watercraft Club for their New Years Day ride. We totaled a brief 55-miles, but added a few dozen extra getting to the meet-up point by water.
From there, we joined up and headed east, winding up the river that brought French fur trappers and early American frontiersmen to the wooded West, long before the American Revolution had begun. These pioneers and mountain men used many of the caves that pockmarked the limestone cliffs as camps between trapping beaver pelts and trading with native tribes.
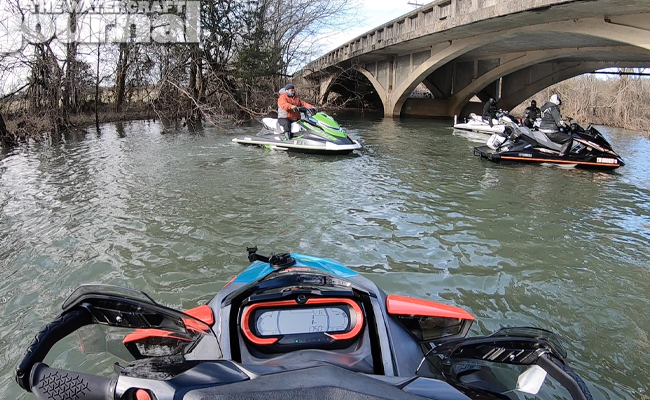
About twenty miles east, we veered south into Spring Creek, aptly named for a narrow creek fed by a natural spring. We followed the winding path all the way to Coles Ferry Pike, a narrow bridge marking the end of the line (that is, before bottoming out).
Above: Reacting Spring Creek was well worth the winding journey. Although any threat of snow was absent, freezing temperatures were definitely on the docket today. It’s funny how the color of the Cumberland River changes depending on the temperature. This milky green is common when the mercury sinks below 40 degrees.
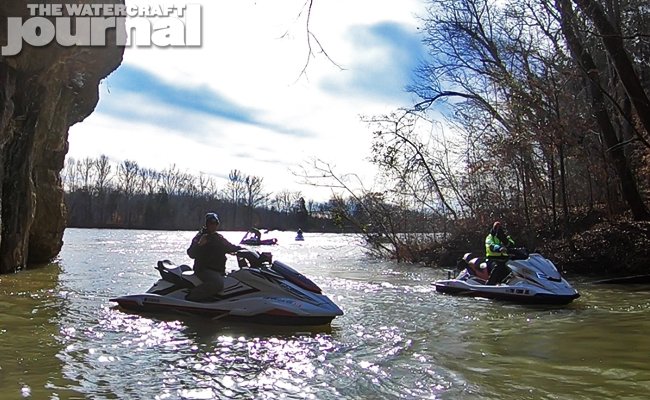
From there, we wound back up into the main river and continued east a little further before nearing Hartsville. Riding alongside the northern face, we discovered a narrow pocket in the cliffs hiding a secret waterfall. Recent rainfall accounted for the cascade, and each of the group took a minute to idle into the cove and check it out up close.
From there, we ventured just a little further until reaching the Highway 231 bridge, where the Linq fuel caddy was emptied into the Sea-Doo’s tank and grabbed a quick snack before we all doubled back toward the launch at Flippers.
Above: The penultimate stop of the day was at a hidden waterfall tucked behind an outcropping of limestone. We all slipped in and checked out the cascades before resuming our trek East.
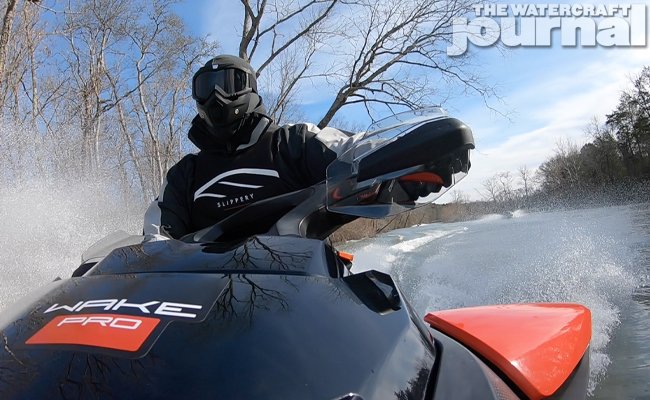
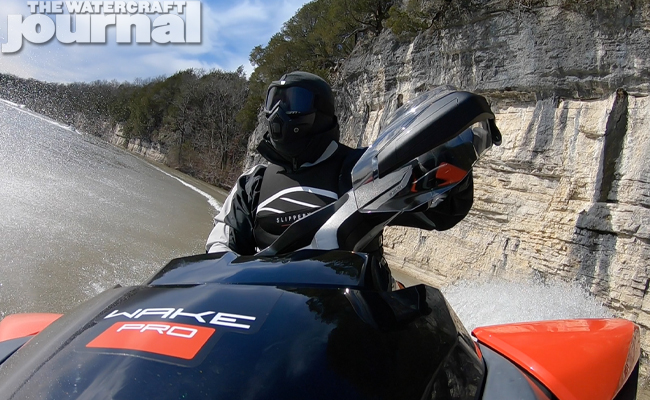
Above: Without a doubt, the heated grips and deflectors (hand guards) made a huge difference. We really didn’t consider how important warm hands can be to enjoying your winter ride! Again, these new heated grips can fit any iControl-equipped Sea-Doo runabout that came with factory palm grips. The only gripe we could think of was the guards’ almost persistent blocking off our rearview mirrors. Comfort comes at a cost, they say!
While outside temperatures hovered in the high 40’s, windchill was still a factor, and without the heated grips and hand shields, we’d be in a bad way. At the beginning of the ride, we toggled the grip’s setting to Red, the highest option. That quickly proved uncomfortably hot even after a minute, so we toggled back down to Yellow, the middle setting – and there they stayed the rest of the day. Typically, extreme cold gets our hands and feet hurting pretty quickly. Not so anymore with these new accessories from Sea-Doo. Now it looks like all we need are a good set of cold weather boots!
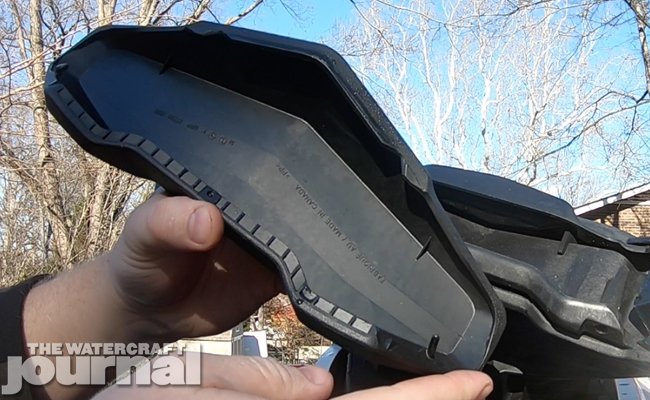
A fun video from Jet Ski Camping provides five useful tips that will help make riding your jet ski more efficient. It begins with a simple tweak of the front compartment on your PWC. Sometimes when bouncing around in the chop, water will make its way into the compartment, causing some of your stuff to get wet. The jet ski’s front box isn’t fitted all the around the top with watertight tape and that can pose a problem. The solution is to pull the plastic bin out and place hatch seal tape completely around the top of the box. Weather seal tape will also work. Problem solved.
The next dilemma is lack of room in that same forward storage compartment. When going offshore, it’s a good idea to carry flares and other safety equipment. Flares generally come in a large container, which takes up most of the storage space. Jet Ski Camping suggests placing the flares in a plastic pasta container and other safety gear will fit as well. This is a great space saving idea.
Another cool hack that many of us have used in other outdoor activities is using a hydration bladder. They’re great for backpacking, biking, and pretty much any other activity. Now some life jackets have a built-in port for a hydration bladder, creating a hands-free drinking experience enabling riders to maintain control of their skis.
The forgotten drain plug is another issue and is a quick way to sink a ski. An easy tip for remembering to install the drain plug in your watercraft is to place a sticker near the safety chain on the watercraft trailer. Just remember why the sticker is there and you’ll be golden.
The final hack calls for using liquid dish soap when flushing the PWC. Pour some dish soap into the garden hose before flushing the jet ski and the soap will break down any salt. Run the ski until the bubbles stop and you’re finished. These five simple hacks are so easy that anyone can incorporate them into their routine. Happy riding!
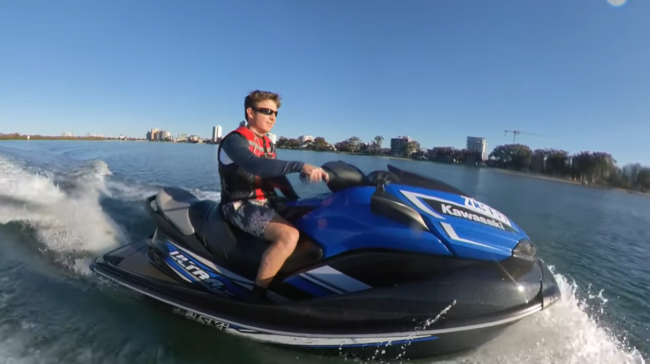
If you happened to catch The Watercraft Journal’s annual Top 10 Christmas Gifts For Jet Skiers guide (which, if you haven’t you really ought to. There’s some good stuff in there), you’ll had noticed the inclusion of these Spex Amphibian Eyewear goggles. We had been wearing them pretty regularly before the guide came out and have been using them on and off since then. Now, a few months into our testing process, we’re ready for a review.
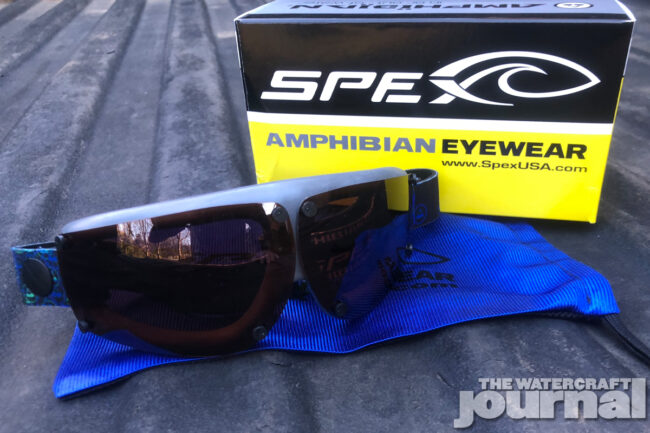
There are a few companies offering products that manage to walk the line between sunglasses and goggles, and as such require us to evaluate them using both sets of parameters. As sunglasses how do they stack up? As goggles, do they meet our certain requirements? The Spex Amphibians perform an admirable balancing act all while being smack in the center of the price chart – with a listing of $59.95 – again, making them a well-balanced entry.
As we’ve said before, the Spex Amphibians are unlike any floating sunglasses we’ve seen before. Primarily because they’re not just sunglasses. Equally, they’re not just goggles either. But rather, a blend of the two that make for a unique all-around experience, that is comfortable, lightweight and entirely geared towards PWC. While there’s plenty of unique function, there’s some admirable form in these as well.
The Spex Amphibians feature interchangeable lenses that are fastened to a soft-molded frame – made from a proprietary material called “Floatron” – that is durable, lightweight, and buoyant. Additionally, the soft frame makes them incredibly comfortable. Even a soft neoprene strap keeps the Spex taught but not too tight to your face even if adjusted incorrectly. Everyone who we had try them parroted the same thought: Dang, these are comfortable.
The polarized lenses do not sit in the frames, but in front of them, leaving a thin gap between the two. This gap lets fast-moving air circulate through, keeping the lenses from fogging up or collecting moisture. Equally, it naturally dries them after a heavy splash. On warmer days, this natural ventilation is more than welcome. But when it’s pretty chilly out, you’re going to want something a little better sealed.
When evaluated as floating sunglasses, the Spex Amphibians meet the mark: lightweight, comfortable, polarized and won’t fly off your face at speed. As goggles, they score slightly less. The frames are comfortable for sure, but the soft rubberized material does feel a little weird compared to the breathable foam used by others. It’s a minor quibble but was shared by a few of our testers.
If you’re the kinda rider who keeps extra gear, tools and other needful things, definitely slip in a pair of Spex Amphibian Eyewear. Each pair come in a mesh sock for easy storage and protection. Even if they might not be your go-to’s for everyday riding, the Spex are a fantastic backup if the weather flips suddenly, or you’ve got a second rider who forgot a pair of sunglasses. Definitely a smart choice.
We recently informed you about Alvaro De Marichalar’s journey across the globe where he began his voyage around Spain and to the Canary Islands.
We have just received word that he successfully made the long trip across the Atlantic Ocean and is in the Caribbean. Alvaro has been trekking through Saint Barth’s island, Puerto Rico, and Cuba.
He plans to then journey through the Gulf of Mexico region across Florida, Texas, and down Mexico to the Panama Canal. The next stage of his U.S. visit will take him up the west coast from California to Washington and then up to Alaska.
We imagine his riding gear will be dramatically changing as he nears the polar regions and eventually makes his way along the Alaska coast and across to Russia.
Marichalar then plans to continue back south along Japan and finally westward again on his journey back to Spain. We wish him luck and be sure to stay tuned for more information on his historic 1519 world tour.
We know we usually write about PWC, however, we wanted to let you know about an upcoming event at Clearwater, Florida’s Cycle Springs PowerSports. Block out January 24th and January 25th on your calendarsbecause the 2020 Kawasaki Good Times Demo Tour is heading to Cycle Springs PowerSports. Fifteen bikes will be available to ride from 9am to 4pm during the Kawasaki Good Times Demo Tour.
The Cycle Springs crew is stoked to host two days of the tour. Not only will bikes be available to ride, a Kawasaki Lounge stocked with Monster Energy drinks will be on site as well. The lounge will also feature live entertainment and prize giveaways. Everyone likes free stuff!
Ride the bike of your dreams and save up to $500 on select models with Kawi cash. Terms apply to the Kawi cash offer. Read the fine print on site.
According to the Kawasaki Motors Corporation press release, consumers will have the opportunity to ride models from the Ninja family, Versys adventure/touring line, Vulcan sport cruiser line, and the full Z line of naked bikes.
If you plan to ride some bikes, make sure you meet these requirements: In order to be eligible to demo a motorcycle, consumers will need to show their driver’s license with motorcycle endorsement, pass a breathalyzer test, and wear appropriate riding gear; which consists of closed toe shoes, pants, riding jacket, gloves, and a helmet (some loaner gear is available).
Years ago in college, Kawasaki motors made a lovely donation in the form of a brand-new Kawasaki ZX-6R motorcycle to the Formula SAE design team.
This unit was then used to design and build a formula one-style race car using the Kawasaki’s engine, transmission, electronics, and many other components. The experience and knowledge gained was priceless.
Kawasaki has always made tremendous strides in making donations to education and other charitable efforts. Last year, they tallied nearly $100,000 in donations to various causes such as the ALS-Association, Wounded Military Foundation, and CHIPs for KIDS toy drive.
They even donated two 2020 STX-160 Jet Ski’s as well as an Ultra LX to support charities. For full details on all of these efforts, read press-release below.
Foothill Ranch, Calif. – Kawasaki Motors Corp., U.S.A., has proudly supported several local and national charities in raising hundreds and thousands of dollars in 2019, supporting worthy causes with cash and product donations, as well as VIP racing fan experiences at Monster Energy Supercross. The charitable efforts of Kawasaki Motors Corp., U.S.A. and its employees have nearly exceeded $100,000 in value.
“The charities Kawasaki has chosen to work with are a fundamental part of our community,” said Bill Jenkins, SVP Sales and Operations. “We’re thrilled to have the opportunity to support charities such as the Boys and Girls Club of South Coast Area, the CHiPs for Kids Toy Drive, Honoring our Wounded Military (HOWM), Orange County Police Canine Association, and The ALS Association – Orange County Chapter. We have supported these organizations with both financial and product donations for their causes to help our community where we can.”
Kawasaki’s efforts helped to raise $45,000 for the Boys and Girls Club of South Coast Area by donating two 2020 Jet Ski® STX®160 personal watercraft and two VIP Monster Energy Kawasaki Team Supercross experience. The items were auctioned off at the Boys and Girls Club of South Coast 2019 Great Futures Gala.
With the holidays fast approaching, Kawasaki employees always make sure to support those in need by providing toys and other gifts for the California Highway Patrol’s ninth annual CHiPs for KIDS toy drive. In 2019, Kawasaki team members stepped up once again to help deliver a happy holiday to families in Southern California.
Amongst the many important charitable causes Kawasaki supports is the Honoring Our Wounded Military Foundation. For 2019, Kawasaki donated a 2019 Jet Ski® Ultra® LX for the Honoring Our Wounded Military live auction, that helped to raise $40,000, which enabled the foundation to achieve more than $195,000 in donations for 2019.
The ALS Association’s Walk To Defeat event became close to the hearts of many Kawasaki employees in 2019, with many participating on Team Tamura in the ALS Association — Orange County Chapter event. Kawasaki helped to raise more than $1,300 for the organization in tribute to former Kawasaki President Yoshi Tamura, helping ALS Association — Orange County Chapter raise more than $283,000 in 2019.
Kawasaki also raised $1,500 for the Orange County Police Canine Association in 2019.
And as 2019 comes to an end the Kawasaki Motors Corp. Charitable Match Contribution Program employees have additionally raised nearly $10,000 for various charities serving an array of causes across the country.
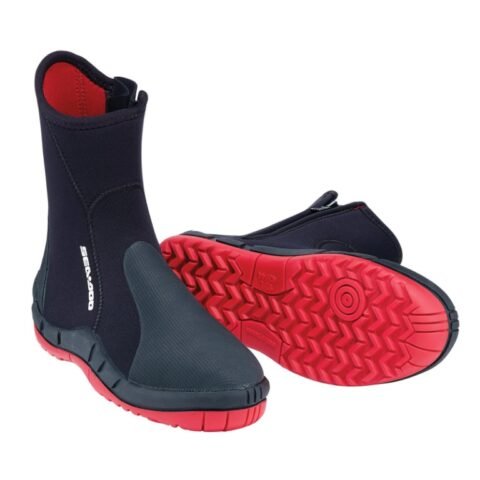
Winter is upon us and we still want to participate in our favorite water activities and Jetski Safaris have provided us with expert knowledge about preparing for winter jet skiing. The water and air temps have dropped considerably so we have to make changes to our gear and what we wear on the water. If you’re new to hitting the water during winter months, this means it’s time to go shopping for the appropriate cold-water gear.
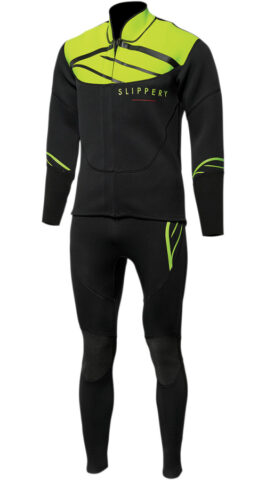
Seek out a reputable dealer for all of your cold-water needs. Depending upon where you live, this will dictate what millimeter wetsuit to wear. If you’re like many others, wetsuits ranging from 2mm to 5mm and spray jackets will be taking up room in your closet.
Booties, gloves, a beanie, or balaclava are also cold-water necessities. 5mm booties with a grippy sole are what are needed for a good safe ride. 3 to 5mm gloves should be enough to keep your hands warm and able to give you what you need to hold onto the handlebars. Goggles or glasses are a good line of defense against the spray.
Try on everything, including your PFD and move around to loosen up and help you get the feel of extra neoprene. This will help make sure that when you take a ride, you’ll be ready.
Now that the gear is purchased, it’s time to learn about the weather and some good apps with websites to keep you in the know in real time. Extrapolate data from a few apps and average them out and you will get a good idea of the water and weather conditions. Windy,windguru.com, and xcweather.com(UK) are three top apps to download and compare data.
Weather is one of the most important things to check before heading out and it’s also a good idea to keep an eye on the forecast while riding. Conditions can change in an instant and when you add the cold water and cold air temps to the mix, this is a recipe for disaster if you aren’t prepared. Fatigue sets in much quicker during the winter months. Depending on the direction of the winds, a rough sea state may occur, forcing you to have to expend extra energy as you work to control your ski. Take frequent breaks when the opportunities arise, eat a snack, and try to get warm.
Before you even head out, make sure your ski is in good operating condition before heading out. Look over the hull for damage, check the oil, look inside the engine bay, and check the engine mounts by trying to lift the engine. If there’s any movement, you may need new mounts or maybe a couple are loose. Also, look for water in the compartment. Use the rule of 1/3rds with fuel when heading out. 1/3 fuel out, 1/3 fuel to return, and 1/3 for emergency backup.
A safety kit is of utmost importance. A VHF radio is a big deal to have on the water and it should be attached to your person at all times. The radio could save your life if you get bounced from your ski and separated. Take a VHF course so you know how to use the radio.
Below is a list of other items that should be carried aboard your PWC at all times.
A tow line is another addition to carry aboard
An inshore flare pack
A small anchor and line should also be part of your kit.
A knife with a serrated edge.
Small First Aid Kit
Spare Killcord
Always leave your float plan with someone so they can for help if you’re well behind schedule. Take a cheap cell phone in case you need to let someone know you’re running late.
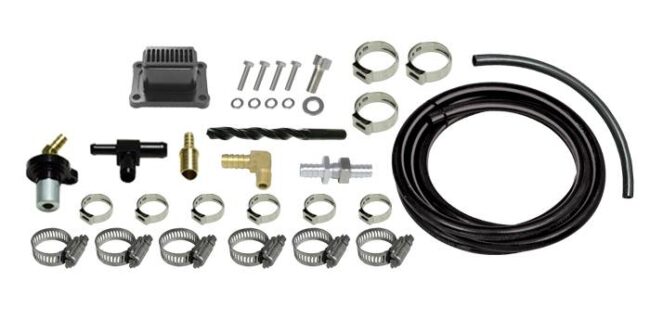
If you already have your hands on a brand new 2020 Yamaha SVHO model or are planning on getting one, then RIVA Racing has just released a few engine cooling upgrades that you might be interested in.
Chances are if you plan on modifying your new WaveRunner, then you are familiar with the pump design changes for all 2020 SVHO models. In order to support the ever-changing market, Riva has also designed some fresh new items that are compatible with the latest SVHO WaveRunners.
This includes a new Billet Pump Strainer itself as well as the complete Engine Cooling Upgrade Kit. The full pro-series kit includes the new pump strainer as well as all necessary hoses, fittings, and hardware to install the kit.
These upgrades of course are proven to increase the performance and reliability of the engine’s cooling system. By utilizing the high flow pump strainer and water jacket fittings, the increased water flow gives necessary engine protection when modifying your platform for increased power and performance.
Items plan to become available in February so act soon to retain yours and as always be sure to take advantage of free shipping on all qualifying orders.
For 2020, the upcoming fishing trips out of Doubtless Bay are so popular that they are quickly selling out. The initial trip has already sold out and so adventure fishing has planned another trip for May.
The April 30 – May 3, 2020 trip is on sale and if tickets last, the price is $595 per person which includes a 4-day luxury stay with all meals. This social trip will be a great opportunity since this time of the year offers good fishing in New Zealand.
Check out the full details below or head over the link above to sign up. Note that availability will change as people continue to book trips.
4 day Jetskifishing social trip May 2020, don’t miss out!
The 4 day personal watercraft social trip includes Thursday, Friday, Saturday and Sunday.
If you own a PWC rigged for fishing, join us, all brands are welcome.
Package price per person $595 includes your 4 day luxury stay and all meals.
($200 deposit required per person) Date: February 30th April to 3rd May 2020 Location: Doubtless Bay, Far North Limited availability (Children full price and must be at least 15 years of age to register a spot for the social trip)
P.S. This payment is only your booking deposit and can be paid by credit card, full trip costs listed above and your final payment is due beginning of March 2020.
* No refunds, credits, transfers or exchanges, as other Jetskifisho’s will miss a spot once you book!


 Every day, people around the world wake up and start brewing a pot of coffee. After drinking their morning coffee and taking a shower, they proceed to put on some clean clothes.


 Seek out a reputable dealer for all of your cold-water needs. Depending upon where you live, this will dictate what millimeter wetsuit to wear. If you’re like many others,