YouTube content creator Jiggin’ with Jordan puts things into perspective in his video about helping the victims of Hurricane Ian. The hurricane was initially forecast to make landfall where his mom lives on the water, putting her at ground zero.
Emotions were running high with her in the cone’s bullseye. The track shifted and hit a few hours south. Jordan was emotionally tied to this storm and loaded up a trailer after cleaned up some of the mess at his place. The dude is full of gratitude. He still has a home with a few downed trees and a little flooding.
Jordan loaded his trailer with supplies, including generators, gasoline, tarps, and other goods for the people devastated by the storm. He headed to southwest to meet with Captain Marco to see where they could be of service at the real ground zero.
hey traveled by boat through canals and other waterways, passing the wreckage of boats, homes, bridges, and other structures that were wiped out by the massive storm surge and winds from Hurricane Ian.
Jordan needed someone like Captain Marco to navigate the waterways in southwest Florida. They motored to Captiva, Cape Coral, and Fort Myers Beach, the true ground zero and dropped off fuel and other supplies to the people in need.
Jordan and the guys have awesome attitudes making them perfect for bringing help and moral support to the people. It’s tough and the video is very sobering. We’re grateful for guys like Jordan and others who help in a time of need. As someone who has lived in FLA and NC for over 30 years combined and been through some rough hurricanes, I felt this video to my core.
Pennzoil announced the release of a new line of engine oils for outdoor vehicles at the SEMA Show. The oils are formulated for outdoor vehicles in North America. These include ATVs/UTVs, watercraft, motorcycles, and snowmobiles.
The synthetic has been specially formulated for the extreme conditions these recreation vehicles are often subjected to. The VP of Lubricants Marketing at Shell Lubricants said they wanted to take the technology that Pennzoil customers are accustomed to and provide the same for those who love the outdoors.
Read the complete press release below: Pennzoil® has announced the new Pennzoil Outdoors line of engine oils designed for the vehicles of outdoor enthusiasts at the SEMA Show. The new portfolio includes engine oils formulated for outdoor recreation vehicles in North America including ATVs/UTVs, watercrafts, motorcycles, and snowmobiles.
“Whether it’s enjoying the backcountry on an ATV or enjoying time boating with the family, we’re excited to bring this new line to outdoor enthusiasts to give them peace of mind during their adventures,” said Bree Sandlin, Vice President of Lubricants Marketing at Shell Lubricants. “It’s important for us to continue to innovate to meet the needs of our consumers. We’ve taken the technology that Pennzoil customers are accustomed to in their passenger cars and formulated these small engine oils to provide the same performance and protection for those who love the outdoors.”
ATVs/UTVs, boats, motorcycles, and snowmobiles are among the most popular outdoor recreation vehicles for exploration, each driven by traditionally smaller engines that require unique engine oil formulations. The current full synthetic offering from Pennzoil is well suited for the often-extreme conditions of these recreational vehicles, allowing the Pennzoil technology team to translate these benefits for the Pennzoil Outdoors portfolio.
New Product Details:
Pennzoil ATV/UTV SAE 10W-40 Engine Oil:
Pennzoil ATV/UTV engine oil has wet-clutch compatibility and a smooth-shifting, consistent clutch feel to help riders focus on the fun and encounter fewer bumps along the way
The engine oil cleans engines in dusty environments and protects in extreme temperatures
Suitable for use where API SN and JASO MA2 specifications are required
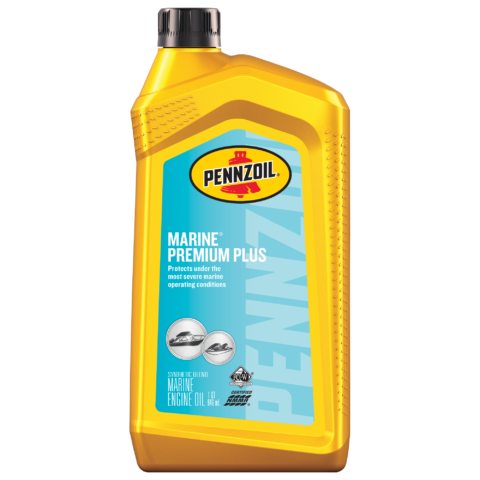
Pennzoil Marine 4-cycle SAE 10W-30 and SAE 25W-40 Engine Oil:
Pennzoil Marine ® engine oil is formulated with performance-boosting additives, which target critical needs in marine engines to provide greater fuel efficiency as compared to 2-stroke marine engine oil
Surpasses the American Petroleum Institute’s (API) requirements for SI, SL, and SM specifications and exceeds OEM requirements and FC-W® Catalyst Compatible specifications, and meets all 4-stroke outboard manufacturer’s requirements
Can be used in inboard, outboard, and stern drive engines
Pennzoil Motorcycle SAE 10W-40 Engine Oil:
Pennzoil Motorcycle engine oil creates more efficient power delivery for motorcycles and reduces engine noise and vibration for an enjoyable ride to enhance the riding experience
Optimizes wet-clutch performance, protects in extreme heat and low temperatures, and provides enhanced responsiveness and maximum acceleration to keep riders comfortable on the road
Meets the requirements of API SN and JASO MA2 specifications which are standard for most American, European, and Japanese motorcycles including V-Twin, 4-stroke engines found in high-performance and race-tuned bikes
Pennzoil Motorcycle SAE 20W-50 Engine Oil:
Pennzoil Motorcycle engine oil provides smooth clutch engagement, keeps the engine clean, and reduces engine noise and vibration for a smooth ride
Formulated specifically to prevent dirt particles from sticking together to form deposits and protects standard air and water-cooled 4-stroke motorcycle engines with integral gearboxes and wet clutch assembly
Meets the API SL and JASO MA2 specifications which are standard for most American, European, and Japanese motorcycles including V-Twin, 4-stroke engines found in high-performance bikes
Pennzoil Snowmobile 2-Stroke Engine Oil:
Pennzoil Snowmobile engine oil boasts a low-ash formula to help prevent spark plug fouling, ring deposits, and combustion chamber deposits, and prevents exhaust power valve sticking and piston scuffing
Provides exceptional cold-flow performance and overall helps keep the engine clean and running efficiently
Suitable for use where API TC, JASO FD, ISO-L-EGD specifications are required
Radinn Electric Jetboards has a cool video series titled Make Waves and they’ve come out with a new video collaboration with The Missfits, who are twins Alie and Liza Toppa.
The Toppa’s chase waves along the Eastern Seaboard, sharing stoke along the way. Their mom got them into surfing when they were eight years old and living in Newport, Rhode Island. Now they hope to capitalize on their love for the water and board sports by building their Missfitts brand.
They want to create a community of Missfits who like to have fun and dare to be different. Their mission to take surfing, skating, and sailing to the masses extends from Rhode Island all the way to south Florida. The ladies are looking to make friends and meet cool people while enjoying board sports.
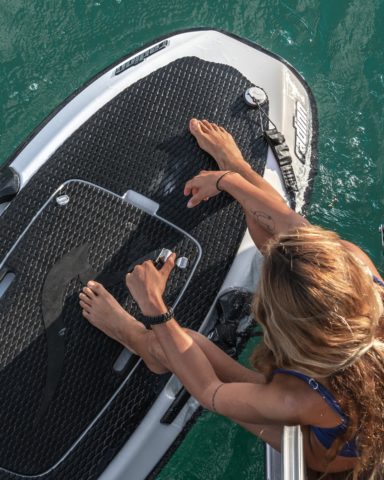
Riding Radinn Electric Jetboards has added another dimension to their surfing. No waves no problem because waves aren’t needed to get moving on a jetboard. Any open water will do, and you make your own waves with Radinn Jetboards.
Alie and Liza love the fact that they don’t have to wait for swell or even be in position to catch a wave. With a Radinn Jetboard, you can just squeeze the remote and go! Keep up with The Missfits brand on Instagram and follow while you’re at it. They’re always making waves!
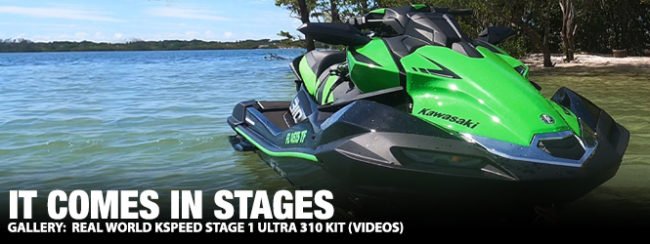
The day that KSpeed announced that they had “cracked the code” on the 2022 Ultra 310 ECU was the same day I placed my order for their 2022+ Stage 1 Kit. The kit is relatively easy to install, and includes just three components – a 2-degree pump wedge, a top-loading intake grade, and a remapped ECU.
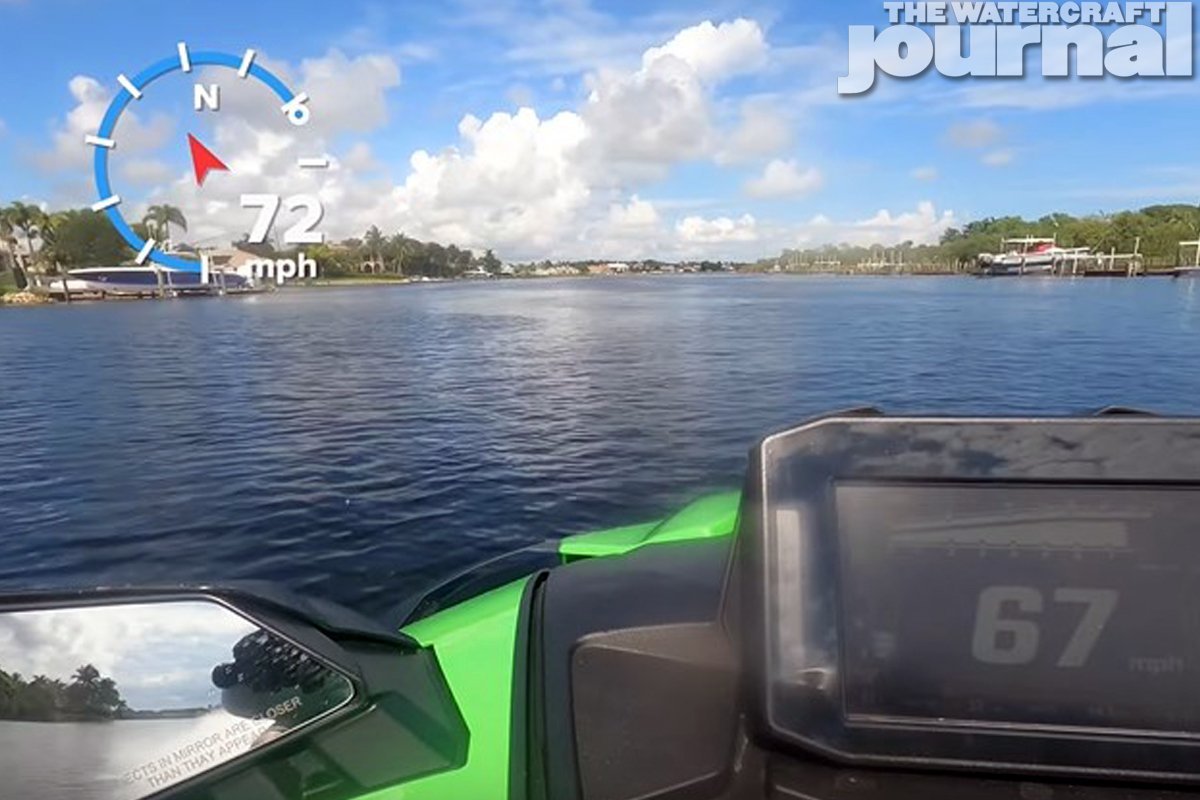
On my Ultra 310 LX-S, during more than 5 hours of testing, I saw a consistent sustained GPS confirmed top speed of 72 mph @ 7950 RPM with 15lbs of boost – a 5mph improvement over my stock top speed of 67 mph. Acceleration and hook-up were greatly improved in both inshore and offshore conditions.
For those interested in operating parameters, my water temp was 132 degrees, oil temp 239 degrees, and intake temp was 104 degrees. The outside temperature was 90 degrees, and the ocean water temp was 81 degrees Fahrenheit. My ski has 60 hours on the meter, and is running Kawasaki KPO 15W-40 full synthetic oil.
My “real world” testing was done in salt water, with 50 lbs of gear, three-quarters of a tank of fuel, and a 200lb 6’3” rider with a helmet. While these conditions are not ideal for logging bench marked competition-level speed runs, they are typical conditions I encounter during weekly rides, and paint a solid picture of how the ski will perform for most recreational riders.
You don’t buy an Ultra 310 to compete in hydro-drags or race around the buoy course- you buy an Ultra 310 if you’re someone who wants a solid made-in-USA (assembled in Lincoln, NE since 1981) deep-v fiberglass ski designed to plow through offshore chop. The KSpeed Stage 1 kit serves to enhance the Ultra 310’s offshore abilities even further.
Previous Ultra 310 generations could be easily fitted with a relatively cheap “SCOM” or speed control override module. The latest generation has a GPS-based speedometer and advanced CANbus engine management system that cannot be modified or “cheated” with a SCOM.
The GPS chipset for the speedometer is integrated into the “meter control unit” which is not a user-serviceable item. As of this publication, the only way to remove the factory speed limiter on the 2022+ Ultra 310 Jet Skis is with a remapped KSpeed ECU.
After I placed my order, KSpeed was very quick to fulfill and ship. I received multiple update emails throughout the process, and it only took 5 days for my order to arrive via DHL delivery. Marty James with KSpeed was very responsive and helpful in responding to my questions and concerns.
If you own a set of Allen wrenches and a basic metric socket set, the entire KSpeed Stage 1 kit can be installed in less than an hour. I chose to purchase an additional ECU for my ski, rather than mail my stock OEM one back to Australia for programming. Most buyers will likely not opt to spent the additional $1200+ for an extra ECU, but I wanted the option to go back to my stock setup and tune.
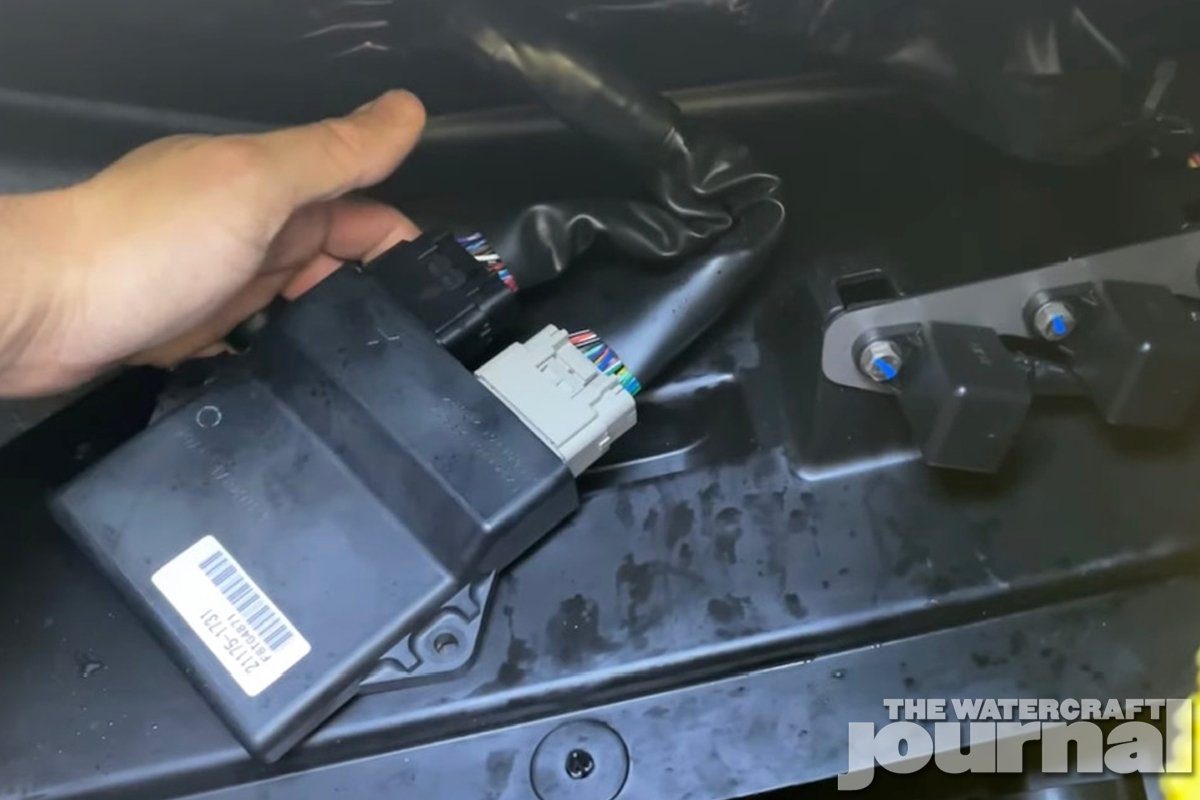
Swapping the ECU is the easiest of the 3 components, taking about 5 minutes to complete. Make sure your safety lanyard and immobilizer key are removed. Next, pop out the plastic push-rivets holding the ECU and relay panel in place- this is located in the front compartment on the starboard (right) side of the ski.
The ECU is held in place with two 10mm bolts: remove these two bolts. Next, there are two 39-pin connectors one grey and one black. Carefully unclip both ECU connectors and remove your OEM stock ECU from the ski. Make sure to grip the connectors and not the wire harness itself.
Once your remapped ECU is securely installed and both the grey and black 39-pin connectors are reconnected, you must now initialize the ECU. This can be done by inserting and removing your immobilizer key three (3) times – allowing the main meter display to boot up and shut down each time.
Make sure you are outside for the final step. Once you have completed the initialization, insert your key and verify that the red “GPS signal” light on the left side of the dash panel goes out. Then start up the ski and let it run for no more than 10 seconds. Blip the throttle a few times, and then you are good to go.
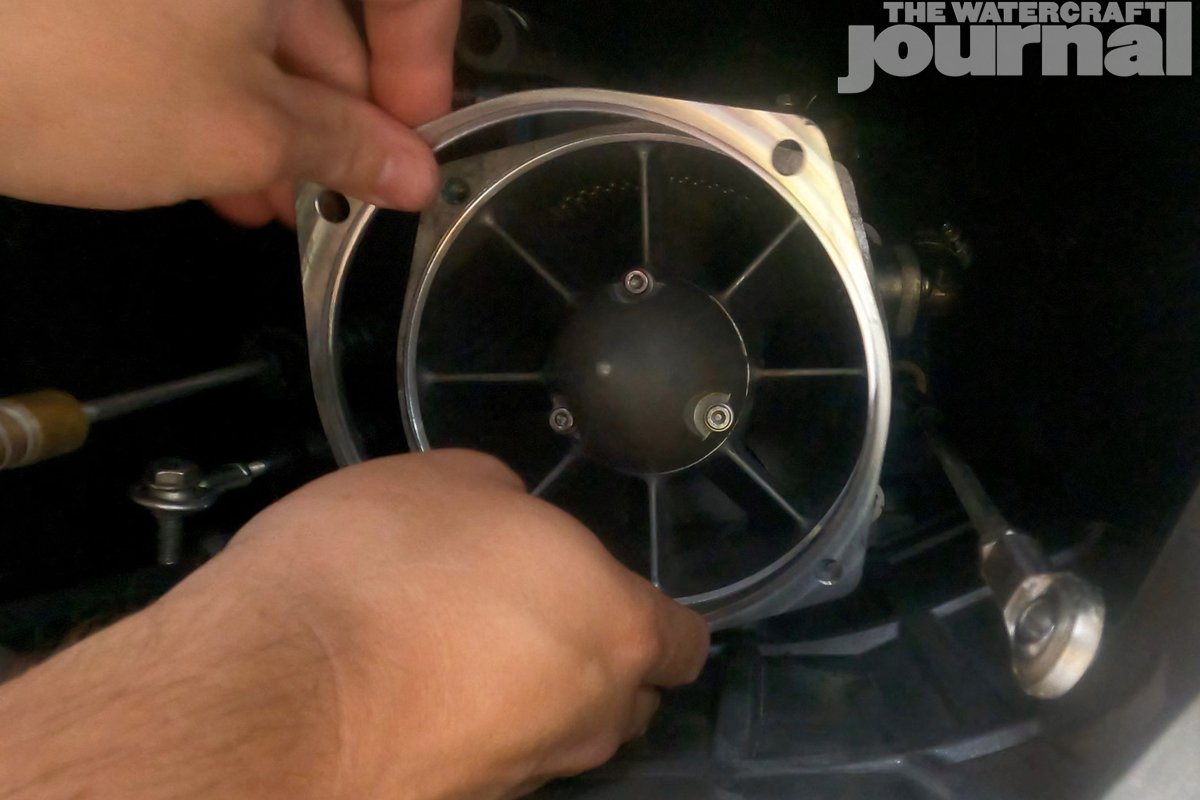
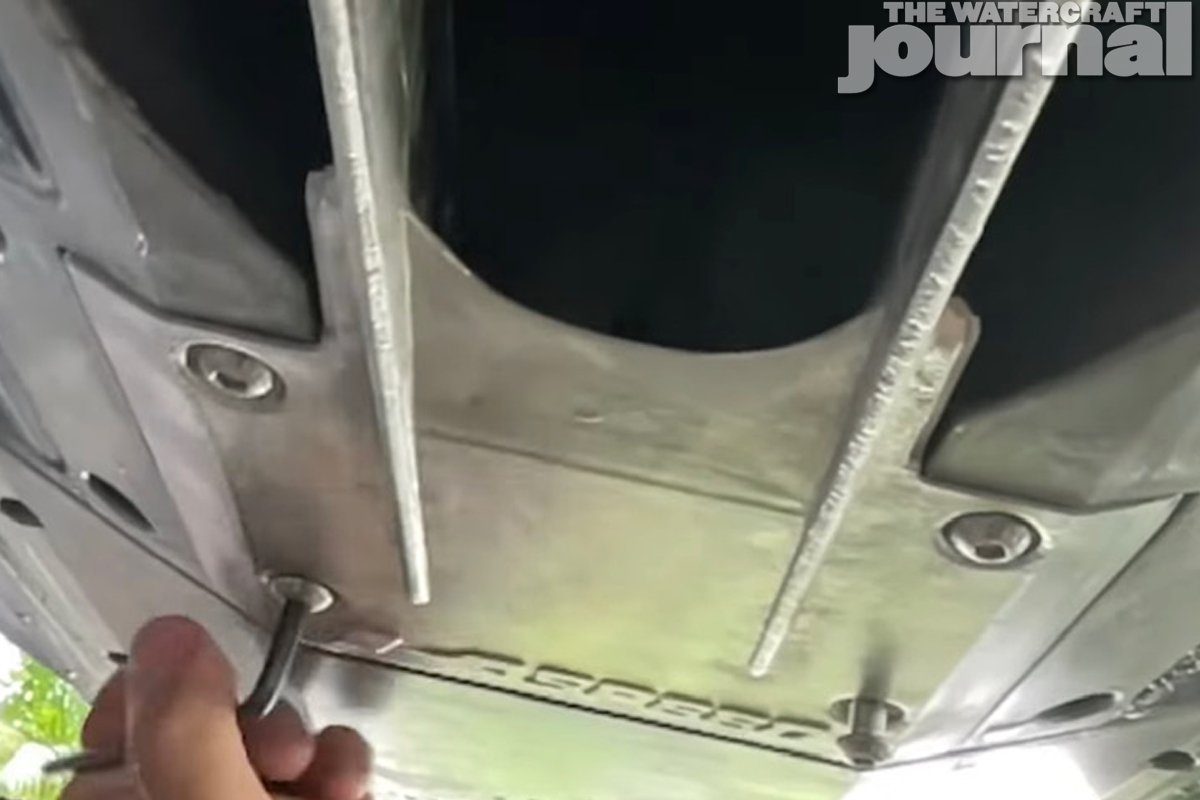
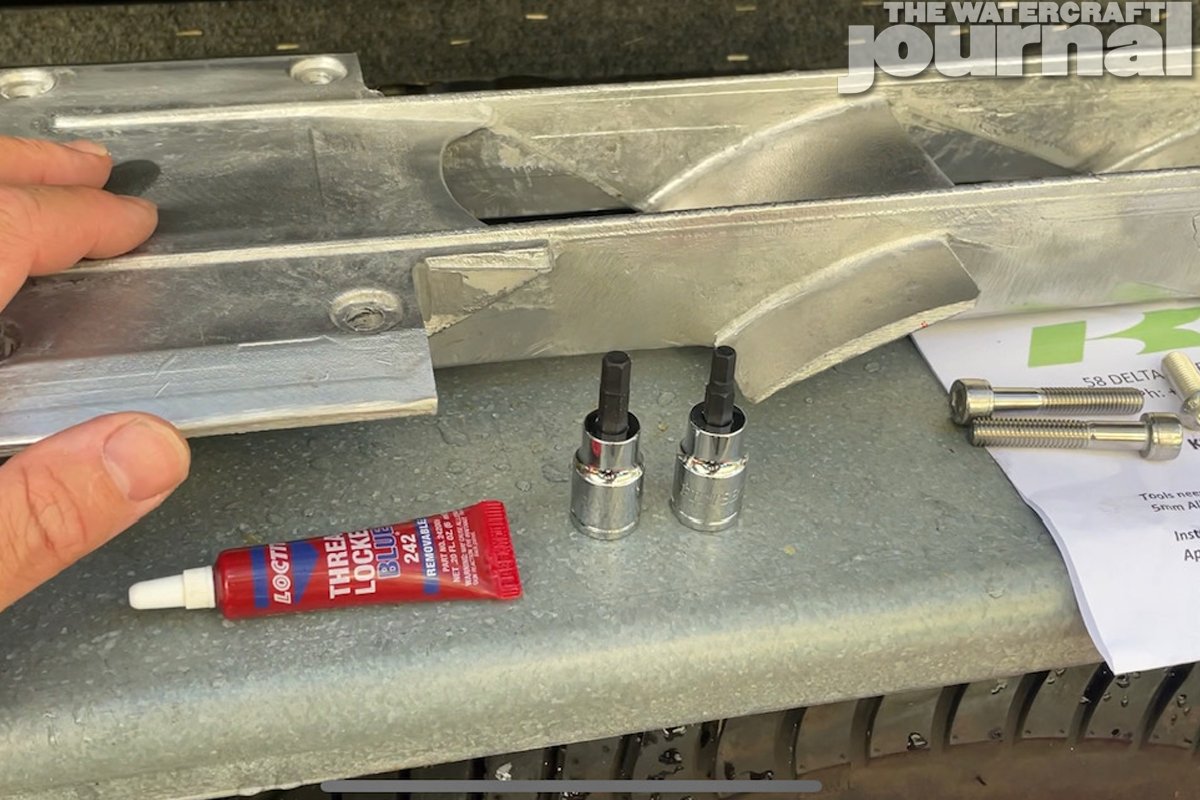
Installing the intake great requires 5mm and 6mm Allen wrenches, and a bottle of blue removable Loctite. The stock grate is secured with six (6) 6mm Allen bolts – remove these and the accompanying washers.
After removing the stock grate, line-up the KSpeed grate underneath the ski, and loosely install the included hardware. Make sure to add a small dab of blue Loctite to each bolt before threading them into the ski.
Two (2) 6mm Allen bolts are used to mount the front of the grate, while four (4) 5mm Allens are used for the rear part of the grate. Note that the stock bolts and washers are not re-used for this installation.
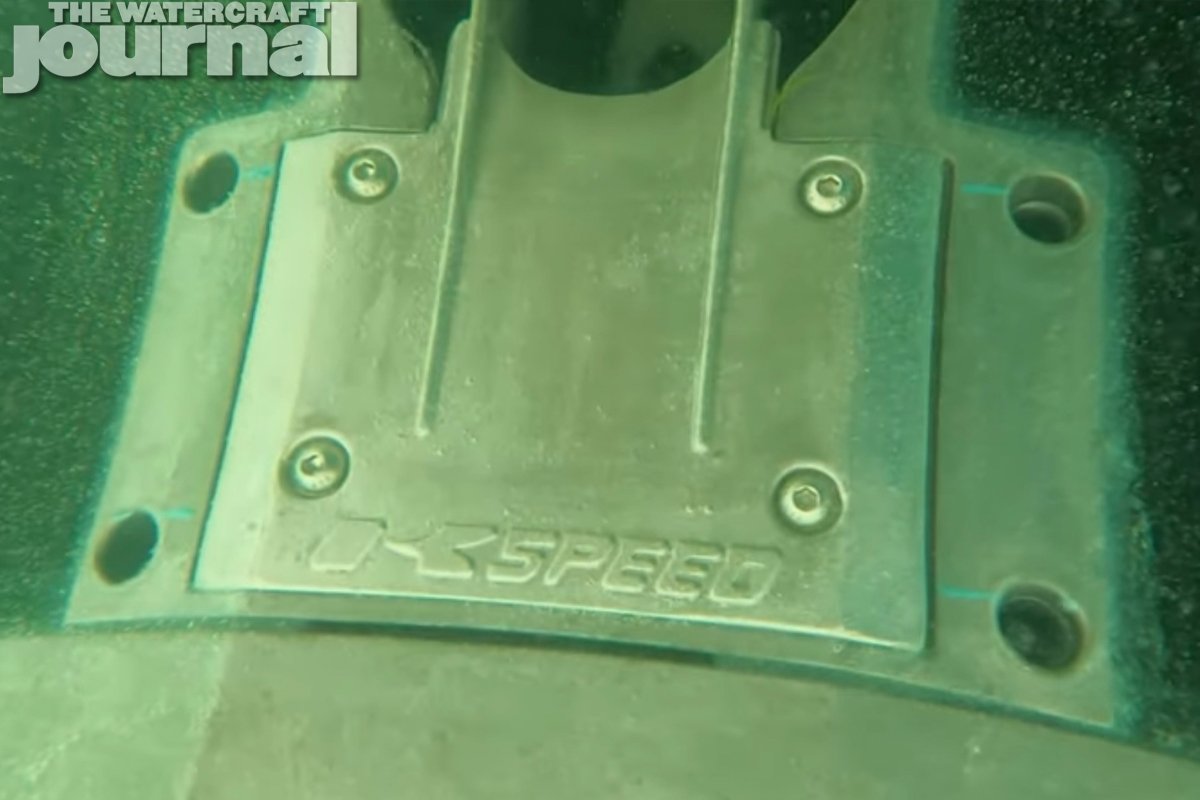
My testing revealed that the KSpeed grate is about 9.3 oz lighter than the stock unit, and provides better hole shot and less loss of speed in rough conditions. After numerous launches, I found that there is no discernable cavitation or loss of traction when launching from a standstill.
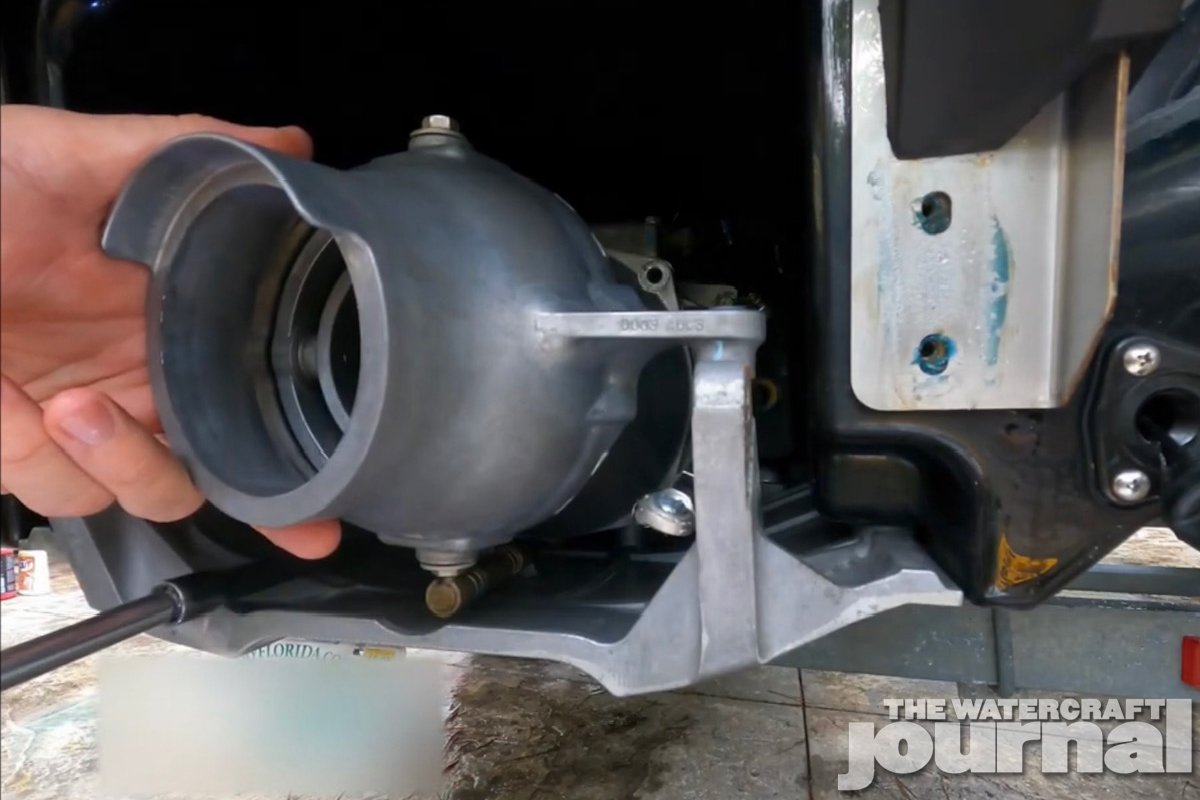
The 2-degree pump wedge is the most involved to install, but can be done with just a few basic tools. The entire jet pump does not have to be removed from the ski- just the exit nozzle. KSpeed recommends removing the ride plate for this process, although I have found that step is not necessary.
The first step is to remove the rear fold-down step (four 5mm Allen bolts), followed by detaching the reverse bucket (two 12mm bolts with washers and bushings). You then must disconnect the steering and trim linkages (10mm bolts), followed by the bilge pump discharge hose. There are four 12mm bolts holding the jet pump exit nozzle in place – remove those 4 bolts using a 12” extension on your 3/8 ratchet.
When installing the aluminum pump wedge ensure that the thick part of the wedge is at the bottom of the pump, and the thin part is at the top. Make sure that the text stamped onto the wedge “KSpeed 2 Degree” is facing the jet pump or toward the front of the ski
Two of the OEM 12mm bolts that you removed will be re-used to secure the top of the exit nozzle, while two new longer 13mm bolts provided with the Stage 1 kit will be used to secure the bottom (now thicker due to the wedge) part of the nozzle.
Ensure that you use non-permanent blue Loctite when securing all bolts. It is a good practice to make sure that all linkages, bushings, and spring-loaded quick-connect fittings are thoroughly greased with waterproof marine grease upon reassembly.
The most difficult part of this process is recalibrating the trim and steering linkages to accommodate the additional thickness of the pump wedge. I found that using a digital caliper made this process easier. If your initial adjustment is off, you can make additional adjustments in the future without having to remove the jet pump again.
The increased bow rise offered by the 2 degree wedge is noticeable even at slower speeds. Getting the bow higher at neutral trim makes for a drier and more comfortable ride by allowing the Ultra 310 to pass more easily over wake from boat traffic in slow-speed and no-wake zones.
https://youtu.be/ZeNTMpsuXak
Overall, I am very pleased with the performance of the KSpeed Stage 1 kit, and would recommend it to anyone looking to take their Ultra 310 to the next level. There are no major modifications needed to the engine, exhaust, intake, supercharger, intercooler, catch can, jet pump, BOV, or cooling system. The modifications you must make for this kit are 100% removable, allowing you to return your ski to stock condition without much effort.
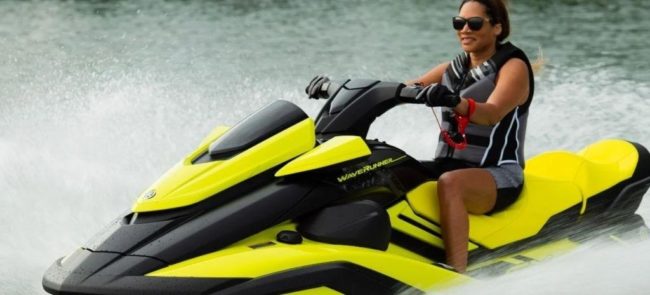
Let Cycle Springs Powersports order your 2023 Yamaha WaveRunners or Superjet. You can order any 2023 model WaveRunner by going on the site and picking your new watercraft. Request more information, apply for financing directly from the website. You can also grab an insurance quote while you’re there.
The End of Season Sales Event is going on until December 31st, so you can get in on that as well and save big with APR financing as low as 4.99% for 36 months. This is about as good it’s going to get for now, so order your new WaveRunner. Cycle Springs has the JetBlaster, the PWC made for those who like to get out there and shred.
This sporty ski will have you throwing spray as you blast across the water. It is listed at $10,699, which is pretty good price point for this ski. If you’ve got big money and desire luxury and high performance while you’re on the water, then the Yamaha FX SVHO with audio is for you. This has the Connext “Infotainment” touchscreen hub, with features like GPS-ready mapping, Bluetooth technology, audio controls, and much more.
It also offers tons of storage so you can pack some gear and spend the day on the water without a care in the world. This one is priced at $18,899. If you prefer to stand up, order the 2023 Yamaha SuperJet and get your freestyle on! These things are fun and priced to move, coming in at $10,499. Head over to the Cycle Springs website and check out these and all the other models available for ordering.
When it comes to performance parts for the 2022 and 2023 Kawasaki Ultra 310 JetSki, look no further than Kspeed out of Brisbane, Australia. “We are team of experts that focuses purely on Kawasaki 4-stroke JetSkis. We work, race, ride, modify and best of all – we go to sleep at night dreaming about them.”
The team at Kspeed got their first 2022 test machine in July 2022, and spent about 3 months “cracking the code” on the new ECU and engine management system. Kspeed’s Stage 1 kit for the previous generation of Ultra 310s was the culmination of nearly a decade of research and development.
These dyno confirmed, race tested breakthroughs in tuning and component design are now available for 2022+ Kawasaki Ultra 310 Series Jet Skis. Kspeed’s initial bench marking of their new Stage 1 was done on a 2022 310X, which logged a top sustained top speed of 73.3 mph, and a 0-65 mph time of 5.37 seconds.
The stock speed of the same 310X was logged as 66.2 mph with a 0-65mph time of 6.97 seconds. With those results, the Stage 1 kit yielded a 7.1 mph improvement and shaved 1.6 seconds off the 0-65mph time.
The $922 USD kit + shipping (price fluctuates with exchange rates) includes a 2-degree aluminum pump wedge, a top-loading intake grate, and an ECU reflash. This is not a grab bag of random components from other manufacturers- these are all high-quality Kspeed branded components that have been developed and tested in-house.
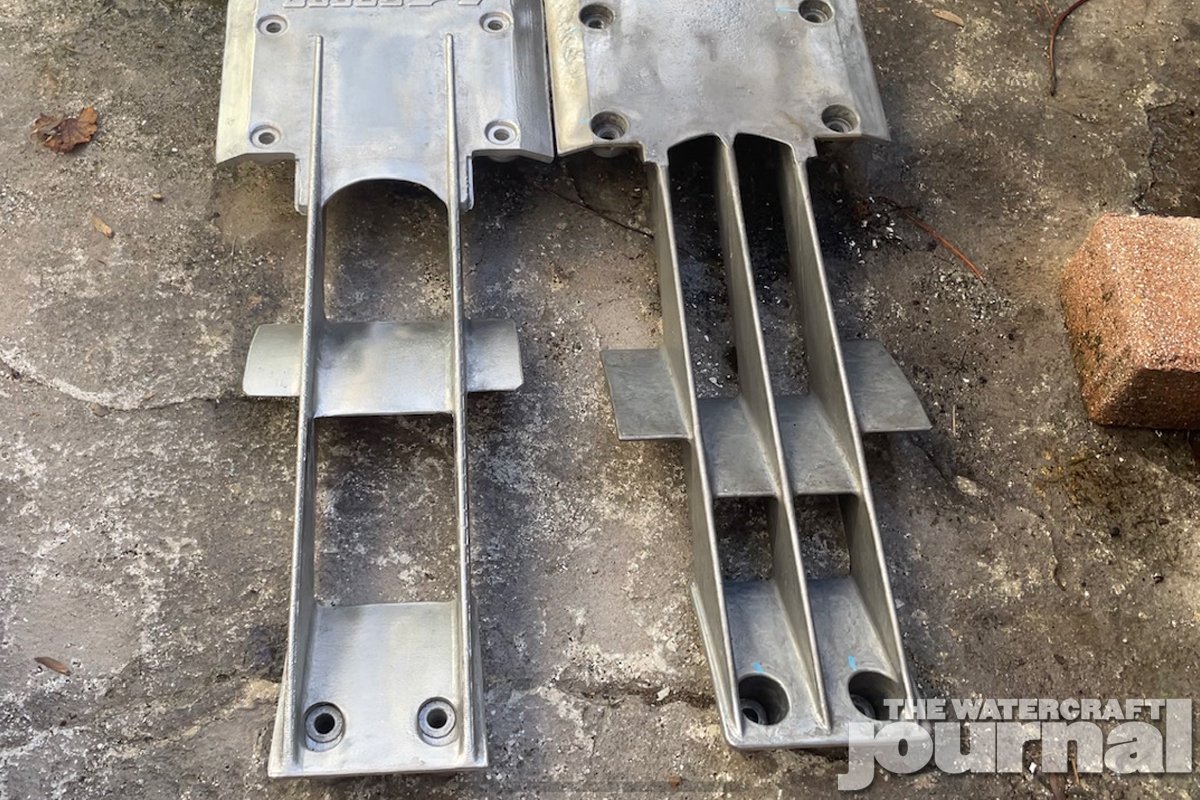
The KSpeed intake grate lacks the restrictive grilles and boxy geometry present on the stock grate. By changing the angle of water entry, Kspeed can get more water into the pump, which improves hook-up in all conditions.
The 2-degree aluminum wedge is installed between the jet pump body and the exit nozzle. Rather than bending the water flow by trimming the nozzle and slowing down the flow of water slightly, this wedge allows 2-degree positive trim in neutral position.
With the factory speed limiter removed, the tuned Kspeed ECU delivers up to 10% more horsepower than stock. Riders will notice increased acceleration as well as a decrease in throttle lag and a faster launch off the line.
While the reflash service itself is included in the purchase price of the Stage 1 kit, buyers must first mail their current stock ECU (with both the Black key and the Yellow SLO key) into Kspeed, at their own expense – or purchase an additional ECU.
The following procedure has been adapted from the official factory method outlined in the OEM Shop Manual for the 2022 Kawasaki Ultra 310. The instructions provided in this article are “by the book.” Different climates require different oil types – please refer to the table in your user manual to determine the correct oil weight for your climate. Synthetic 10W-40 is suitable for most climates, and that is what will be used in this tutorial.
The 2022-up Kawasaki Owner’s Manual, under the “Maintenance and Adjustments” section (pages 158-160) indicates that an oil change should be performed every 25 hours under normal usage. You should change your oil each year even if you do not hit the 25 hour threshold. The manual also indicates that the oil filter should be changed every 100 hours. This author changes the oil and filter every 25 hours.
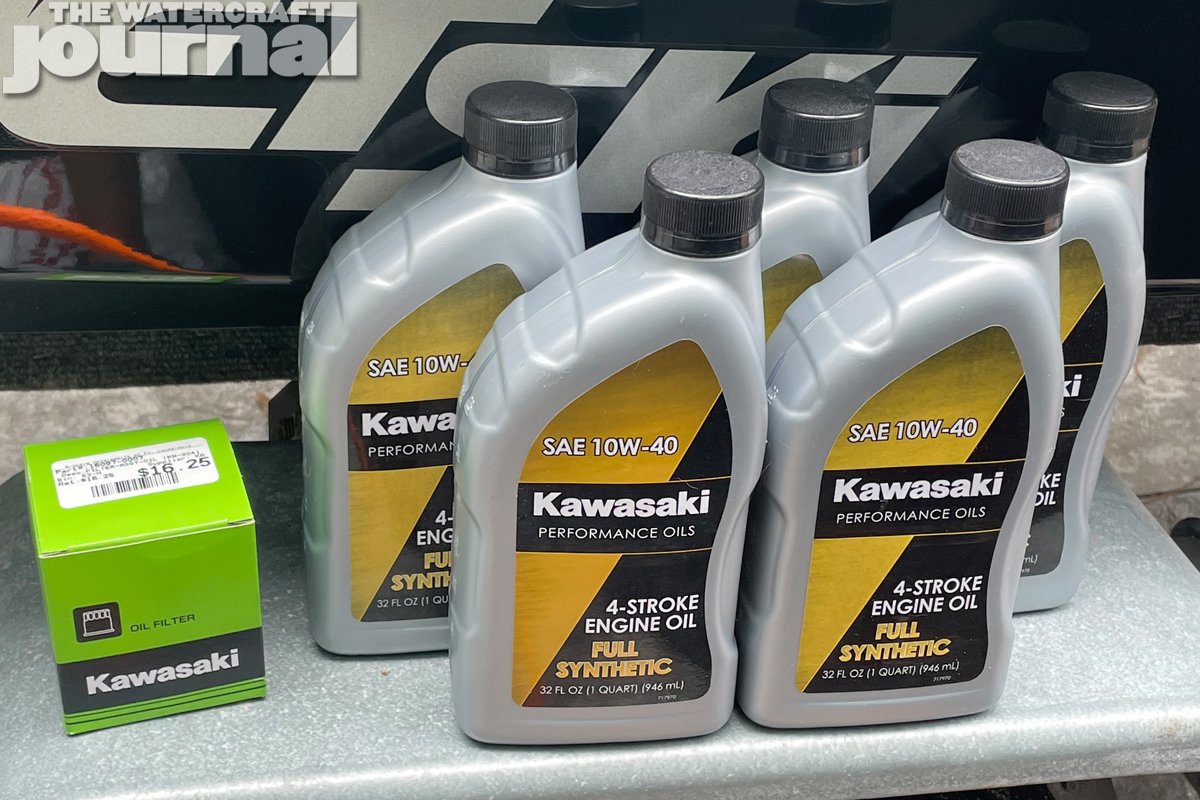
Before starting, ensure that you have the following tools and material available: 5 quarts of Kawasaki 10W-40 full synthetic oil, a Genuine Kawasaki Oil Filter (PT# 16097-0008), a vacuum oil extractor (the author uses an air powered auto-extractor), a small 9-inch level (to ensure that the engine is level), an oil absorbing pad (or paper towels), an oil filter wrench (band type or socket type), and a 10mm socket or nut driver.
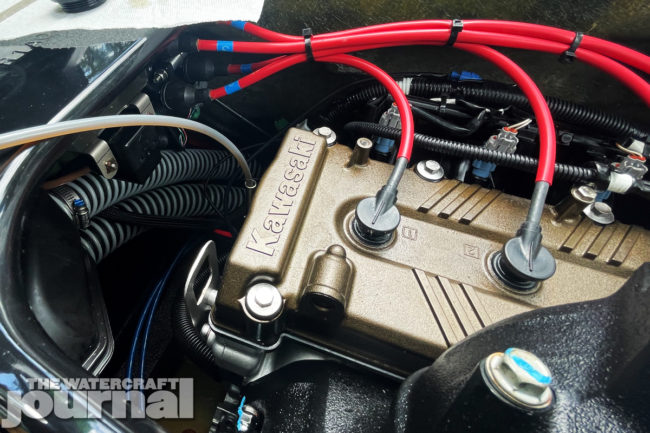
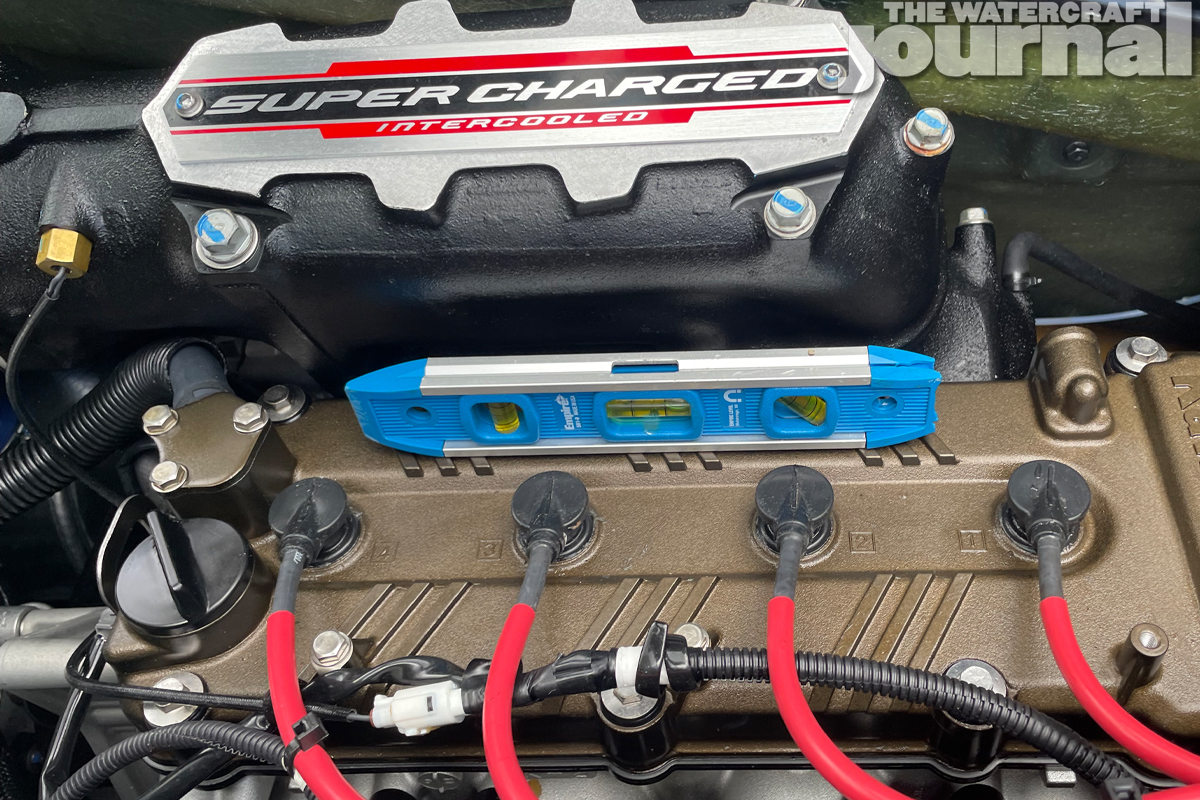
First, remove your seats and place them in a safe place. Next, using your 10mm socket or nut driver, remove the 6 stainless steel acorn nuts and washers holding your engine cover in place. Make sure to keep all hardware accounted for. Remove the engine cover by pulling upwards, and place it away from the ski. (Be sure not to knock the little rubber cap off the supercharger fogging port!)
Place your level on the valve cover of the engine, and lower or raise the tongue of your trailer until the engine is level. Ensure that you level the watercraft port to starboard as well as fore to aft. Ensure that you are in a well-ventilated area, and start your ski’s engine. Connect your hose to the engine flush port (the dark grey flush port on the far-left side) and allow the engine to idle for about 2 minutes.
Never run your ski without cooling water for more than 15 seconds. Always ensure that your engine is running before the water is turned on. Once the engine has had ample time to warm up (you can monitor the oil temp rising), turn off the water first, then stop the engine. Now remove the dipstick and oil filler cap from the ski, and place them on a clean paper towel or surface.
Prepare your vacuum extractor, and snake the extraction hose down the dipstick tube. You should be able to extract about 4.8 US quarts of oil from the ski. The manual states that the ski has a total capacity of 5.8 US quarts – you will not be able to extract all of the oil from the engine. Make sure that you don’t allow any foreign material like dirt or sand to enter the engine. This can cause engine damage.
Some videos on the internet recommend punching a small hole in the top of the oil filter so that oil can drain back into the engine. Do not do this! This method may allow sludge or debris trapped in the filter to flow back into your engine. This method is not recommended by Kawasaki.
Place an oil absorbing pad underneath the filter, and proceed to loosen the filter by turning it counter-clockwise with your filter wrench. Remove the filter briskly, and try to limit the amount of oil that spills out. Clean up any spilled oil with absorbing pads (or paper towels) and dispose of them properly. There is a small catch-tray under the filer. Try to place paper towels or an oil absorbing pad in this area. It is a good idea to wear disposable gloves while doing this.
*The Kawasaki manual suggests removing the intake manifold for easier access to the oil filter, however this step is unnecessary and adds an additional 30-to-45 minutes to the job.
Pour a small amount of fresh oil into the new filter to prime the filter element. Next, using your finger, run a small bead of motor oil over the filter’s O-ring. It is a good idea to wear disposable gloves while doing this. Install the new oil filter, tightening it as much as you can by hand. Once the filter is hand tight, use your wrench to tighten the filter another half of an inch or so. Do not over-tighten the filter.
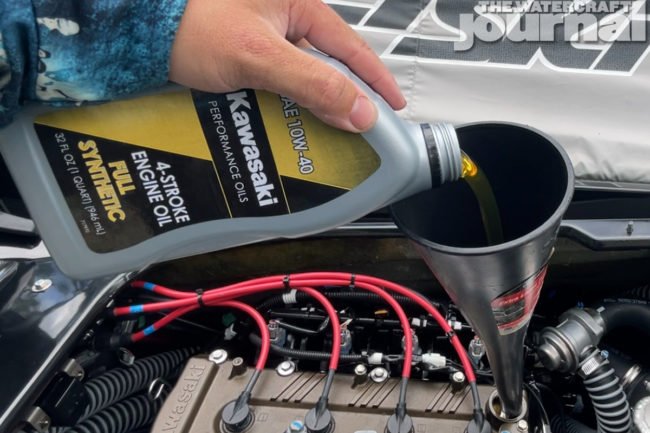
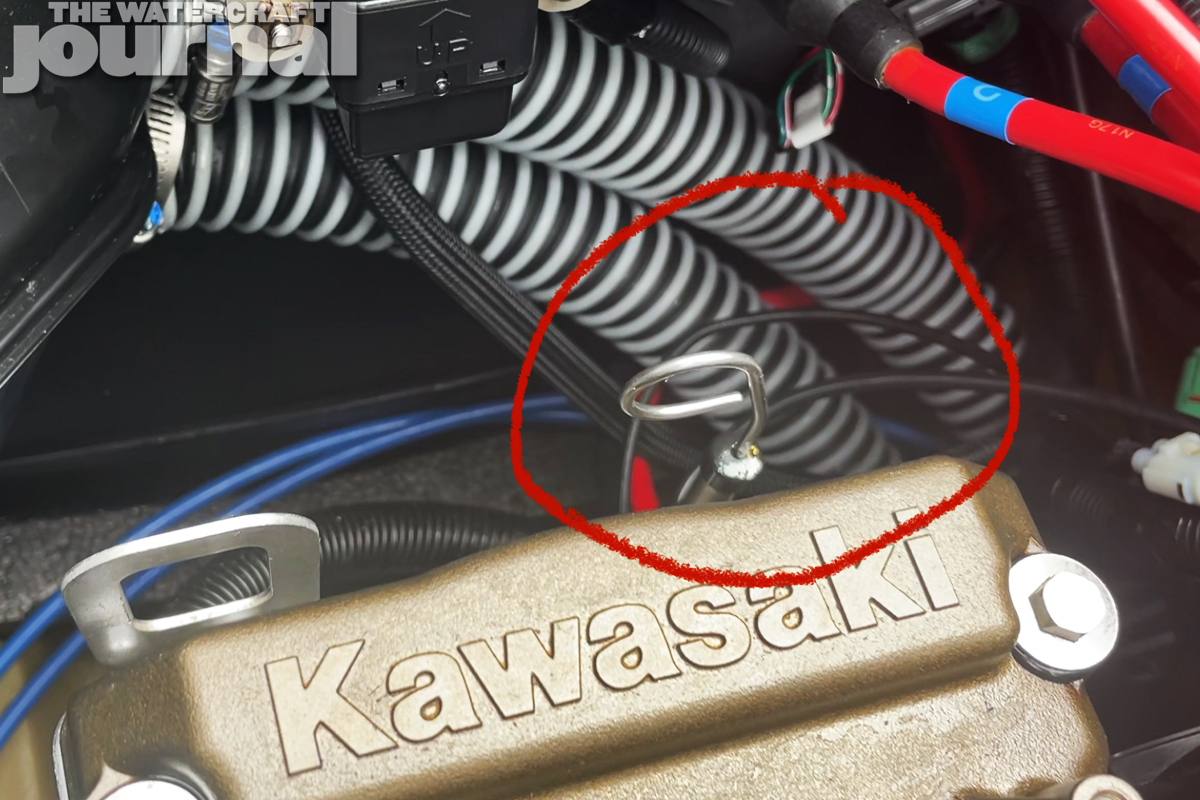
Using a funnel, add an amount of oil equivalent to the amount you removed into the top of the engine, then check the dipstick. The oil level should be just between the high and low levels on the dipstick, and may drop slightly after you run the ski for the first time, due to oil filling the new filter. Add or remove oil as necessary, and reinstall the oil filler cap and dipstick securely. Ensure that the “loop” on the top of the dipstick is facing the left or port side of the JetSki.
Run the engine for several minutes while flushing the cooling system. As mentioned earlier, remember to always turn the water on after the engine is started, and off before the engine is stopped. Shut the engine off, and check the oil a final time. Add or remove oil as necessary. Check that there are no oil leaks from the oil filter, and ensure that any spilled oil is sufficiently cleaned from the bilge. Dispose of all used engine oil, filters, and oil-soaked rags properly.
Kawasaki recommends the following procedure the first time the watercraft is launched after changing the oil: First, run the engine for several minutes. Then ride the JetSki and run the engine at around 5,000 rpm for 5 minutes. Stop the engine, and let the ski cool down for 10 minutes. Make sure the watercraft is securely tied to the dock, and is steady in the water. Ensure the gas tank is full.
Next, remove the seats and open the clear dipstick access port on the engine cover. At this point, there is no need to remove the engine cover. Check the oil level. Adding oil will require you to remove the engine cover- which can be done with a 10mm socket or nut driver. An emergency tool kit is included with the ski, in the bottom part of the front compartment, above the battery. Be sure to keep all hardware secured if you need to remove the cover while at the dock.
Log the oil change in the back of your Kawasaki user’s manual, and save all receipts so that you have proof that the oil change was performed. This author saves the cardboard sleeve from each oil filter, writing the engine hours on the box with a sharpie. If you have a warranty claim down the road, having documentation that proper maintenance was performed is absolutely necessary.
Kawasaki Full Synthetic 10W-40 Watercraft Oil exceeds SAE, SM, NMMA, FC-W, JASO MA and JASO MA2 standards. If you do your own research, you will see that this is one of only a handful or marine synthetic oils that exceeds all the standards listed above.
Note that this oil change procedure requires mechanical skills and special tools. If you are not comfortable with performing an oil change yourself, have an authorized Kawasaki dealer perform the service for you. Regardless of who performs your oil changes, check your oil level often, and keep an extra quart of oil in your ski or in your tow vehicle at all times. Always refer to your Owners Manual for maintenance intervals, oil types and capacities, and other important maintenance information.
We received a press release about riders from the United States, the Caribbean, Western Europe, and Australia making their way to Nassau, Bahamas for the P1 AquaX World Championships. The lineup of over 30 racers also includes two racers from the Cayman Islands. Seth Watler and Cline Glidden are the two riders who will represent the Cayman Islands.
Watler is a veteran of the sport and was the first Cayman Islands national champion. Glidden will compete in the ProAm class. The three-day event runs from November 4th-6th and is hosted by the Atlantis Paradise Island Resort.
Check out the full press release below:
Personal watercraft riders from the United States, the Caribbean, Western Europe and Australia will be heading to Nassau next week for the P1 AquaX Bahamas World Championship and the line-up will include two racers from the Cayman Islands. The iconic Atlantis Paradise Island resort will serve as the host destination for the three-day event (November 4-6) with the opening day including practice, testing and qualifying, followed by six races across the weekend.
The World Championship will feature a total of more than thirty professional and amateur endurance riders, who have primarily qualified through performances in the USA national race series, and flying the flag for the Cayman Islands will be Seth Watler and Cline Glidden who qualified through the P1 AquaX Cayman Islands National Tour. Pro rider Watler is a veteran in the sport and was the first Cayman Islands Watercraft Association (CIWA) national champion before taking a few years off from racing. Competing in the Pro Am class will be Cline Glidden who has been at the top of amateur racing in the Cayman Islands for past few years.
CIWA President Chris Bodden said: “We partnered with P1 AquaX this year to stage a three-round series on Grand Cayman and we knew that this affiliation would push our riders and give them the opportunity to compete with the best endurance racers in the world. We know Seth and Cline will do Cayman proud and we will all be tuned into the action next week to cheer them on. I want to thank all of our sponsors, partners and supporters who made this all possible. Go Team Cayman!”
Ventisha Conolly, Events Manager at Cayman Islands Ministry of Youth, Sports, Culture and Heritage, was very pleased with this season’s National Tour and commented: “We saw some great competition on the water and the Ministry is looking forward to welcoming more young Caymanian racers, including female riders, to the sport.”
Thirty-year-old Watler was born and grew up in New Orleans and moved to the Cayman Islands when he was 11-years-old. He began racing in 2008 and became national champion two years later. He explains: “I grew up with the need for speed and rode dirt bikes back in Louisiana. I practice on the water at least once a week and do fitness training three times a week. In addition, I incorporate a supplemented nutrition programme into my fitness schedule.” This will be my first overseas race event and I have prepared well to compete in The Bahamas.”
Born and raised in the Cayman Islands, 25-year-old Cline Glidden started racing ten years ago and became the Am class national champion this year. “I attribute my success to being consistent and having a good team around me,” he commented. “I’ve competed overseas in a number of sports but not in personal watercraft racing, so I’m nervous but looking forward to racing against the best in the world.”
The Pro Enduro riders will be competing for the P1 AquaX world title, with the amateur racers battling for the P1 AquaX Amateur International Cup. The action will be broadcast in the United States on the Bally Sports Regional Networks and CBS Sports Network, with international coverage on leading sports channels in more than 100 million homes in over 50 countries.
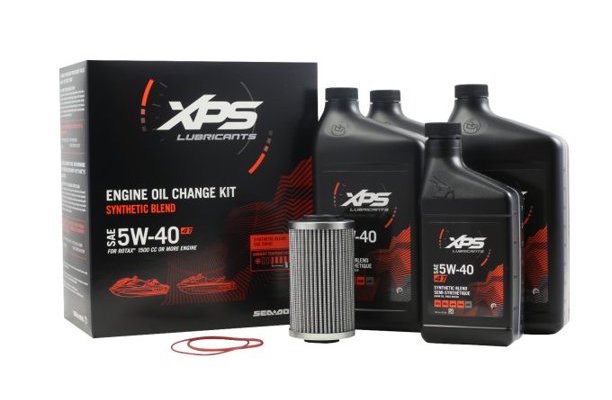
Broward Motorsports Racing has a sale on oil and oil change kits. The season is winding down for a lot of us with winter coming in fast. This sale is right on time for winterizing your PWC. The Yamalube Oil Change Kit is on sale for $43.99. The kit includes four quarts of 10W-40 Oil. Genuine Yamaha oil filter, and the necessary drain gasket. Everything is packed in the box for your convenience.
This kit is for Yamaha WaveRunners equipped with the four-cylinder 1.8 Liter engine only. If you only need oil for your WaveRunner, they have it on sale by the gallon or the quart. The Yamalube 10W-40 Mineral 4Q Watercraft Engine Oil is marked down to $20.99.
This oil is made for and approved for high revving powerful four-stroke WaveRunners. It will keep your engine from corroding and wearing out when riding in harsh marine environments. Purchase the Yamalube 10W-40 Mineral 4W Watercraft Engine Oil by the quart for $8.99.
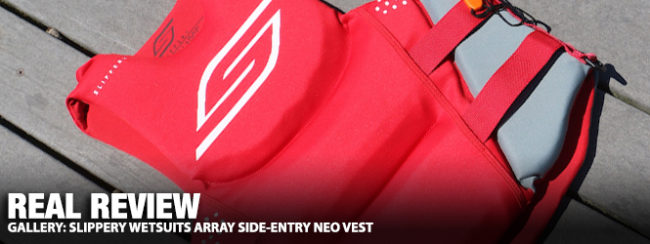
Competitors side-entry vests are often clunky, made from uncomfortable materials or brutally ill-fitting. And worse yet, they’re adorned with distracting doodads and features that distract from the single-most important characteristic of any riding gear: is it comfortable? It isn’t a difficult question to answer, but dang if people will continue to defend their poor choice because they’ve already paid for it, or they think they gain some sort of brand credibility when none are the case. A poor fitting, uncomfortable vest just plain sucks.
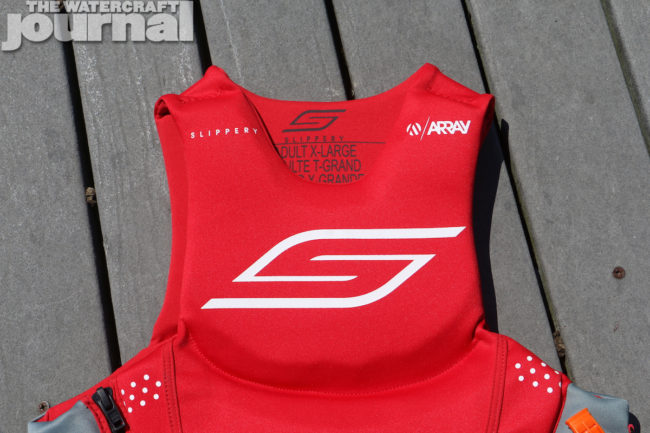
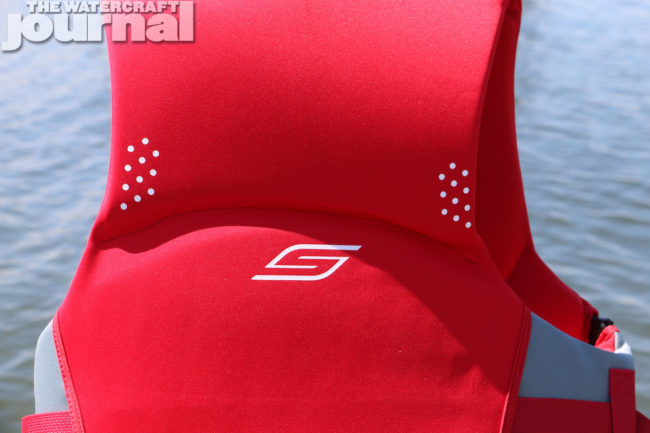
Over the years, Slippery has made several improvements to the Array’s construction, using super-comfortable, stretchy neoprene providing plenty of give and being comfortable on bare skin. Despite being a USCG-approved Type 3 vest – meaning its required to provide sufficient flotation to keep an unconscious person’s head above water – the Array Side-Entry is surprisingly slim and smartly cut.
Optimal flexibility while seated is achieved via multiple hinge points molded into the EV foam panels. By breaking up the larger panels, Slippery designed a vest that looks more like flexible body armor than two slabs of foam strapped around your torso (again, like some other guys’ vests). The segmentation gives the Array Side-Entry fantastic range of motion; doubling over the handlebars to reach inside the front storage bin isn’t such an ordeal as many more cumbersome vests make it.
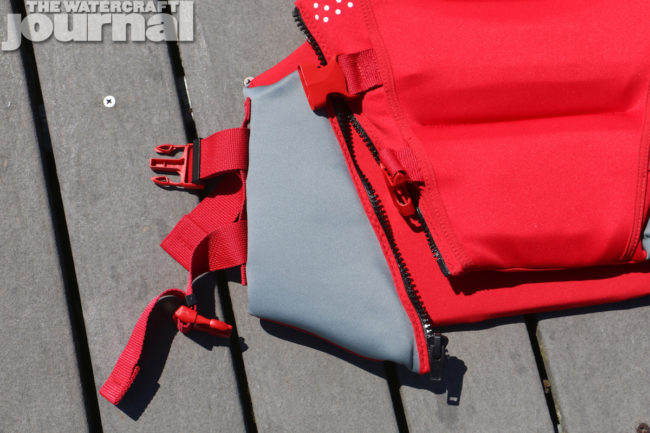
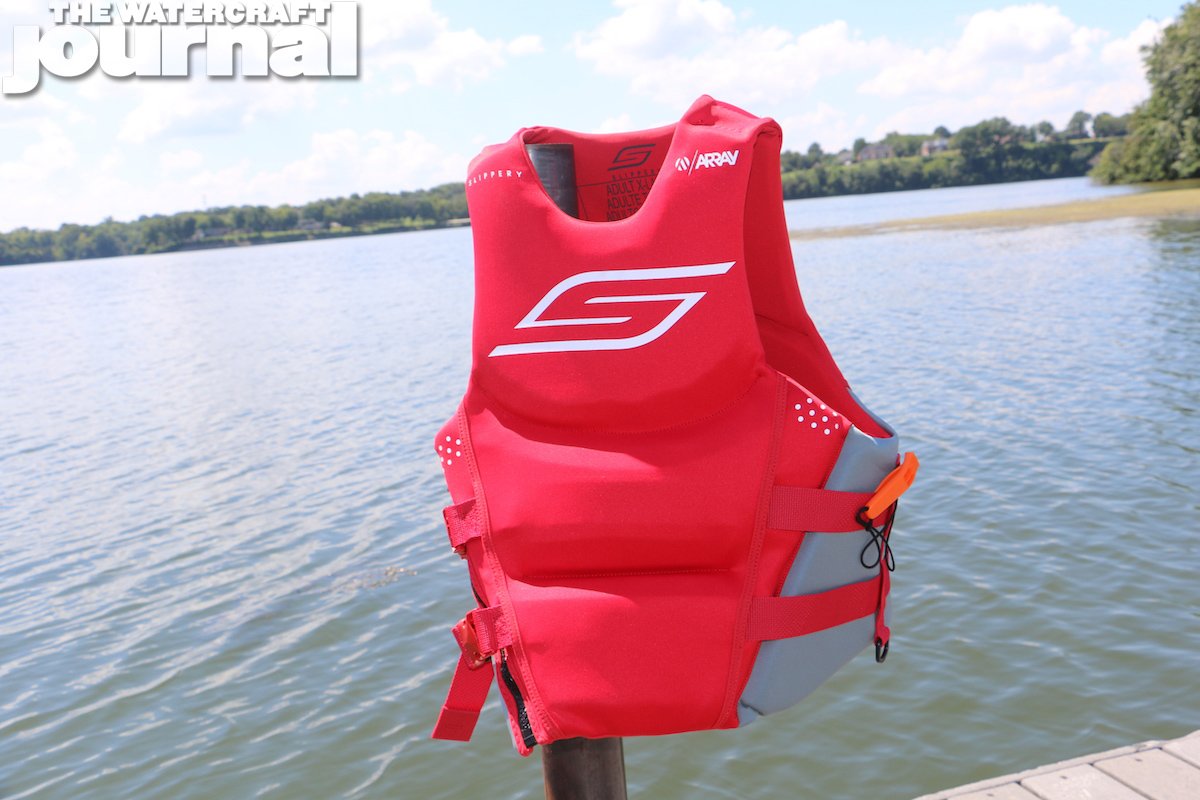
Large, open armholes and narrow shoulder straps gives the vest its wide range of arm motion. A wide neckline at the collar gives the head and neck a similarly wide range of motion too. Large 1-and-a-half-inch wide belts are tucked under the soft neoprene skin, capped with buckle closures that cinch tight. These snap over a thick-toothed, coated zipper, securing the opened side for easy entry. Slippery added a D-ring sown into the net webbing, and has included a tethered emergency rescue whistle too.
Personally, bright full-colored vests (and most riding gear) isn’t really our style but in preparation for riding the you’ll-never-find-me-out-on-the-ocean-Metallic-Mist-Green Sea-Doo GTX Limited 300 in the Intracoastal Waterway this summer, the bright red Array matched our Sunset Red UV-blocking Riding Jersey and helped us stand out like a landing beacon. Priced at $99.95, the Slippery Array Side-Entry Neo Vest offers a far superior fit and feel than the scratchy canvas-wrapped vests, is far less cumbersome and is surprisingly comfortable – all things we thought we’d never use to describe a life vest.


 Emotions were running high with her in the cone’s bullseye. The track shifted and hit a few hours south. Jordan was emotionally tied to this storm and loaded up a trailer after cleaned up some of the mess at his place. The dude is full of gratitude. He still has a home with a few downed trees and a little flooding.
 Pennzoil announced the release of a new line of engine oils for outdoor vehicles at the SEMA Show. The oils are formulated for outdoor vehicles in North America. These include ATVs/UTVs, watercraft, motorcycles, and snowmobiles.
 Radinn Electric Jetboards


 The stock speed of the same 310X was logged as 66.2 mph with a 0-65mph time of 6.97 seconds. With those results, the Stage 1 kit yielded a 7.1 mph improvement and shaved 1.6 seconds off the 0-65mph time.